Thursday, December 30, 2010

Field Trip: Benessere Oils and Vinegars (plus Urban Farmer)

This last semester was long and kind of rough. After a super crazy summer semester, fall semester started and never let up. So, to relax and feel better about everything, Kirsten and I decided to go visit Benessere Oils and Vinegars, which I had first heard about months before in Portland Food and Drink. It was the perfect way for two food obsessed library students to unwind.

The store is beautiful and though small, chockablock full of amazing oils and vinegars. It's also very conveniently located, just a few blocks from Pioneer Square. We started out tasting the vinegars, very impressed by the variety of flavors.


This was one of my favorites. It was so delicious and sweet and though I didn't buy any that day, I will have to find a way to use it in the future in some fantastic dessert.


Kirst was a good sport about me taking a bunch of pictures of her trying a variety of vinegars.

You know I bought this one.

Kirst bought her parents this awesome Spanish olive oil along with a fantastic honey ginger white balsamic. Just before Christmas, I returned to buy my parents the same set. I highly recommended Benessere for yourself and for gifts!

After our tasting adventure, we decided a happy hour was in order. I'd been wanting to go to Urban Farmer for forever and was so excited to go. The ambiance is inviting and open. It's in the Nines Hotel and I always love hotel bars. There's just something so fun about them, but this one is really a step above.


Crab dip with cheese puffs, an excellent start to any happy hour.

Free slider because I checked in with FourSquare? Yes!


Kirst and I split a cheese plate and a charcuterie plate, had a couple of glasses of Riesling, and really enjoyed the beginning of our break.

Wednesday, December 29, 2010

Peanut Butter Balls

I was asked specifically before baking to make something with peanut butter and chocolate. And why not? It's a great combination. Corey found these ones and even though we left out an ingredient, it worked out rather well.

Peanut Butter Balls from food.com:

Makes a lot

1 c. sifted powdered sugar
½ c. creamy peanut butter
3 Tb. butter, softened
1 lb dipping chocolate

Stir together powdered sugar, peanut butter and butter until well mixed. Shape peanut butter mixture into 1 inch balls, placing them on a baking sheet covered with waxed paper. It was at this point Corey realized she had forgotten the butter. We decided to roll with it anyway.

Let balls stand for 20 minutes until dry.

Melt the dipping chocolate or confectioners' coating. Drop balls one at a time in melted chocolate. Using a fork, remove from the chocolate, letting excess chocolate drip off. Place back on the waxed paper. Let stand until dry.

These are super rich. I'm not sure if forgetting the butter ended up being a good thing or not, but these were a nice addition to our cookie plates. To wrap up the whole bake day extravaganza, here are the completed plates themselves. I hope you all had a great Christmas!


Tuesday, December 28, 2010

Shortbread Cookies

I love shortbread. A lot. I have many fond holiday memories of boxes of Walkers Shortbread in those pretty plaid boxes. Instead of making sugar cookies this year, which Corey and I decided that, though delicious, just took far too much time, we decided to do this instead. It still uses cookie cutters and is still totally delicious. These are so easy.

Shortbread Cookies from Joy of Baking:

Makes about 20 cookies, depending on the size and shape of your cookie cutters

2 c. all-purpose flour
¼ tsp. salt
1 c. unsalted butter, room temperature
½ c. powdered sugar
1 tsp. pure vanilla extract

In a separate bowl whisk the flour with the salt. Set aside.

In the bowl of your electric mixer, beat the butter until smooth and creamy, about 1 minute. Add the sugar and beat until smooth, about 2 minutes. Beat in the vanilla extract. Gently stir in the flour mixture just until incorporated. Flatten the dough into a disk shape, wrap in plastic wrap, and chill the dough for at least an hour.

Preheat oven to 350 degrees with the rack in the middle of the oven. Line two baking sheets with parchment paper.


On a lightly floured surface roll out the dough into a ¼” thick circle. Cut into rounds or other shapes (like Star Wars characters!) using a lightly floured cookie cutter. Place on the prepared baking sheets and place in the refrigerator for about 15 minutes. Bake for 8 - 10 minutes, or until cookies are very lightly browned. Cool on a wire rack.

So good! I love shortbread, but I think I love it even more now that I finally got to use my Star Wars cookie cutters. The first reaction I heard from a friend was “Is that a Yoda cookie?”Yes, yes it is. And he's delicious.

Monday, December 27, 2010

Thumbprint Cookies

These ones were Corey's idea and I'm so glad we made them. They're simple and delicious and really good for any time of year. Well, any time of year you actually want to turn the oven on. I think using homemade jam is what really elevated these. I highly recommend doing just that.

Thumbprint Cookies from Simply Recipes:

Makes about 2 dozen fabulous cookies

1 c. butter, room temperature
½ c. sugar
2 eggs, room temperature
1 tsp. vanilla extract
Pinch of salt
2 c. of flour
¾ c. jam (we used Corey’s blueberry freezer jam)

Cream the butter and sugar on high speed for about 3 minutes.

Separate the eggs. Add the yolks and vanilla extract to the butter mixture. Add the flour and salt. Mix until just combined. Place the dough in the fridge for 30 minutes and preheat the oven to 350 degrees.
Roll the dough into balls about 1 inch in diameter. Place the balls on parchment lined cookie sheets. Press down with your thumb to make a small well in the center of the cookie. Do not press too hard or the cookie will fall apart. Fill with ½ teaspoon of jam. I’m not going to lie, this was my favorite part.

Bake for 12-15 minutes or until slightly firm. Allow to cool for a few minutes on the cookie sheet to firm up before moving them to a wire rack to finish cooling.

These are so good. So easy and so good. You have no reason to not make them.

Friday, December 24, 2010

Pumpkin Whoopie Pies

Merry Christmas Eve everybody!

Last year, Corey and I made pumpkin cupcakes. This year, we decided to continue the tradition with a twist. I had plenty of leftover pumpkin puree (from my awesome pie) and had that in mind while we browsed recipes. When we came across this one, I knew we had a winner. These made the house smell so good.

Pumpkin Whoopie Pies slightly modified from Joy of Baking:

Makes far too many

For the cookies-
3 c. flour
1 tsp baking powder
1 tsp baking soda
1 Tb. ground cinnamon
1½ tsp. ground ginger
1 tsp. ground cloves
1 tsp. nutmeg
1 tsp. allspice
½ tsp. salt
1 c. unsalted butter, room temperature
2 c. brown sugar
2 large eggs, room temperature
1 tsp. pure vanilla extract
15 oz. pumpkin puree

For the filling-
¼ c. vegetable shortening
¼ c. unsalted butter, room temperature
1 c. confectioners'sugar
1½ tsp. pure vanilla extract
½ c. light corn syrup (I tried finding golden syrup instead, but with no luck)

Preheat oven to 350 degrees and place oven rack in the center of the oven. Line two baking sheets with parchment paper.

In a large bowl whisk together the flour, baking powder, baking soda, ground cinnamon, ground ginger, ground cloves, nutmeg, allspice (the last two were our additions), and salt.

In the bowl of your electric mixer, fitted with the paddle attachment, beat the butter and sugar until light and fluffy. Add the eggs, one at a time, beating well after each addition. Beat in the vanilla extract and pumpkin puree. Beat in the flour mixture just until incorporated. Drop heaping tablespoons of the batter onto the prepared baking sheet, spacing about 2” apart. With moistened fingers or with the back of a spoon, smooth the tops of the cakes. Corey totally rocked this part. Bake for about 10 - 12 minutes or until the tops of the cookies, when lightly pressed, spring back. Remove from oven and transfer to a wire rack to cool completely.

While the cookies cool, make the filling. Beat the shortening and butter until soft and creamy. With the mixer on its lowest speed, gradually beat in the confectioners' sugar. Increase the speed to high, and beat until light and fluffy, about 5 minutes. Then, with the mixer on low speed, beat in the vanilla extract and slowly drizzle in the corn syrup. Continue to beat until the filling looks like soft mayonnaise. It really did. It was weird.

After the cookies have cooled and the filling has been made, it’s time to assemble. Take one cookie and spread a heaping tablespoon of the filling on the flat side of the cake. Top with another cookie. The assembled cookies can be stored, covered, in the refrigerator for several days. Bring to room temperature before serving.
These are so moist and delicious and wonderful. The only thing I think we would have done differently is make them smaller. They’re not quite unwieldy, but would be better from cookie plate distribution at a smaller size. Still, these are amazing and well worth the multi-step effort.

Thursday, December 23, 2010

Things I Love Thursday, Christmas Edition: Dec. 23, 2010

Well, it's almost Christmas and that's pretty cool. I hope you are all happy and safe and warm wherever you are and for whatever holiday you do or don't celebrate. Here's some fun holiday food stuff I'm loving right now.


Cookie Cutter Ornaments: Nothing says I'm into Christmas and baking like these. I'm sure this would make a lovely gift.

Recycled Soda Christmas Card: Another way to reuse food containers! These are so pretty!

Chocolate Cough Syrup: Well, lot's of people get sick around the holidays. When this is finally developed, it might make some of those sad folks feel just a little bit better. What a strange thing to develop though. Well, those Brits do like their warm beverages! Haha.

(Check out the how-to here)

Cookie Plate Comic: So true in so many ways. Be careful with your cookie plates!

Brie: My family really likes to do antipasti plates before holiday dinners. David Lebovitz has an awesome discussion about different kinds of brie and I think it's well worth a read. Of course, nothing will ever beat the brie I had in Paris on a baguette sandwich that was just like awesome cheese butter. But TJ's has some pretty good ones.

(awesome looking restorative post-holiday soup recipe here)

Shot Pint: Not only would this make a great gift, it might help everyone through these stressful holiday days. Know a non-drinker? Do shots of soda! Or egg nog? Okay, that sounds gross. Anyway, I think this looks pretty cool.


Dear Jewish Friends, Read This: Okay, so it's a stereotype, but it's a tasty one!


I'm also loving: snacky shopping for aforementioned antipasti plate; late night beers with my long lost friend Nate; squeezing in as many tasty meals as possible with Corey before she leaves the US; giving cookies to all my friends; bake day in general; Sarah's lemon bars like whoa!; Kirsten's cookies; my library always having so many goodies for all us student workers; the anticipation of AIM (Asian, Italian, Mexican) meals at my parents house; awesome congratulatory drinks from Lisa; happy hours all over the place; impromptu brown rice bowl dinners; spiced drinks of every kind.

What are you loving this week? 

Wednesday, December 22, 2010

Thin Mints

To start of baking day, it turns out I started with the most difficult recipe. In the end, everything worked out, but I will never make these again. Well, not like this anyway. They are really good, though, so if you want to see for yourself, give it a try.

Slim Mints modified from Chow:

Makes a lot of cookies

1 large egg yolk
½ tsp. peppermint oil
½ tsp. vanilla extract
1¾ c. all-purpose flour
1 c. powdered sugar
½ c. unsweetened Dutch-process cocoa powder
¼ tsp. fine salt
½ c. unsalted butter, chilled and cut into small pieces
Chocolate chips
Canola oil

Place egg yolk, peppermint oil, and vanilla extract in a small bowl and whisk to break up the yolk.

Combine flour, sugar, cocoa powder, and salt in the bowl of a food processor fitted with a blade attachment and pulse a few times to aerate and break up any lumps. Add butter and pulse until the mixture looks like sand, about 25 1-second pulses. Add yolk mixture and pulse just until the dough forms into a ball, about 15 1-second pulses.

Turn dough out onto a clean work surface and roll into 2 logs, each about 1 1/2 inches in diameter. It was at this point that I knew something was wrong. It was still super powdery and not at all dough like. So back into the processor it went (well, not all of it. It was a bit messy for a bit) and I added in about 1/3 cup cold water until the powder turned into actual dough. Wrap the logs in plastic wrap and refrigerate until just firm but still pliable, about 1 hour. The logs will flatten slightly while chilling. Reshape the logs so they are perfectly round and refrigerate until firm, about 1 hour more. I know what they look like.

Heat the oven to 350 degrees (where it was at all baking day) and arrange a rack in the middle. Line a baking sheet with parchment paper and set aside. Remove a dough log from the refrigerator, remove the plastic wrap, and slice the dough into 1/8” coins. Place the cookies ½” apart on the prepared baking sheet. Rewrap the extra cookie dough in plastic and refrigerate until ready to bake the second batch. Bake the cookies until the edges are firm but the tops are still soft, about 9 to 11 minutes. Ours took closer to 13. Remove to a wire rack to cool completely. Repeat with the remaining dough.
 Their directions for dipping the cooled cookies into chocolate are ridiculously long and unnecessary. Corey melted some chocolate chips with a bit of canola oil over a double boiler and dipped the cookies in. We then put them in the fridge to cool.

These are tasty, but not worth the hassle. If I do something like this again, I’m going to use a basic chocolate cookie dough recipe, add in more mint (many weren’t very minty at all), and dip them in chocolate the way we did. Corey has a theory that the reason we had issues with this recipe is that the Girl Scouts don’t want us to know how to really make them. She might be right!

Tuesday, December 21, 2010

Vanilla Roasted Pears

Smitten Kitchen is one of my favorite food blogs. Deb never fails to surprise me with something delicious and wonderful. So when I saw this recipe back in October, I knew it had to be one of my Thanksgiving desserts. I ended up with four total, including my apple pie from a couple of years ago. This was the last one, literally. I made it after everyone was digesting and the dishes were in the dishwasher. This will also, finally, wrap up my Thanksgiving recipes.

This one was worth the wait. I bought more pears recently so I can make it again. It's that good.

Vanilla Roasted Pears from Smitten Kitchen:

Serves 4 or so (it can serve 8 with other desserts)

¼ c. sugar
½ vanilla bean
1½ lbs. slightly-under-ripe, fragrant, medium pears, halved though the stem and cored (I, like Deb, went with the perfect for baking Bosc)
2 Tb. lemon juice
2 Tb. water
2 Tb. unsalted butter

Preheat oven to 375 degrees. Place the sugar in a small bowl. With a thin, sharp knife, split the vanilla bean lengthwise in half and scrape out the seeds. Stir the seeds into the sugar.
 Arrange the pears in a large baking dish, cut-side up. Drizzle the lemon juice evenly over the fruit, then sprinkle with the sugar. Nestle the vanilla pod among the fruit. Again, following Deb’s lead, I first slit my halves lengthwise into quarters. Pour the water into the dish. Dot each pear with some butter.
 Roast the pears 30 minutes brushing them occasionally with the pan juices. Turn the pears over and continue roasting, basting once or twice, until tender and caramelized, 25 to 30 minutes longer. If the pears are small, test for doneness after 35 or 40 minutes of cooking; a paring knife poked into the thickest part of one should meet with no resistance.

 Serve warm. Deb has some awesome suggestions on how to serve them, including, spooned with the caramelized pear drippings from the pan over ice cream, dolloped with crème fraîche, on your morning oatmeal and over slices of gingerbread. I ended up just serving them warm along with all of the other desserts. They are amazing. The vanilla really sinks in and anything roasted is awesome in my opinion. This is a super easy dessert and should be on your docket any time pears are around.

Monday, December 20, 2010

Last Minute Holiday Gift Guide

It's officially the last minute. Fortunately for you, dear procrastinator, gifting for your food loving friends and family is not too hard. Here's some ideas:


Locally appropriate cookbooks
: Two of my favorite gifts ever have been getting The Fiddlehead Cookbook (Juneau, AK) and the Alice Bay Cookbook (Skagit Valley, WA). Cookbooks are pretty obvious, but finding something that will be significant and meaningful is always appreciated. The Fiddlehead Cookbook features a recipe by someone I used to babysit for and another by my brother's kindergarten teacher. Plus, the recipes will be based around locally available ingredients. If you live in the Pacific Northwest, I'd recommend picking up The Grand Central Baking Book, The Paley's Place Cookbook, Wildwood: Cooking from the Source in the Pacific Northwest, or Pike Place Public Market Seafood Cookbook. A note on the inside about why you got it is a very nice touch.


Le Creuset: Like everyone else on the planet into cooking and baking, I am obsessed with Le Creuset. Though I don't own any yet (hint hint), it's a collection I'd love to build. Though it is not in my best interest to share this, David Lebovitz is having an AMAZING Le Creuset giveaway on his blog right now. I know this stuff is very, very expensive, so it's worth a shot to try to win it (I already entered). I promise you, every budding chef on your list will love this.


Baked Goodies: Who doesn't love yummy homemade pastries and cookies? I'll be posting soon about the Corey and Becca bake day results (very tasty), so consider making a plate of stuff for your friends and family. Does some cupcake lover live far from you? Check out the Cupcake Project's guide to shipping cupcakes (the end results are adorably delicious). Looking for ideas? Check out what we did last year.
  
Charity Donations: Giving to charity in someone's name is always a good gift idea, not just for food lovers, but you can make it food based just for them. Heifer International is an amazing organization that allows you to gift different kinds of animals to people in need all over the world. It's a gift that keeps on giving and truly helps. Consider donating to your local food bank or homeless shelter that provides holiday meals. Other organizations to check out are Global Crop Diversity Trust and Adopt a School Garden.


Specialty Items: Do you have a spice lover on your list? How about a coffee obsessed individual? Get them that high end something that they might never buy for themselves, like some awesome finishing salts or ridiculous olive oil. Most places will wrap things nicely for you and nothing says you rock my plate like Hungarian smoked paprika.

A Meal Out: Has your friend been talking about the same restaurant they want to try for forever? Take them out! On you!

I hope you all have fantastic holidays and don't stress too much. If it comes from the heart (and is aimed at the stomach), you'll do well.

What's been your favorite food based gift that you've given or received?

Sunday, December 19, 2010

Roasted Pumpkin Pie

I mentioned Mix Magazine in my last Thanksgiving dessert post and here it is again for the next one. I decided to do pie this year. Though last year rocked and I’m really proud of my desserts, pie definitely has a place at the table. Plus, when I saw this recipe, I really wanted to make a pie that involved roasting my own pumpkin. It’s so simple, but the flavor is just superb.

The original recipe uses a frozen pie shell, but I just don’t roll like that. So I cobbled together this recipe plus my first pumpkin pie plus my apple tart from Rosh Hashanah. The crust didn’t overbake or get too dark, even though I forgot to put foil around the edge at the beginning, like I usually do. This is a perfect holiday dessert or really, for any fall occasion.

Roasted Pumpkin Pie from Mix Magazine:

Makes a beautiful 9" pie


For the puree:
At least a 4 lb. pumpkin

For the pie:
Full recipe galette dough
1½ c. roasted pumpkin puree
1 c. buttermilk
3 large egg yolks
1 tsp. vanilla extract
2 Tb. flour
1 tsp. cinnamon
½ tsp. ground nutmeg
¼ tsp. ground cloves
¼ tsp. baking soda
½ tsp. salt
½ c. granulated sugar
½ c. lightly packed brown sugar
Whipped cream, for serving


To make the puree, roast the pumpkin by cutting it in half and place it cut-side down on a foil-lined baking sheet. The original doesn’t have you scoop out the seeds first, but I think it’s easier to do it before roasting. Roast in a 400 degree oven until you can easily plunge a fork into the squash and twist it easily, about 1 to 1½ hours, depending on the size and thickness of the squash. Scrape out the roasted flesh and put in a food processor. Pulse a few times until it resembles a puree. Refrigerate the puree in an airtight container for up to two days or freeze for up to three months. My pumpkin was fairly large, so I had extra, which was put to good use. Oh no, extra pumpkin puree? Not a problem for me!

For the pie, make the galette dough (this can be done a couple of days ahead of time), and press into a pie dish. Heat the oven to 400 degrees.

In a medium bowl, whisk together the pumpkin puree, buttermilk, egg yolks and vanilla. In a large bowl, combine the flour, cinnamon, nutmeg, cloves, baking soda, salt, granulated sugar and brown sugar. Add the wet mixture to the dry mixture and whisk to combine.


Pour into the pie dish and place the pie on a rimmed baking sheet. Bake for 10 minutes and then reduce the oven temperature to 350 degrees. Continue baking until a knife inserted about 1 inch from the center comes out clean, about 35-40 minutes. The pie can be made up to one day ahead, which I did. It’s much easier to deal with Thanksgiving when the pies are already done. Cool completely, cover with plastic and chill.

I am not exaggerating when I say that this is the best pie I have ever made. Ever. It was perfect in so many ways. Roasting your own pumpkin is so easy and the flavor really is just that much better. The crunchy galette dough was perfect with the sweetness of this pie and it looked beautiful. Though we did have a lot of dessert on Thanksgiving, this one has stolen my heart. I may never make a different pumpkin pie again. Okay, I might, but this one is really, really good!

Monday, December 13, 2010

Red Fox Brownies with Caramel Swirl and Sea Salt

I got a little crazy for desserts this year. Last year, as you may recall, I made two desserts, neither of which were pie. I made some pretty delicious brownies and since I was having a non-pie eating chocolate lover for dinner, I knew I needed brownies once again. And when I saw the recipe for these brownies in Mix (which gets randomly dropped off on my doorstep. I'm not complaining.), I knew they were the ones. The original recipe has you use store bought caramel sauce and because it was Thanksgiving, that wasn't going to happen, so I turned to 
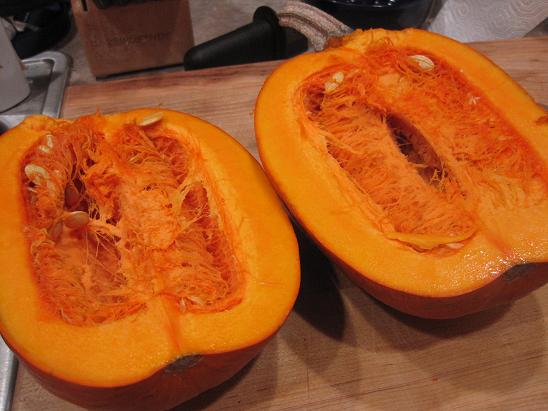
Ina Garten's recipe. I made pumpkin-caramel sauce last year for my panna cotta and because that went well, I figured this would be fine too. As it turns out, it was the only mini-disaster of the day and my sister-in-law, a culinary graduate, helped me rescue it. And the brownies? They were amazing.

Red Fox Brownies with Caramel Swirl and Sea Salt from Mix Magazine and Caramel Sauce from Barefoot Contessa:

Serves at least 8 and probably a lot more

For the caramel sauce:
1½ c. sugar
1/3 c. water
1½ c. heavy cream
½ tsp. pure vanilla extract

For the brownies:
8 oz. bittersweet chocolate, coarsely chopped
4 oz. unsweetened chocolate, coarsely chopped
1½ c. (3 sticks) unsalted butter, chopped into 1” pieces
6 eggs
1 Tb. vanilla
3 2/3 c. sugar
Pinch of kosher salt
4 1/3 c. flour
Caramel sauce, divided
1½ tsp. sea salt, divided

To make the caramel sauce, mix the water and sugar in a large heavy-bottomed saucepan. Cover and cook over low heat until the sugar dissolves. Increase the heat and boil uncovered until the sugar turns a medium brown, about 5 to 7 minutes, stirring occasionally with a wooden spoon. Watch it carefully at the end, as it will go from caramel to burnt very quickly. Stand back to avoid splattering, and gradually add the cream and the vanilla extract. Simmer until the caramel dissolves and the sauce is smooth and thick, about 2 minutes. For whatever reason, my sauce was just too thin. Part of the problem may have been that I use all natural sugar, which is already pretty brown and though it smelled done and looked mostly done, it really wasn't. Becca (not me, my sister-in-law) rescued it by just making a lot more and whisking it all in together. It still wasn't as thick as I would have liked, but it worked and that's what's important.

For the brownies, preheat oven to 350 degres. Grease a 9-by-13" baking dish.

Melt chocolate and butter together over a double boiler. Whisk to combine and set aside.

Place eggs, vanilla, sugar, and salt in a stand mixer bowl. Using the whisk attachment, whip on high for 5 minutes or until the batter is thick and holds a ribbon when the beaters are lifted from the bowl. Remove from mixer. Gently sift flour over the top of the eggs mixture. Using a rubber spatula, fold in the flour gently. Fold the chocolate mixture into the batter quickly, being sure to get all the way to the bottom of the bowl.

Pour half the brownie batter into the prepared pan. Drop half of the caramel sauce over the batter in dollops. Swirl into the batter. Sprinkle with ½ teaspoon sea salt. Pour the remaining batter over the caramel and spoon the remaining caramel sauce in dollops over the top. Swirl into the batter and sprinkle the remaining teaspoon of sea salt over the top.


Bake until the top has a thin, flaky layer, the sides begin to pull away from the pan, and it is slightly domed, about 50 to 60 minutes. A knife inserted into the center will come away with just a crumb or two.


Cool before serving. I realized when starting this post that I only took one picture of the brownies and that was before they baked. I promise you they were amazing and were very well received. So much so that Aaron made a dessert fence. It was partly to stop the dog (there's his cute nose there) from getting to the apple pie and the brownies, but also to stop Amy, Becca, and Aaron from constantly picking at them. Unlike last year, these ones were so big, thick, and rich that there were brownies for quite a few days after, so there's really no excuse for me not getting a picture of them. I guess you'll just need to make it yourself.

I will definitely make this again, but I will probably do a half recipe. These were gigantic! I should have known when I saw that they took six eggs, but just went with it anyway. They are so decadent though that I think a half size will do most people just fine.

Tuesday, December 07, 2010

Things I Love Thursday: Dec. 9, 2010


Make Your Own Girl Scout Cookies: This might be just the thing to get the Becca and Corey Holiday Bake Day going just right. Oh yes, that will be happening again. And I'm really excited about it. And maybe if you live in Portland, you might get a plate.

SunChips Bag Not Too Noisy for Canadians: Though the bags are ridiculously noisy, I think it's a fair trade off when considering how much better they are for the environment. Canada gets it. Just don't bring them to the movie theater.

San Francisco Bans Happy Meals: I think this is amazing and I am so surprised that it actually happened (though I'm not surprised by where it happened). They aren't actually banning them, they just want McDonald's to make the food targeted at kids healthier. Not healthy, but healthier. Parents should be able to make these decisions on their own, but big corporations need to think about what they are doing too and they won't unless someone (or in this case some city) makes them listen.


Nacho Infographic: Once upon a time, when I was living with Aaron and our friend Lindsay, I made a plate of nachos. Aaron said that when I die and they do the autopsy, inside of me will be nothing but nachos. Lindsay thinks this is one of the best moments of all time. This infographic (something else I love) tells you so many wonderful things about that amazing food: nachos.

And to go with those delicious nachos: hot sauce. Serious Eats has an awesome article about how to throw a hot sauce tasting party. Aaron has recently gotten into eating spicier food, so this would be very helpful. Plus, it looks like lots of fun! My friend Patrice also recently posted her hot sauce recipe. When it gets cold outside, it's time to spice things up!

Can you stop staring at it? Because I can't.

Last week I mentioned Jones Soda had made a crazy latke flavor, but the fun doesn't stop there folks! In what might be completely opposite of last weeks' Jones Soda mention, it appears they now have bacon soda. I know bacon is really popular right now, but do you really want to drink it? Please tell me someone does. I'd love to hear a taster's response (because I'm not going to drink it).

The God of Cake: I choked back laughter at work because this is one of the funniest things I have ever read. Cake is amazing and this is hilarious. Read it.

I'm also loving: super successful latke nights; my food processor; Rolo brownie mixes from overseas; Jameson and ginger; planning appetizer afternoons; future field trips to taste olive oils and vinegars; emptying out my pizza crust and filling it with parmesan cheese, just like when I was a kid; extra grilled onions; Norwegian soul food; Amy reading recipes to me while I'm trying to not think about tattoo inflicted pain (thanks so much! It helped!); Chris' ridiculous baked ziti and amazing first time ever garlic bread; PB&Js with lingonberry jam.

What are you loving this week? 
Related Posts Plugin for WordPress, Blogger...