Showing posts with label pie. Show all posts

Wednesday, September 10, 2014

Black and Blue Pie

This whole post is about to get super Portland on you. Like Portlandia-esque Portland. This is a pie I made for my tattoo artist as a tip for my last tattoo. I made it with local berries. And local flour (hey Bob's Red Mill). And local butter (Tillamook). Also I'm wearing black and red flannel right now.

This pie is also super good. It looked great the first time, so I made it again. You should use whatever end of season berries you have and make this. Decorate it any way you want. Maybe put a bird on it? I dunno.

Black and Blue Pie:

Makes one 9” pie


Filling-
3 c. blackberries
3 c. blueberries
2/3 c. – ¾ c. sugar (depending on how sweet your berries are)
1 tsp. lemon zest
1 tsp. fresh lemon juice
Dash nutmeg
Dash cinnamon

Topping-
2/3 c. all-purpose flour
3 Tb. brown sugar, packed
½ tsp. cinnamon
¼ tsp. salt
Dash allspice
Dash nutmeg
6 Tb. unsalted butter, melted and cooled slightly
Make the pie dough! Roll it out how you do and put it in a 9-inch pie dish. Refrigerate while prepping everything else. If you have extra dough like I did after trimming, use a cookie cutter to make fun shapes with the remainder. Refrigerate alongside pie crust.

Whisk sugar, lemon zest, nutmeg, and cinnamon together. Add berries and toss to coat. Add lemon juice and toss to coat again. Let sit at least 10 minutes.

While your berries are sitting, preheat oven to 375 and make the topping. Whisk together all dry topping ingredients. Add in melted and cooled butter and mix with fingers until blended evenly.
To assemble your pie, remove formed dough from fridge, scoop in berry mixture, and sprinkle topping as evenly as possible.

Bake pie for 1 hour and 15 minutes, until the filling is bubbling and your topping has become golden. If it is browning too quickly, cover top with foil. Place a baking sheet on the rack below your pie to catch any bubbly juices.
Let cool on wire rack until you can handle it enough to deliver to your tattoo artist. Or your friends out back. Or your mouth.
I really enjoyed this pie – but it was more like a cobbler because as you might see from the recipe above, I did not add corn starch to the berry mixture. Do that. Add about 2½ tablespoons corn starch to the berry mixture to help gel some of those juicy, juicy berries.

Overall, though, this was a great pie – easy to make, fun to decorate, and a great gift.

You've got a little summer left. Give this pie a try.


And now I'm done with summer pie recipes. On to the fall pies!   

Tuesday, September 09, 2014

Peach Pie


Summer isn't quite over yet. Sure, the leaves are falling off of the trees, kids are back in school, and the unofficial end of summer has passed, but it's going to be 90 on Saturday here in Portland, so no, summer isn't over yet.

And summer means pie. Today and tomorrow will be my last two summer pie recipes. For this summer. Probably.

Let's start with peach pie. Take my very favorite pie dough recipe, fill it with summer stone fruit (you can count on Smitten Kitchen for bad ass pie fillings. And pies, if you want to just do everything Deb did), and bake. Plus I made a lattice top for the first time ever.

Peach Pie modified from Smitten Kitchen:

Makes 1 9” pie

1 full recipe best pie dough ever (no arguments) 

Filling-
About 3½ lb. peaches (approximately 6 large, 7 medium or 8 small)
1 Tb. fresh lemon juice, from about half a regular lemon
¼ c. granulated sugar (use 1/3 c. for a sweeter pie)
¼ c. light brown sugar (ditto)
1/8 tsp. ground cinnamon
Few gratings of fresh nutmeg
1/8 teaspoon table salt
2 Tb. minute tapioca, ground to a powder, or 3 tablespoons cornstarch or potato starch

Finish-
1 Tb. milk, cream, or water
1 Tb. coarse or granulated sugar

Make the pie dough. Then prep filling. Bring a large saucepan of water to boil. Prepare an ice bath. Make a small x at the bottom of each peach. Once water is boiling, lower peaches, as many as you can fit at once, into saucepan and poach for two minutes. Using a slotted spoon, transfer to ice bath for one minute to cool. Transfer peaches to cutting board and peel the skins. In most cases, the boiling-then-cold water will loosen the skins and they’ll slip right off. In the case of some stubborn peaches, they will stay intact and you can peel them with a paring knife or vegetable peeler and curse the person who made you waste your time with poaching fruit. These were my favorite recipe directions ever.

Halve and pit the peaches, then cut into about 1/3-inch thick slices. You’ll want 6 cups; it’s okay if you go a little over. Add to a large bowl and toss with lemon juice. In a small dish, stir together sugars, cinnamon, nutmeg, salt and cornstarch until evenly mixed. Add to peaches and toss to evenly coat.

Preheat oven to 425 degrees.

Yell peach pie assemble! Then put it together yourself because this is a pie, not a giant cartoon robot fighting force. Flour counter, unwrap your first dough (if the two pieces look uneven, go for the smaller one) and put it in the middle and flour that too. Be generous. Start rolling your dough by pressing down lightly with the pin and moving it from the center out. You’re not going to get it all flat in one roll or even twenty; be patient and it will crack less. Roll it a few times in one direction, lift it up and rotate it a quarter-turn. And that’s what you’re going to continue to do, roll a couple times, lift the dough and rotate it. Re-flour the counter and the top of the dough as needed–don’t skimp! You should be leaving no bits of dough on the counter and none should be stuck to your pin. If at any point, the dough starts to get sticky or soft, it’s warming up and will only become more difficult to work with. Transfer it back to the fridge for a few minutes (or even the freezer, but for just a minute) to let it cool, then resume your rolling process. I have an amazing marble slab that I got for my birthday. If you do also, put this in the fridge while before working on your pie dough – it's amazing.

Once your dough is a 12- to 13-inch circle, transfer pie dough to a standard pie dish by folding it gently into quarters (making no creases), arranging the folded corner into one quadrant of the bottom of your tin and gently unfolding it to fit over the base. Trim the overhang to one inch.


Scoop filling into bottom pie dough, including any accumulated juices (they contain the thickener too, also: tastiness). Roll out your top pie dough using the same procedure, until it is 12 to 13 inches in diameter. If you’d like to make a regular lidded pie, use it as is, cutting some decorative vents in the pie lid before baking. To make a lattice-top pie, cut the pie dough into strips anywhere from 1/2 to 1-inch wide with a pastry wheel, pizza wheel or knife. Arrange every other strip across your pie filling in one direction, spacing the strips evenly. Fold back every other strip gently on itself and add the longest remaining strip in the other direction. Fold the strips back down, repeat with the other strips until a full lattice-top is formed. Trim the lattice’s overhang to the diameter of the pie dish’s rim (i.e. no overhang; only the bottom crust will have that and this is a case of do as I say, not as I do, because I totally forgot this detail when I was making the above pie). Gently fold the rim of the bottom crust over the lattice strips and crimp decoratively. Follow these directions carefully – I managed to make a pretty lattice top pie on my first go, so these have to be good directions.

Finish pie by brushing with milk, cream, or water and sprinkle with sugar.

Bake pie for about 20 minutes in the preheated oven, until the crust is set and beginning to brown. Reduce oven temperature to 375 and bake pie for another 30 to 40 minutes, until filling is bubbling all over and the crust is a nice golden brown. If the pie lid browns too quickly at any point in the baking process, you can cover it with foil for the remaining baking time to prevent further browning.

Cool pie for three hours at room temperature before serving. I know you won’t listen to Deb — there’s hot delicious pie to be eaten, after all — but if you’re concerned about the runniness of the pie filling, keep in mind that the pie filling does not fully thicken until it is fully cool. Deb is right. You should wait. Pie can be stored at room temperature or in the fridge; from the fridge, it will be even thicker.
From the fridge, you might find yourself standing in front of it, door open, eating pie directly from the pie plate. Maybe. I'm not saying that's what happened over here. Don't worry about it. Do worry that you're not eating this yet. Go finish off the season with this pie.

Or the one I post tomorrow. Or both. Up to you. Pie is great, so I won't judge.
Saturday, July 26, 2014

Red Raspberry Pie

There are so many wonderful things to do with raspberries (cake. ice cream. sauce.), but summer really is about pies. My mom group had a French picnic for Bastille Day and that meant lots of food. We could have said “let them eat cake” (historically inaccurate, BTW), but instead I said “let's eat pie.”

Red Raspberry Pie via Alice Bay Cookbook:

Makes 1 9” pie

1 9” baked pie shell (use one half of the best pie dough recipe ever and fully blind bake it.)

1 quart fresh raspberries
¾ c. sugar
2½ Tb. corn starch
¼ tsp. salt
½ c. water
½ c. fresh orange juice
Remove 1 cup of raspberries and puree in blender or press through sieve. (Or use a food processor). Set aside.

In a medium saucepan, combine sugar, cornstarch, salt, water, and orange juice. Cook over low heat, stirring constantly, until thickened, about 10 to 15 minutes. Add pureed raspberries.
Place whole raspberries in pie shell. Pour syrup over the berries. Chill in refrigerator for at least 4 hours.


Super easy. Super summery. This one you should do before summer is over.

Thursday, January 09, 2014

Mini Pear Pies

The reason I hardly ever blog is I have this baby guy and he takes up a lot of my time and when he's sleeping or otherwise occupied with block stacking or chasing the dog around, I tend to zone out on silly phone games or cute pictures of animals on the Internet. So not blogging. I do think about it, though, and I continue to take pictures of the food I make (a thing I still do when not helping a baby stack blocks or be nice to the dog who puts up with a lot from a small thing that tries to climb on him all the time). Another thing I do is hang out with a great group of moms. So baking + hanging out with moms = trying to show off and bring tasty things to meet ups. I haven't done this in awhile, but this was an early hit.

I should probably try to show off again. And blog. But you know, block stacking.

Mini Pear Pies slightly modified from Mogwai Soup:

Makes 12 mini pies

5 pears, pealed and chopped
½ c. sugar
Peel of one lemon
1 Tb. lemon juice
Pinch of ground ginger
Pinch of cinnamon
Pinch of allspice
2 cardamom pods, crushed
Pinch of salt
1 Tb. of corn starch
A few Tb. of water
Butter or oil
1 egg beaten with a tablespoon of water

Make your amazing pie dough. Roll it out. Let it rest in the fridge. While you prep the filling, let the dough get to room temp and then roll it out. I used a not often used martini glass (a confluence of watching a lot of Sex and the City and turning 21) to cut out the bases and a drinking glass to do the tops.
Add all the filling ingredients except corn starch to a saute pan and cook on medium heat. After 10 minutes add the cornstarch and cook for 5 more minutes, if it is thickening too much you can add a few tablespoons of water. Cool off a bit before filling your pies.
Butter or oil the cups of a 12 cup muffin tin. Push in the bottoms of the pies, curling them up over the edge about ½ inch. Put about 1½-2 tablespoons of filling into each pie. Go for too little at first rather than too much. You still need to seal them. Cover with the tops and seal the edges with a fork. Brush with egg wash and sprinkle with some sugar.

Bake it at 400 degrees for about 30 minutes, checking after 20 or until nicely golden brown.
Cool in pan until you can push them out and cool on a rack. Transfer to some happy mommies or, you know, your mouth. Good times for everybody! Plus they look really fancy.

Tuesday, April 23, 2013

30 Before 30: Banana Cream Pie (#16)


I wanted to try something very new for an ending to our corned beef lunch. I've never made a custard pie before and what better than banana cream pie? The crust was disappointing. I should have stuck with my gut and gone for Thomas Keller's amazing pie crust and rolled it in graham cracker crumbs. The filling though? Magnificent.

Banana Cream Pie via Baking Illustrated:

Makes 1 9-inch pie

For the crust-
1¼ c. unbleached all-purpose flour
½ tsp. salt
1 Tb. sugar
3 Tb. vegetable shortening, chilled
4 Tb. cold unsalted butter, cut into ¼-inch pieces
4-5 Tb. ice water
½ c. graham cracker crumbs (about 8 crackers)

For the filling-
½ c. plus 2 Tb. sugar
¼ c. cornstarch
1/8 tsp. salt
5 large egg yolks, lightly beaten
2 c. 2 percent or whole milk
½ c. evaporated milk
1 tsp. vanilla extract
2 Tb. unsalted butter
1-2 tsp. brandy
2 medium bananas

For the topping-
1 c. heavy cream, chilled
1 Tb. sugar
1 tsp. vanilla extract

Make the crust first. It needs to be completely baked and cooled before filling it with the custard.

Process the flour, salt, and sugar in a food processor until combined. Add the shortening and process until the mixture has the texture of coarse sand, about 10 seconds. Scatter the butter pieces over the flour mixture; cut the butter into the flour until the mixture is pale yellow and resembles coarse crumbs, with butter bits no larger than small peas, about ten 1-second pulses. Turn the mixture into a medium bowl.

Sprinkle 4 tablespoons of ice water over the mixture. With a rubber spatula, use a folding motion to mix. Press down on the dough with the broad side of the spatula until the dough sticks together, adding up to 1 tablespoon more ice water if the dough does not come together. Flatten the dough into a 4-inch disk. Wrap in plastic and refrigerate at least 1 hour, or up to 2 days, before rolling.

Remove the dough from the refrigerator (if refrigerated longer than 1 hour, let stand at room temperature until malleable). Roll the dough on a work surface sprinkled with 2 tablespoons of graham cracker crumbs. Continue sprinkling additional crumbs underneath and on top of the dough as it is rolled, coating the dough heavily with crumbs. Roll the dough out to a 12-inch circle. Transfer the dough to a 9-inch pie plate by rolling the dough around the rolling pin and unrolling it over the pan. Working around the circumference of the pie plate, ease the dough into the pan corners by gently lifting the edge of the dough with one hand while gently pressing into the pan bottom with the other hand. Trim the dough edges to extend about ½-inch beyond the rim of the pan. Fold the overhang under itself; flute the dough or press the tines of the fork against the dough to flatten it against the rim of the pie plate. Refrigerate the dough-lined pie plate until firm, about 40 minutes, then freeze until very cold, about 20 minutes.

Adjust the oven rack to the lower-middle position and heat the oven to 375 degrees. Remove the dough-lined pie plate from the freezer, press a doubled 12-inch piece of heavy duty foil inside the pie shell, and fold the edges of the foil to shield the fluted edge; distribute 2 cups ceramic or metal pie weights over the foil (or dried beans, like me). Bake, leaving the foil and weight in place until the dough looks dry and is light in color, 25 to 30 minutes. Carefully remove the foil and weights by gathering the corners of the foil and pulling up and out. Continue baking until deep golden brown, about 12 minutes more. Transfer to a wire rack and cool completely.

To make the filling, whisk the sugar, cornstarch, and salt together in a medium saucepan. Add the yolks, then immediately but gradually whisk in the milk and evaporated milk. Cook over medium heat, stirring frequently at first, then constantly, as the mixture starts to thicken and begins to simmer, 8 to 10 minutes. It seems like it will never happen, but then suddenly it does and it is fantastic change. Once the mixture simmers, continue to cook, stirring constantly, for 1 minute longer. Remove the pan from the heat, whisk in the butter, vanilla extract, and brandy.


Pour the filling into a shallow pan. Put plastic wrap directly on the filling surface to prevent a skin from forming; cool until warm, 20 to 30 minutes. Pour half of the warm filling into the baked and cooled pie shell. Peel the bananas and slice them over the filling. Top with the remaining filling. Once again place a sheet of plastic wrap directly on the filling surface. Refrigerate the pie until completely chilled, at least 3 hours.

When ready to serve, make the topping. Beat the cream and sugar in a chilled bowl over an electric mixer at medium speed to soft peaks; add the vanilla. Continue to beat to barely stiff peaks. Spread over the filling and serve immediately.

Overall, I really enjoyed this pie. Again, the crust was the weakest part, but the filling was so good, in the end it was just delicious.

Recipes Complete: 16
Recipes to Go: 14

Wednesday, August 29, 2012

Cherry Pie

Rainier cherries are one of my favorite summer fruits. I really wanted to turn them into a pie, but most recipes require sour cherries. That’s fine for some, but I wanted to use these bad boys, so I scoured my cookbooks and not surprisingly, I found a lot of cherry pie recipes. Thomas Keller’s Ad Hoc at Home (seen previously here and here) was the winner in using sweet cherries. He recommends Bings. I say Rainiers if you can get them. They rock just that much more.

As a side note, I’d like to mention that this is the best my pie crust, excluding the very different galette dough which I have used as pie dough here and here, has ever tasted. My friend Corey mentioned the crust to me specifically after I gave her a big piece for her and her husband to share. I am a big, big fan of this pie and you should be too.

Cherry Pie from Ad Hoc at Home:

Makes 1 double crusted pie

Crust-
2½ c. all-purpose flour plus more for rolling
1¼ tsp. salt
2½ sticks (10 oz.) unsalted butter, cut into ½” pieces and chilled
About 5 Tb. ice water

Filling-
2 Tb. cornstarch
2 Tb. water
7 c. sweet cherries, pitted
¾-1 c. granulated sugar
1 Tb. vanilla extract

1 large egg, beaten
Granulated sugar for sprinkling

Keller may prefer to make his pie doughs by hand, but I’m still a big fan of the food processor method. The instructions reflect my bias. It’s great to get your dough done ahead of time so you only have to worry about the filling/rolling out the dough, depending on if you have help/how fast you can pit cherries.

Combine the flour and salt in the work bowl of a food processor. Add in the butter and pulse a few times until the butter pieces are well incorporated and no larger than a pea. Drizzle ¼ cup of water over the top and pulse a few times until the dough just holds together when pinched.  Add the remaining tablespoon of water if the dough is very dry. Turn out of the food processor and don’t worry if it looks like a big pile of flour. Knead the dough until it is completely smooth and the butter is incorporated. This last part has always been what I have struggled with, but this time I just kneaded it more and didn’t try to add any additional water, which can make the dough tough instead of flaky and delicious.

Divide the dough in about half, with one piece slightly larger than the other. The larger piece will be for the bottom crust. Shape each half into a 1” thick disk, wrap tightly in plastic wrap, and refrigerate for at least 1 hour. As my mom always says, you have to give the gluten time to rest.

Combine the cornstarch and the water in a small bowl, stirring to dissolve the cornstarch into a slurry.

Put 5 cups of cherries in a large bowl and set aside. Put the remaining 2 cups of cherries I a food processor and blend into a puree. Don’t worry if there are some small pieces remaining. Taste the puree to check how sweet it is.

Combine the puree and sugar (¾ cup if the cherries are very sweet, up to 1 cup if they are more tart) in a medium saucepan, bring to a simmer over medium heat, and simmer for about 30 minutes, stirring often to prevent the bottom from burning, until the mixture has reduced to 1¼ to 1½ cups. Reduce the heat to medium-low and, stirring constantly, add the cornstarch slurry.

Bring to a boil, stirring, and cook until the mixture becomes translucent again. Remove from the heat, spoon a little of the puree mixture onto a plate, and let cool slightly, then rub it between your fingertips to feel for any remaining grains of cornstarch. If necessary, cook slightly longer to dissolve the cornstarch. Transfer the filling to a medium bowl and stir in the vanilla extract. Let cool completely.      

If the dough is too hard to roll, let it rest at room temperature for a few minutes or pound it a few times with a rolling pin. Or, in my case, do both. Lightly flour the work surface and the rolling pin. Lightly dust the top of the larger disk of dough with flour and roll it out to a 13-14” round, about 1/8” thick. Roll outward from center, rotating the dough frequently and adding a little flour to the work surface or dough as needed to prevent sticking. Fold the dough in half and transfer to a 9-10” pie plate, gently easing the dough into the corners and up the sides. Roll out the second piece of dough in the same manner, to a 12” round, about 1/8” thick. Place on a parchment lined baking sheet. Refrigerate both doughs for 15 minutes. Again, resting is important.

Position one oven rack in the bottom of the oven and the other in the center and preheat to 400 degrees.

Stir the puree into the whole cherries and pour into the pie shell. At this point, if the top crust is too hard to shape, let it rest at room temperature for a few minutes. Moisten the rim of the pie shell with some of the beaten egg. Cover the filling with the top crust and press the edges together to seal and create a raised edge to the crust. Trim away the excess dough that overhangs the rim. Brush the top crust with the beaten egg and sprinkle with sugar. Using  paring knife, cut a few slits in the top of the pie for steam vents. Put on the bottom rack and bake for 20 minutes.

Lower the heat to 375 degree, move the pie to the center rack, and bake until the crust is golden and the filling is bubbling, 20 to 30 minutes. Transfer the pie to a cooling rack to cool.
According to Keller, the pie is best served 2 to 3 hours after it is baked, but it can be kept at room temperature the day it is baked or wrapped and refrigerated for up to 3 days. To heat, warm in a 325 degree oven for about 15 minutes.
I started eating this about 20 minutes after it came out of the oven. It is a fantastic summer dessert, great with or without vanilla ice cream.


Sunday, June 19, 2011

Pink and Green Pie

 For my birthday this year, Jamie got me The Boozy Baker because I like cocktails and baking (pretty awesome gift, right?). I was really excited when she gave it to me and I didn't want to wait long to make something from it. I always do a lot of planning and dreaming when I first get a cookbook, so it was nice to do some actual baking not too long after getting it. I had already decided to buy a bunch of strawberries to make jam, so I needed to find a pie recipe with strawberries - and there it was, the classic combo of strawberries and rhubarb, but just a little different. I brought a slice to my internship and the rest of the pie to Memorial Day brunch (yes, this was awhile ago, but guess what? Strawberry and rhubarb are still available at the market!). A half slice survived to the end of the day. It is very, very good and gave me my first opportunity to create a crust with vodka.

The only change I made was leaving out the pistachios, which I know mostly removes the green part from the pink and green combo, but Aaron is not a nut fan and since it wasn't an integral ingredient, I let it slide. Do yours however you like.

Pink and Green Pie from The Boozy Baker:

Makes one tasty pie

For the crust:
1½ c. all-purpose flour
1 Tb. granulated sugar
¼ tsp. salt
1 stick unsalted butter, child and cut into ½” cubes
1 Tb. vodka
2-4 Tb. ice water

For the filling:
1¼ lb. fresh rhubarb, trimmed
1 c. granulated sugar
½ tsp. cinnamon
½ c. berry liqueur
¼ c. cornstarch
½ c. strawberries, hulled and sliced

For the crumb topping:
½ c. all-purpose oats
2/3 c. rolled oats
¼ c. granulated sugar
¼ c. packed brown sugar
¼ tsp. cinnamon
¼ tsp. salt
7 Tb. unsalted butter, diced

To make the crust, combine the flour, sugar, and salt in a food processor and pulse to combine. Add the butter and pulse until coarse. Add the vodka and then the ice water, 1 tablespoon at a time, and pulse until the dough comes together in large clumps. Gather the dough into a ball and flatten into a disk. Wrap in plastic wrap and refrigerate for 30 minutes.

On a floured surface, roll the dough to a 12” circle. Transfer to a 9” pie plate (mine is slightly bigger) and crimp the edges decoratively with a fork. Put in the refrigerator while preparing the filling.

To make the filling, combine the rhubarb, sugar, and cinnamon in a large saucepan. Cook over medium heat until the rhubarb begins to soften and the sugar dissolves, 5 minutes. Meanwhile, combine the berry liqueur and cornstarch and stir until smooth. It will look like strawberry milk, which is weird. Anyway, once smooth, add to the rhubarb mixture and bring to a boil, stirring constantly until thickened, about 5 minutes. Remove from heat and transfer to the refrigerator and cool for 30 minutes.

To make the crumb topping, combine the flour, oats, sugars, cinnamon, and salt in a medium bowl. Cut in the butter until it forms coarse crumbs. Set aside.
Preheat the oven to 375 degrees and position a rack in the lower third of the oven. Remove the crust and rhubarb mixture from the refrigerator. Stir the strawberries into the rhubarb mixture and pour it all into the crust. Sprinkle with the crumb topping and bake for 30-35 minutes (mine was perfect at 30), or until the crust is crisp and golden and the fruit is bubbling.

This is a very tasty pie and though not radically different from the strawberry-rhubarb I’ve made before, it is a fun variation.

Monday, March 14, 2011

Happy Pi Day!

Do you like math? How about pie? If you like one or the other (or both!), then today is the day for you. It's the celebration of the mathematical constant pi (Ï€), which is often represented in it's shorter version 3.14. That's today! If I had planned further ahead, I would have made a pie today. As it is, I'm going to round up the  awesome pie recipes that I've posted in this blog.
  •  In my very first pie post, back in old 2008, I made my very first apple pie and my very second pumpkin pie. Though I'm still not a pie pro, it's fun to look back at my pie early days. Plus, they were both delicious.
  • Remember way back in the day when I was really into savory pies? I still am! I had forgotten all about this Broccoli-Cheddar Pie (I mean, 2009 was such a long time ago in internet years). The crispy grated potato crust was amazing and it would be so much easier to do now that I have a food processor!
  • Just a short time later, I banged out another savory pie, this time with an actual pie crust. Just looking at the pictures from the Spinach-Ricotta Pie makes me want to make it again.
  • Not all of my savory pies were successes. Shortly after getting my food processor, I attempted this Potato Onion Broccoli Cheddar Pie, which though not fantastic, was a good first attempt. And now in 2011 I'm reminded that it was a first attempt and I should give it another try.
  • Last spring brought this Strawberry-Rhubarb Pie to fruition (haha! I'm so punny!) and now that spring is coming this pie may need to happen again.
  • Rosh Hashanah is a celebration of life and last year I decided to do that with traditional apples and honey in a brand new tart (which is basically pie, in my opinion) that I made up. Sweet, sweet memories.
  • Also from last fall, this OMG so good Roasted Pumpkin Pie made its debut at my Thanksgiving table and I still dream about it.
Apparently all of my future plans, after going through these recipes, involve making pie. What are your favorite pies? Where do you like to go to get pie? 

Sunday, December 19, 2010

Roasted Pumpkin Pie

I mentioned Mix Magazine in my last Thanksgiving dessert post and here it is again for the next one. I decided to do pie this year. Though last year rocked and I’m really proud of my desserts, pie definitely has a place at the table. Plus, when I saw this recipe, I really wanted to make a pie that involved roasting my own pumpkin. It’s so simple, but the flavor is just superb.

The original recipe uses a frozen pie shell, but I just don’t roll like that. So I cobbled together this recipe plus my first pumpkin pie plus my apple tart from Rosh Hashanah. The crust didn’t overbake or get too dark, even though I forgot to put foil around the edge at the beginning, like I usually do. This is a perfect holiday dessert or really, for any fall occasion.

Roasted Pumpkin Pie from Mix Magazine:

Makes a beautiful 9" pie


For the puree:
At least a 4 lb. pumpkin

For the pie:
Full recipe galette dough
1½ c. roasted pumpkin puree
1 c. buttermilk
3 large egg yolks
1 tsp. vanilla extract
2 Tb. flour
1 tsp. cinnamon
½ tsp. ground nutmeg
¼ tsp. ground cloves
¼ tsp. baking soda
½ tsp. salt
½ c. granulated sugar
½ c. lightly packed brown sugar
Whipped cream, for serving


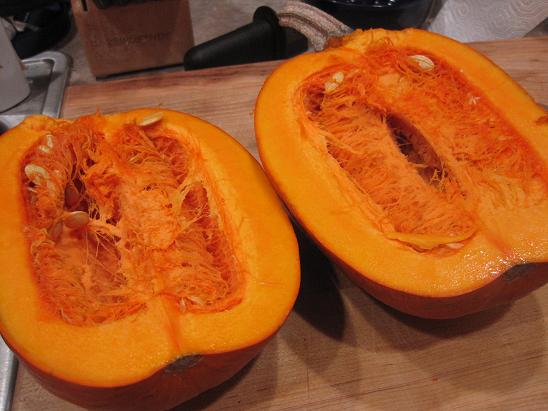
To make the puree, roast the pumpkin by cutting it in half and place it cut-side down on a foil-lined baking sheet. The original doesn’t have you scoop out the seeds first, but I think it’s easier to do it before roasting. Roast in a 400 degree oven until you can easily plunge a fork into the squash and twist it easily, about 1 to 1½ hours, depending on the size and thickness of the squash. Scrape out the roasted flesh and put in a food processor. Pulse a few times until it resembles a puree. Refrigerate the puree in an airtight container for up to two days or freeze for up to three months. My pumpkin was fairly large, so I had extra, which was put to good use. Oh no, extra pumpkin puree? Not a problem for me!

For the pie, make the galette dough (this can be done a couple of days ahead of time), and press into a pie dish. Heat the oven to 400 degrees.

In a medium bowl, whisk together the pumpkin puree, buttermilk, egg yolks and vanilla. In a large bowl, combine the flour, cinnamon, nutmeg, cloves, baking soda, salt, granulated sugar and brown sugar. Add the wet mixture to the dry mixture and whisk to combine.


Pour into the pie dish and place the pie on a rimmed baking sheet. Bake for 10 minutes and then reduce the oven temperature to 350 degrees. Continue baking until a knife inserted about 1 inch from the center comes out clean, about 35-40 minutes. The pie can be made up to one day ahead, which I did. It’s much easier to deal with Thanksgiving when the pies are already done. Cool completely, cover with plastic and chill.

I am not exaggerating when I say that this is the best pie I have ever made. Ever. It was perfect in so many ways. Roasting your own pumpkin is so easy and the flavor really is just that much better. The crunchy galette dough was perfect with the sweetness of this pie and it looked beautiful. Though we did have a lot of dessert on Thanksgiving, this one has stolen my heart. I may never make a different pumpkin pie again. Okay, I might, but this one is really, really good!

Thursday, September 09, 2010

Rosh Hashanah Honey Apple Tart

Shana tova! It's Rosh Hashanah, also known as the Jewish New Year. This is the time when we celebrate the sweetness of life, traditionally through the use of apples and honey. If you search for "apple honey" in Google, the first article that comes up is this one, which explains the importance of apples and honey not only to the New Year, but to the Jewish people in general. Rosh Hashanah signifies the beginning of the High Holy Days, which deal heavily on repentance, ending with Yom Kippur. Yom Kippur involves fasting, so I won't have any recipes for that unless I come up with an awesome breaking the fast meal for this year.
But Rosh Hashanah does involve food and some of my favorites! Apples and honey are an amazing combination and I thought that making a tart would be a great way to celebrate. It's simple because of the use of galette dough and delicious because it's apples and honey. I think everyone will love it, even on non holidays.

Rosh Hashanah Honey Apple Tart:

Makes one 12" tart

1 full recipe galette dough
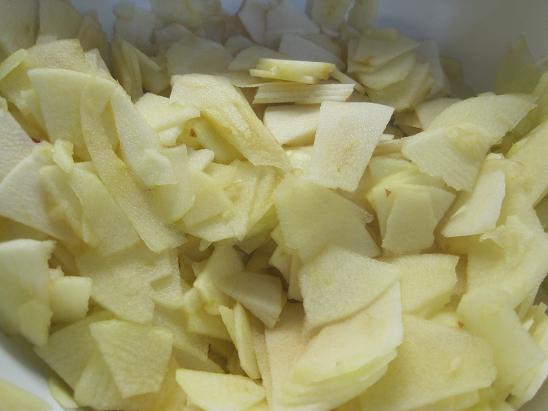
4 apples, Braeburn or Fuji, peeled, cored, and sliced very thin
½ c. plus 3 Tb. honey, divided
3 Tb. unsalted butter, melted
2 Tb. flour
2 Tb. cinnamon
1 Tb. allspice
½ tsp. lemon juice
2 Tb. lavender infused honey (optional. I get it at the Farmer's Market)

Heat oven to 400 degrees. Melt butter until slightly browned. I do this because I really like the nutty flavor of browned butter and it combines very well with apples. Mix butter with ½ cup of honey. Stir in with apples. Mix in lemon juice, spices, and flour.


Press chilled dough into tart pan and fill with apple mixture. Place on middle rack of oven and bake for 35 minutes. Remove from oven and allow to cool for 5-10 minutes.


Drizzle additional honey over entire tart, serve, and enjoy the sweetness of a new year!


The galette dough is perfect for this as it comes together so quickly and is always perfectly flaky. If you choose to use the lavender honey, it is a perfect complement to the other spices in the tart. By slicing the apples so thin, the apple to honey ratio per bite is increased and you really taste the combination with each bite. I hope you all have a happy, healthy, sweet New Year, whether you're Jewish or not.

Wednesday, May 19, 2010

Strawberry-Rhubarb Pie

One of the desserts that will always remind me of home is strawberry-rhubarb pie. I have a vague memory of the first one I ever had. I can’t remember where or who I was with or why I was wherever I was, but I do remember the combination of tart rhubarb and ridiculously sweet strawberries. It’s always stuck with me.

When I was at the farmer’s market and saw this ridiculously beautiful rhubarb, I knew I had to get it. I also bought a very large amount of strawberries, which I am surprised made it home because they were just so sweet, I kept snacking on them on the walk back. Anyway, for a pie that reminds me of home, of course I had to use The Fiddlehead Cookbook. Hometown cookbook, hometown pie, happy Becca. I didn’t use the crust recipe they use, instead subbing in the one my mom sent me oh so long ago. Use it. It’s amazing. I had extra rhubarb and strawberries and this is reflected in the recipe below. I also noted the original amounts. Oh yeah, and make sure you get the leaves off of your rhubarb. Those are poisonous.

Strawberry-Rhubarb Pie from The Fiddlehead Cookbook:

1 9” pie (8 pieces)

1 unbaked double 9” pie crust (see the recipe I use here).
5 c. sliced fresh rhubarb stems (orig. 4 c.)
1½ pint fresh strawberries, washed, patted dry, and stems removed. Large ones cut into quarters. (Orig. 1 pint)
1/3 c. all-purpose flour
1 1/3-1½ granulated sugar, depending on the sweetness of your strawberries. Mine were sweet, so I went to the low side.
½ tsp. ground cinnamon
2 Tb. butter

Place rhubarb, strawberries, flour, sugar, and cinnamon in a large glass or stainless steel bowl, mix well, and allow to sit for 15 minutes.


Preheat oven to 400 degrees and place rack in center of oven. Pour rhubarb mixtures into unbaked shell, mounding toward center. Dot filling with butter, cut into teaspoons. Use water to dampen lip of pie shell. Loosely fold top crust in half and transfer to pie. Unfold and center on pie. Trim upper crust to match lower. Folding under, pinch two layers of crust together to create a secure and attractive edging to pie. Yeah, I sort of tried to do this. It was pretty enough.

With a fork or a small knife, make a pattern of small holes or slits in top of pie. Lightly dust with a pinch of sugar and place in oven. Put a cookie sheet lined with foil on shelf directly below pie to catch any drips. This is pretty good advice for any pie baking you may do, FYI.

Bake at 400 degrees for 10 minutes, then reduce heat to 375 and bake for 40 to 45 minutes, until juices are bubbling out of slits in center of pie. Mine was done at 40.

Remove from oven and allow to cool on a rack for 30 minutes or more before cutting. Serve warm or at room temperature with vanilla ice cream. Cover tightly and store at room temperature for 1 day, longer in the refrigerator.

This pie was so good! I loved it! The only oopsie I made was not adding more flour when I added in more fruit. As a result, it was a little more liquidy than I would have liked, but still very tasty and not so soggy as to be an off texture. The crust is very forgiving and a small error like that didn’t ruin the pie. While it is best day of, I loved eating this for the next few days afterward. This is a perfect late spring pie.
Related Posts Plugin for WordPress, Blogger...