Wednesday, August 14, 2013

Char Siu Bao

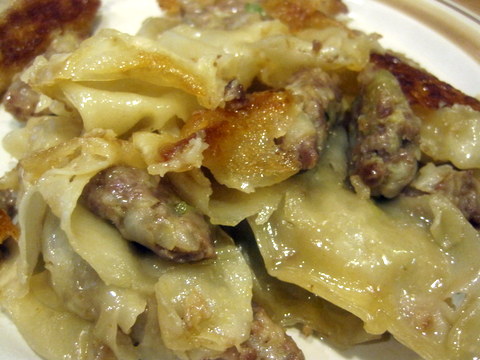
Bao is magic. It is a delicious steamed bun filled with perfection. I go into the kitchen with new recipes all the time, but rarely do they come out just as perfect as these did. This was a project Kirsten and I had been dreaming about for so long. It was worth the wait. It was so wonderful and Aaron is harassing me to make it again. These were the first things we started on dumpling day, but they were the last ones ready. Take the time and make these happen in your life.

Char Siu Bao via Jessica Gavin:

Makes about 24 buns that don't last long

Filling-
2 c. barbecue pork (char siu), ¼ inch dice
2 Tb. oyster sauce
4 Tb. granulated sugar
1 Tb. peanut oil
2 tsp. sesame oil
4 Tb. peanut oil
4 tsp. shallots, minced
3 Tb. all-purpose flour
12 Tb. chicken stock
2 Tb. dark soy sauce

Bun Dough-
1 Tb. granulated sugar
¼ c. warm water (105°F)
2¼ tsp. active dry yeast
4 c. all-purpose flour
2 Tb. lard or shortening
½ c. extra-fine granulated sugar
1 c. whole milk, warm (105°F)
1 Tb. vegetable oil
1 Tb. baking powder mixed with 1½ Tb. water


To make the filling, heat the oil over medium heat and sauté the shallots 2 minutes or until light brown. Add the flour, stir to combine, and cook 1 minute.

Add the chicken stock, stir well, and cook 2 minutes. Add soy sauce and cook one minute. Remove from heat and stir in cut pork and seasoning ingredients. Chill until very firm.

To make the dough, dissolve sugar in warm water, sprinkle yeast over; let stand 2-3 minutes, and then stir to mix well. Let set until it starts to foam, 10 minutes.

Sift flour and make well in the center. Whisk together the lard/shortening, sugar, yeast mixture, and milk. The fat will not completely dissolve into the liquid.

Combine liquid mixture with the flour; gradually incorporate the flour with the liquid to make dough. Knead the dough for 10 minutes, sprinkling with flour as necessary.

Use the oil to grease the outside of the dough; cover and let rest in warm area 1½ hours or until doubled in size.

Punch dough down and flatten out to about ¾ inch thick. Spread the baking powder mixture evenly on the dough. This acts as a stabilizer. Roll dough up and knead about 10 minutes, or until smooth and satiny. The dough should be firmer than regular white bread dough. Cover and let rest 30 minutes.

Divide the dough into four equal parts. Roll one part by hand to form a rope approximately 9 inches long and 1¼ inch in diameter. Mark into 6 equal parts, 1½ inch long. Holding the dough with one hand, grip at the first mark with the thumb and index finger of the other hand and tear away briskly to break off a small dough piece. Continue breaking until you have 24 pieces. Flatten each piece of dough with your palm. Using a rolling pin, roll each into a round disk, making quarter turn with each roll. Roll to leave the center thick; thinner edges are easier to pleat. I had difficulty getting these as thin as I wanted which led to slightly chewier bao, but they still tasted wonderful, so don't worry if you can't get them quite right.
Place about 1 tablespoon of filling at the center of each dough round, flat side up. Gather the edges by first pleating counterclockwise, and then twisting to seal securely. Place the bun round side up on a square piece of parchment paper (2.5 X 2.5 inches).
Let buns rest, covered for at least 30 minutes.

Steam on high heat for 8 to 10 minutes. Do not uncover the steamer any time during the steaming. If a flat lid steamer is used, wrap the lid in a kitchen towel to prevent condensed steam from dripping on the buns.

Eat with dipping sauce and spicy Chinese mustard. These were so, so, so good! I'm excited to try to make different fillings. The dough is super easy and comes together perfectly. I recommend doing this recipe with another person. Having Kirsten work on the filling while I made the dough cut down on our waiting to eat bao time.

These were the perfect end to dumpling day and I can't wait to make the time to make them again.

Tuesday, August 13, 2013

Guo Tie

Who doesn't love a potsticker? We had to make some. This makes a ridiculous amount of filling so either get more wrappers or throw it in with some fried rice. The dipping sauce is the base we used. I know we added a lot of other stuff to it. Go crazy and make it to taste.

Guo Tie and Dipping Sauce via Traditional Chinese Recipes:

Makes so many (at least 20)

1 lb. ground pork
1 lb. napa cabbage
2 green onions, white and green portion minced
1 Tb. minced ginger
1 Tb. Shao Xing rice wine or dry sherry
2 Tb. sesame oil
1 Tb. soy sauce
1 tsp. salt, to taste.
1 Tb. cornstarch
¼ to ¾ c. chicken or pork stock
At least 20 gyoza wrappers

Dipping Sauce:

½ c. soy sauce
¼ c. sweet soy
2 Tb. Shao Xing wine or dry sherry
2 Tb. rice vinegar, or Qing Kiang vinegar
1½ Tb. finely minced ginger, steeped in ¼ c. hot water for 30 min.

Make the dipping sauce first. Mix all of the ingredients together plus whatever fun stuff you come up with and set aside.

Separate cabbage leaves and blanch in boiling water for about two and a half minutes. Allow to cool. Wring out the water from the blanched cabbage using a kitchen towel, and chop to 1/4" to 1/2" pieces. Mix this together with meat and all remaining filling ingredients, adding cornstarch last. Add chicken or pork stock slowly as you mix the filling in one direction. Continue adding stock until mixture is visibly wet and "sloppy." If you've overdone the addition of liquid, and the filling is impossible to handle when making the dumpling, add more cornstarch to firm it up. Keep in mind that the filling will firm up when it is refrigerated. Covered, the filling can be refrigerated for up to five days. When you are ready to fill the dumplings, make one and boil it to test the flavor and texture, and making any adjustments at that time.

Moisten the edge of a wrapper all the way around with water, then using a spoon or chopsticks, place approximately a heaping tablespoon of filling in the center. Fold the skin, and before the edges touch, grasp them with your right thumb and index finger, and beginning at the fold, pleat the outside edge, guiding the dough with your left fingers and press it to the inside. As you do this from right to left, you will create a dumpling, which, when set aside on a piece of parchment paper or floured board, will form a flat side perfect for browning when making potstickers. With a little practice, this process will become second nature.

Pre-heat a flat bottomed, well-seasoned pan or skillet on medium heat; add peanut oil to a depth of approximately 1/16 inch. Arrange guo tie close together with the flat side of the dumpling in the oil. Cover and cook for about 3 minutes; after a couple of minutes, lift one or two of the dumplings to see how the browning is progressing. Add water to a depth of about 1/8”—be careful, this will spatter. Cover again and turn heat down to low or medium low, for about 4 minutes. After the potstickers are well steamed, uncover and cook for another two minutes, to evaporate any remaining water and to re-crisp the dumplings. Remove dumplings to a platter, and serve with browned sides facing up.

Like with frozen potstickers, these stuck to the pan. It's a matter of getting them before all the oil is absorbed into the potsticker itself. The timing might be hard, but the food is delicious. Made all the better when you have a unicorn friend to hang out with your dumplings.

I saved the best for last. Check out the amazing bao we made tomorrow.


Monday, August 12, 2013

Siu Mai

Somewhere, about 50 billion years, Kirsten and I really wanted to have a dumpling day. The main goal was bao, but first I wanted to share the two other dumplings we made. Siu mai is something I go nuts over at dim sum restaurants. As you'll see below, we definitely did not have the deft skill to perfectly seal these delicate dumplings like you see at dim sum places, but they were tasty nonetheless.

Siu Mai slightly modified via About Chinese Food:

Makes about 20 dumplings

6 oz. peeled deveined large shrimp
1 green onion
1 tsp. minced ginger
¾ c. ground pork
1 Tb. oyster sauce
1 tsp. Chinese rice wine or dry sherry
1 tsp. sesame oil
½ tsp. granulated sugar
About 20 gyoza wrappers

Soak the shrimp in warm, lightly salted water for 5 minutes. Pat dry. Mince the shrimp and green onion. Combine with the ginger and pork. Stir in the seasonings. Mix the filling ingredients thoroughly.


Lay a gyoza wrapper in front of you. Wet the edges. Put 2 to 3 teaspoons of filling in the middle, taking care not to get too close to the edges. Gather up the edges of the wrapper and gently pleat so that it forms a basket shape, with the top of the filling exposed.
Steam over boiling water until the filling is cooked through, 5 to 10 minutes.


These pair well with bao and the guo tie I'll post tomorrow. It's fun trying new things! Even with the not so great pleating, they were so good.

Sunday, August 11, 2013

40 Cloves Chicken

It's a cloudy day here in Portland. This is the perfect recipe for a day like today. It is amazingly easy and even more delicious. It's a fantastic one to share. Make sure you have a loaf of crusty bread with this. You'll need it for dunking in the oil.

40 Cloves Chicken via Good Eats:

Serves 6

1 3-to-4 lb. broiler/fryer chicken, cut into 8 pieces
Kosher salt, to taste
Freshly ground black pepper
2 Tb. plus ½ c. olive oil (not extra-virgin)
5 sprigs fresh thyme
40 cloves garlic, peeled.

Heat the oven to 350 degrees.

Season the chicken all over with salt and pepper. Coat the chicken pieces on all sides with 2 tablespoons of oil.


In a 12-inch straight-sided oven-safe saute pan over high heat, cook the chicken for 5 to 7 minutes per side, until nicely browned. Remove the pan from the heat; add the remaining ½ cup of oil, the thyme, and garlic cloves. Cover and bake for 1½ hours.

Remove the pan from the oven and set aside for 15 minutes with the lid on. Serve family style.


We've done this one several times. It's nice picking up a already cut up chicken, tossing it in the freezer, and then defrosting it just for a day like today. Perfect Sunday supper. Or midweek. Peeling all that garlic can be a pain, but it is so worth it. The garlic becomes so soft and spreadable, you'll have extra from sandwiches and bread for a couple of days. Just give it a shot. You'll love it.

Saturday, August 10, 2013

Baked Ranchero Eggs with Blistered Jack Cheese and Lime Crema

I am the worst at blogging. This is an example. I meant to post this, after meaning to post it forever ago before that, almost a month ago. And these are really bad cell phone pictures, which aren't usually really bad, but these ones are. Believe me when I say this tastes a lot better than it looks here.

Baked Ranchero Eggs with Blistered Jack Cheese and Lime Crema via The Smitten Kitchen Cookbook:

Serves 4-6

1 jalapeno
3 c. whole tomatoes (from a 28 oz. can), fire roasted if possible
1 medium white onion, roughly chopped
1 large garlic clove, crushed and peeled
Salt and freshly ground pepper, to taste
1¾ c. cooked black beans (or from a 15 oz. can), drained (optional)

2 Tb. olive oil
4 small (6 inch) corn tortillas
Salt, to taste

12 large eggs
1¼ c. coarsely shredded jack cheese

2 Tb. freshly squeezed lime juice, from about 1 lime
1 c. crema mexicana or sour cream
¼ c. chopped fresh cilantro

Halved in 9 inch skillet or quartered and baked in 1-quart gratin dish

Make ranchero sauce first. Preheat oven to 450 degrees. First, taste your jalapeno for heat. Adjust the amount accordingly, halving or quartering the pepper, if needed, and toss into a blender. I like it spicy, so I just went for the whole thing. Add the tomatoes, onion, garlic, and several pinches of salt and pepper, and blend until smooth. Pout into a 12-inch ovenproof skillet, add black beans, if using them, and bring to a simmer. Cook for 10 minutes, or until it has reduced slightly.

Meanwhile, brush a baking sheet with 1 tablespoon of the olive oil. Cut the tortillas into ½-inch-wide strips, and arrange them on the oiled tray. Brush the tops of the tortilla strips with the remaining tablespoon of oil, and sprinkle with salt. Bake for 3 to 6 minutes, or until they are brown and crisp. Mine are a little thicker, so it needed to bake a little longer, more like 10 minutes. Turn them over once if needed. Remove the strips from the oven, then preheat broiler.

In a separate bowl, stir together the lime juice, crema, and a pinch of salt.
Once the sauce has thickened slightly, remove the pan from heat, and break the eggs across the surface of the sauce, distributing them as evenly as possible. Return to heat, cover the pan, and simmer the eggs gently in the sauce for about 10 to 12 minutes, until the whites are nearly but not completely opaque. Sprinkle the surface of the tomato-egg mixture with cheese, and broil until the cheese is bubbly and a bit blistered, just a few minutes.
Garnish with dollops of lime crema, broken-up pieces of tortilla strips, and cilantro. Serve immediately.
I ended up overcooking the eggs a bit while trying to get the whites to set. It still tasted really good, but without that unctuous yolky flavor and mouthfeel. I would definitely make this again. The sauce is awesome and it makes enough for using on another dish later on.


Related Posts Plugin for WordPress, Blogger...