Shana tova! It's Rosh Hashanah, also known as the Jewish New Year. This is the time when we celebrate the sweetness of life, traditionally through the use of apples and honey. If you search for "apple honey" in Google, the first article that comes up is this one, which explains the importance of apples and honey not only to the New Year, but to the Jewish people in general. Rosh Hashanah signifies the beginning of the High Holy Days, which deal heavily on repentance, ending with Yom Kippur. Yom Kippur involves fasting, so I won't have any recipes for that unless I come up with an awesome breaking the fast meal for this year.
But Rosh Hashanah does involve food and some of my favorites! Apples and honey are an amazing combination and I thought that making a tart would be a great way to celebrate. It's simple because of the use of galette dough and delicious because it's apples and honey. I think everyone will love it, even on non holidays.
Rosh Hashanah Honey Apple Tart:
Makes one 12" tart
1 full recipe galette dough
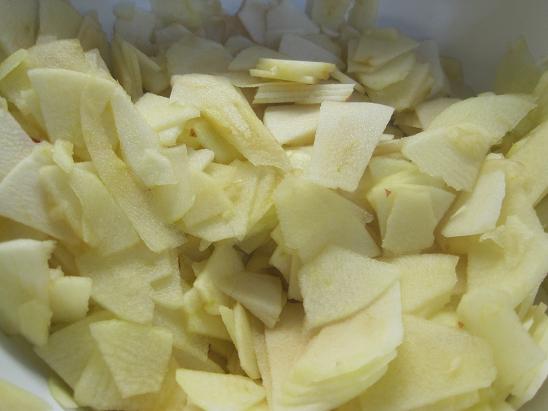
4 apples, Braeburn or Fuji, peeled, cored, and sliced very thin
½ c. plus 3 Tb. honey, divided
3 Tb. unsalted butter, melted
2 Tb. flour
2 Tb. cinnamon
1 Tb. allspice
½ tsp. lemon juice
2 Tb. lavender infused honey (optional. I get it at the Farmer's Market)
Heat oven to 400 degrees. Melt butter until slightly browned. I do this because I really like the nutty flavor of browned butter and it combines very well with apples. Mix butter with ½ cup of honey. Stir in with apples. Mix in lemon juice, spices, and flour.
Press chilled dough into tart pan and fill with apple mixture. Place on middle rack of oven and bake for 35 minutes. Remove from oven and allow to cool for 5-10 minutes.
Drizzle additional honey over entire tart, serve, and enjoy the sweetness of a new year!
The galette dough is perfect for this as it comes together so quickly and is always perfectly flaky. If you choose to use the lavender honey, it is a perfect complement to the other spices in the tart. By slicing the apples so thin, the apple to honey ratio per bite is increased and you really taste the combination with each bite. I hope you all have a happy, healthy, sweet New Year, whether you're Jewish or not.
Showing posts with label pastry. Show all posts
Thursday, September 09, 2010
Saturday, October 31, 2009
A Tale of Two Tarts
I mentioned earlier that I had a failure involving my delicious oven-roasted tomatoes. This is that failure plus my later success. Not everything works out in my kitchen, as much as I would like it to. I got my idea for these tarts from some over-priced ones available at a certain food store in a certain area where I used to work. Though tasty, my coworker said that I could make them and they would be better. I thought so too.


After making the tomatoes, I got to making these tarts. I figured I’d make four big ones, so Aaron and I could have leftovers. I made the pastry dough (previously seen here), grilled some onions, cut up my tomatoes, chopped some garlic, sliced sausage and grated cheddar cheese for Aaron’s, crumbled goat cheese, and set them aside to stuff the dough. I rolled the dough out, filled it, folded it over the stuffing, and baked them sort of like pies.

For whatever reason, they just didn’t work. The dough was flaky, but not tasty. The insides were fine. Overall, not terrible, but definitely not great. I ended up taking the inside out of the second one and using it to make a delicious grilled cheese sandwich. I feel like cell phone pictures are appropriate for these as they are also not terrible, but really not great.


Anyway, I wouldn’t be defeated! I changed tacks and went for a tart more like this one, which was featured in Renai’s blog. Instead of doing pastry dough, though, I went for galette dough because it is wonderful and really does make for a fabulous tart. I did exactly what I did before for the other tarts and got these delicious ones instead. Success! I would definitely make either of these as an appetizer for a fancy dinner party or a regular party. Very tasty indeed!
As for my original idea, I shall return to it someday. I like the idea of it and it could be that it was just a bad day for pastry. I’ve made that dough before, obviously, and it usually comes out just about perfect, so I’m willing to try again. Or maybe I can use the galette dough and fold them into pockets. I’ll experiment and report back. After all, although not everything goes right in my kitchen, it usually does.
Wednesday, August 19, 2009
Cinnamon Buns
So what do you do when you make too much cream cheese frosting? You bake more ridiculous things. And then take forever to blog about it.
I have been reading A Cracking Good Egg ever since I started this blog and I just love it. I also love her personal challenge to cook one recipe out of every one of her cookbooks before she buys a KitchenAid. I have taken a quick look at mine and I am fairly sure I have done that, but some are a bit more explored than others. In any case, when I saw her post for cinnamon buns, I just knew I had to do it and not just to use up that frosting.
These are beautiful and scrumptious and I have already had a request to make more.
Cinnamon Buns only slightly modified from A Cracking Good Egg:
Makes about 16
3 tsp yeast
1 c. warm milk (about 100-110 degrees)
½ c. sugar
½ c. melted butter
1 tsp salt
2 eggs
4 c. plain flour (I ended up doing ½ all-purpose, ½ whole wheat)
1 c. brown sugar
2 ½ tbs cinnamon
1/3 c. butter
Cream cheese frosting
For the dough, mix yeast and 1 tbs sugar into warm milk. Leave in a warm place until frothy. Sift flour, salt, sugar and make a well in the center. Add yeast mix, eggs and melted butter.

Mix to a dough and knead in a bread machine, using a dough hook or by hand until smooth and elastic.
Cover and leave to rise in a warm place until doubled, about an hour to an hour and a half.
Punch and roll out until approx ½ cm thick.

For the filling, beat butter until creamy, add brown sugar and cinnamon and mix until smooth. Spread over the dough.


Roll up lengthwise. Cut into slices. Place on a cookie sheet and cover and leave to rise for an hour.

Bake for 10-15 minutes in 375 degree oven until brown around the edges.

Make the frosting if you don’t have a bunch left over. Spread over the buns while still warm. Try not to eat all of it.
And then eat, give some away, and eat some more. These are sooo good. So good.
I have been reading A Cracking Good Egg ever since I started this blog and I just love it. I also love her personal challenge to cook one recipe out of every one of her cookbooks before she buys a KitchenAid. I have taken a quick look at mine and I am fairly sure I have done that, but some are a bit more explored than others. In any case, when I saw her post for cinnamon buns, I just knew I had to do it and not just to use up that frosting.
These are beautiful and scrumptious and I have already had a request to make more.
Cinnamon Buns only slightly modified from A Cracking Good Egg:
Makes about 16
3 tsp yeast
1 c. warm milk (about 100-110 degrees)
½ c. sugar
½ c. melted butter
1 tsp salt
2 eggs
4 c. plain flour (I ended up doing ½ all-purpose, ½ whole wheat)
1 c. brown sugar
2 ½ tbs cinnamon
1/3 c. butter
Cream cheese frosting
For the dough, mix yeast and 1 tbs sugar into warm milk. Leave in a warm place until frothy. Sift flour, salt, sugar and make a well in the center. Add yeast mix, eggs and melted butter.
Mix to a dough and knead in a bread machine, using a dough hook or by hand until smooth and elastic.
Cover and leave to rise in a warm place until doubled, about an hour to an hour and a half.
Punch and roll out until approx ½ cm thick.
For the filling, beat butter until creamy, add brown sugar and cinnamon and mix until smooth. Spread over the dough.
Roll up lengthwise. Cut into slices. Place on a cookie sheet and cover and leave to rise for an hour.
Bake for 10-15 minutes in 375 degree oven until brown around the edges.
Make the frosting if you don’t have a bunch left over. Spread over the buns while still warm. Try not to eat all of it.
And then eat, give some away, and eat some more. These are sooo good. So good.
Friday, May 01, 2009
Cheese Straws
Behold the duel wonders of Trader Joe’s and recipes on the back of food boxes. After deciding on the fruit salsas and making my own tortilla chips, I felt that there needed to be something else to snack on that was at least a wee bit more substantial. I picked up a box of the puff pastry sheets, last seen at Aaron’s birthday party, just in case. As it turns out, the recipe on the back of the puff pastry box for cheese straws is both really easy and really delicious. It’s full of win!
At some point in the future I may attempt to make my own puff pastry but until that day TJ’s has my back. So yes, I am telling you how to make the recipe from the back of the box. I suppose this is helpful if you buy a different brand of puff pastry sheets or makes your own. Whatever, they were good.
Cheese Straws from the back of the Trader Joe’s Puff Pastry Box:
Makes a whole bunch
2 sheets puff pastry
1 egg
Cracked black pepper
A bunch of sharp cheddar cheese (or Swiss or some other flavorful cheese)
A bit of flour
Preheat oven to 400 degrees.
Defrost dough for 10 minutes. Roll out onto a lightly floured surface until 1/8” thick. Beat the egg in a small bowl and brush over dough with a pastry brush. Cut with a large knife or pizza cutter into strips about ¾” wide by 3” long. Sprinkle with cheese and a bit of ground black pepper.

Place on a baking sheet that is lined with baking paper or very lightly buttered. Bake for about 15 minutes or until golden brown and cooked through. Let cool slightly before removing from pan.
These were a perfect snack to make ahead of time. There would’ve been more for the party, but I ate a bunch throughout the afternoon. Oops! So that’s party post number 3. Almost done!
At some point in the future I may attempt to make my own puff pastry but until that day TJ’s has my back. So yes, I am telling you how to make the recipe from the back of the box. I suppose this is helpful if you buy a different brand of puff pastry sheets or makes your own. Whatever, they were good.
Cheese Straws from the back of the Trader Joe’s Puff Pastry Box:
Makes a whole bunch
2 sheets puff pastry
1 egg
Cracked black pepper
A bunch of sharp cheddar cheese (or Swiss or some other flavorful cheese)
A bit of flour
Preheat oven to 400 degrees.
Defrost dough for 10 minutes. Roll out onto a lightly floured surface until 1/8” thick. Beat the egg in a small bowl and brush over dough with a pastry brush. Cut with a large knife or pizza cutter into strips about ¾” wide by 3” long. Sprinkle with cheese and a bit of ground black pepper.
Place on a baking sheet that is lined with baking paper or very lightly buttered. Bake for about 15 minutes or until golden brown and cooked through. Let cool slightly before removing from pan.
These were a perfect snack to make ahead of time. There would’ve been more for the party, but I ate a bunch throughout the afternoon. Oops! So that’s party post number 3. Almost done!
Labels:
appetizers,
baking,
cheese,
party,
pastry,
vegetarian
Friday, March 06, 2009
Berry Galette
So while my Cheese and Sausage Galette was being consumed, this tasty dish was being baked. Unfortunately, time ran short and my husband and I had to take off for a movie (this one, in case you care. It was really good, btw). So it was cooled and stuck into the fridge. This morning it was gently reheated for about 20 minutes and was fantastic! I cannot wait to try different fruit combinations with this because it is so, so good. You have to try it. Do it now!
Berry Galette from Baking with Julia via my mom:
½ recipe galette dough, chilled
1½ c. mixed berries (I used a mix of frozen strawberries and frozen blackberries. You can also use a variety of cut up fruit instead or in addition.)
1 Tb. plus 1 tsp. sugar, separated
1 Tb. honey, optional (the sugar is enough on its own)
1 Tb. cold unsalted butter, cut into slivers and chilled
A cup of chilled water (for brushing the dough)
Follow prep for dough from the Cheese and Sausage Galette.


Spread the berries (or cut up fruit) over the dough, leaving a 2”-3” border. Sprinkle the tablespoon of sugar over the fruit and drizzle the honey if you are using it (really, though, you don’t need it). Scatter the slivers of butter on top of the fruit. Fold the uncovered border of dough up over the filling, allowing the dough to please as your lift (just like with the cheese and sausage one, but make the border thicker as fruit is runnier than cheese. Dip a pastry brush in the chilled water and give the edge of the crust a light coating and then sprinkle the fruit with the remaining teaspoon of sugar. Or put it on the fruit if you feel like it.
Bake just like the cheese and sausage galette. This is also done at about 35 minutes. Place baking sheet on cooling rack and let cool for about 20 minutes.

Serve warm or at room temperature.
It’s sweet and warm and yummy. And it looks so pretty too. I forgot to take a picture of the final product and my awesome pleating (way better than the savory one was as I followed all the steps correctly this time around), but you can see how nice the edge is on the single piece. It’s all gone now, but I will be making more soon!
Berry Galette from Baking with Julia via my mom:
½ recipe galette dough, chilled
1½ c. mixed berries (I used a mix of frozen strawberries and frozen blackberries. You can also use a variety of cut up fruit instead or in addition.)
1 Tb. plus 1 tsp. sugar, separated
1 Tb. honey, optional (the sugar is enough on its own)
1 Tb. cold unsalted butter, cut into slivers and chilled
A cup of chilled water (for brushing the dough)
Follow prep for dough from the Cheese and Sausage Galette.
Spread the berries (or cut up fruit) over the dough, leaving a 2”-3” border. Sprinkle the tablespoon of sugar over the fruit and drizzle the honey if you are using it (really, though, you don’t need it). Scatter the slivers of butter on top of the fruit. Fold the uncovered border of dough up over the filling, allowing the dough to please as your lift (just like with the cheese and sausage one, but make the border thicker as fruit is runnier than cheese. Dip a pastry brush in the chilled water and give the edge of the crust a light coating and then sprinkle the fruit with the remaining teaspoon of sugar. Or put it on the fruit if you feel like it.
Bake just like the cheese and sausage galette. This is also done at about 35 minutes. Place baking sheet on cooling rack and let cool for about 20 minutes.
Serve warm or at room temperature.
It’s sweet and warm and yummy. And it looks so pretty too. I forgot to take a picture of the final product and my awesome pleating (way better than the savory one was as I followed all the steps correctly this time around), but you can see how nice the edge is on the single piece. It’s all gone now, but I will be making more soon!
Labels:
baking,
blackberry,
dessert,
fruit,
pastry,
strawberry
Thursday, March 05, 2009
Galette Dough and Cheese and Sausage Galette
My mom sent me this recipe from her Baking with Julia book awhile ago and dang, I wish I had done it sooner. It was such a snap to put together and so tasty. Aaron and I had a savory one for dinner and there’s a sweet one baking in the oven right now that I’ll post about later. This can be done in a food processor or by hand. Since my food processor is itty bitty, I did it by hand. As with all recipes from my mom, her notes are scattered throughout.
Galette Dough from Baking with Julia via my mom:
Makes enough for two 8-inch galettes
3 Tb. sour cream (or yogurt or buttermilk. I used sour cream because for once I had some in the house.)
1/3 c. approximately ice water
1 c. unbleached white flour
¼ c. cornmeal
1 tsp. sugar
½ tsp. salt
7 Tb. cold unsalted butter, cut into small pieces
Sit in sour cream and 1/3 c. ice water together in a small bowl and set aside. Mom note – place in freezer along with your cut up butter while you get the flour thing going – it is important that these ingredients remain cold before adding. Okay back to the recipe.

Put flour, cornmeal, sugar, and salt in a large bowl and stir with a fork to mix. Drop butter piece into bowl, tossing them once or twice to coat them with flour. With a pastry blender (I used my fingers, as always), work the butter into the flour, aiming for piece of butter that range from bread crumb to small peas. The smaller pieces will make the dough tender, the large ones will make it flaky. Mom note – aim for a smaller crumb size – you will be happier when it comes time to roll it out later.
Sprinkle the cold sour cream mixture over the dough one tablespoon at a time, tossing with a fork to evenly distribute it. After you’ve added all of the sour cream, the dough should be moist enough to stick together when pressed; if it is not, add additional cold water, one teaspoon at a time. With your hands, gather curds of dough together. You’ll have a soft, malleable dough, the kind you might want to overwork. Mom note – do not as this dough comes together quite easily.

Turn the dough out of the bowl and divide in half. Press each piece of dough into a disk, wrap in plastic and refrigerate for at least 2 hours. The dough can be kept in the refrigerator for a day or two, or it can be wrapped airtight and frozen for a month. Thaw, still wrapped, in the refrigerator. It is convenient to roll the dough into rounds, place parchment between each round and freeze them wrapped in plastic; this way you’ll need only about 20 minutes to defrost at room temperature before it can be filled, folded into a galette and baked.
I modified the Cheese and Tomato Galette from the same set of recipes my mom set for the following savory galette. It was so tasty and I wish I had more to eat right now. Yum, yum, yum.
Here’s what I did for a Cheese and Sausage Galette:
½ recipe galette dough, chilled
2 oz. Monterey jack cheese, shredded
2 oz. fresh mozzarella cheese, cut into chunks
½ c. yellow onion, sliced
2 Andouille chicken sausages, sliced (yay TJ’s!)
Olive oil
Heat a small saucepan over medium heat with a small amount of olive oil. Toss onions in oil and cook until soft and golden brown, about 8 minutes. Set aside.
Position a rack in the lower third of the oven and heat the oven to 400 degrees. Line a baking sheet with parchment paper. Put the dough on a lightly floured surface and roll it into an 11-inch circle that’s about 1/8 inch thick. Since the dough is soft, you’ll need to lift it now and then and toss some flour under it and over the top. Roll the dough up around your rolling pin and unroll onto a prepared baking sheet. I missed this step here and prepared mine on the counter and then had to move it. As a result, it looked much nicer on the counter. Oh well. It still turned out fine.

Mix cheeses and scatter over rolled-out dough, leaving a 2”-3” border. Scatter the onions over the cheese. Place the sliced sausage in concentric circles, one slice slightly overlapping the last, on top of the cheese and onion. Fold the uncovered border of dough up over the filling, allowing the dough to pleat as you lift it up and work your way around the galette.

(PS: Thanks Blogspot for turning this one sideways! You're a pal!)
Bake the galette for 35-40 minutes (35 was just about perfect for me, but you may want to start checking on it at 30), or until the pastry is golden and crisp and the cheese is bubbly. Transfer the baking sheet to a cooling rack and let the galette rest on the sheet for 15 minutes. Mom note – Slip a wide spatula or two smaller ones under the galette and gently place on your serving plate. Do this with careful determination. The galette will easily peel away from the parchment paper.

Serve warm or at room temperature.
The galette can be kept at room temperature for several hours and is best serve the day it is made.
We had ours with some mixed greens. It was such a tasty meal! The dough is crispy and light and just has a really, really good taste. Aaron compared the flavor to the crispy part of a croissant, which I think is a very apt description. I will most certainly be making the dough again and will try different types of savory galettes. It’s just so adaptable and wonderful.
Galette Dough from Baking with Julia via my mom:
Makes enough for two 8-inch galettes
3 Tb. sour cream (or yogurt or buttermilk. I used sour cream because for once I had some in the house.)
1/3 c. approximately ice water
1 c. unbleached white flour
¼ c. cornmeal
1 tsp. sugar
½ tsp. salt
7 Tb. cold unsalted butter, cut into small pieces
Sit in sour cream and 1/3 c. ice water together in a small bowl and set aside. Mom note – place in freezer along with your cut up butter while you get the flour thing going – it is important that these ingredients remain cold before adding. Okay back to the recipe.
Put flour, cornmeal, sugar, and salt in a large bowl and stir with a fork to mix. Drop butter piece into bowl, tossing them once or twice to coat them with flour. With a pastry blender (I used my fingers, as always), work the butter into the flour, aiming for piece of butter that range from bread crumb to small peas. The smaller pieces will make the dough tender, the large ones will make it flaky. Mom note – aim for a smaller crumb size – you will be happier when it comes time to roll it out later.
Sprinkle the cold sour cream mixture over the dough one tablespoon at a time, tossing with a fork to evenly distribute it. After you’ve added all of the sour cream, the dough should be moist enough to stick together when pressed; if it is not, add additional cold water, one teaspoon at a time. With your hands, gather curds of dough together. You’ll have a soft, malleable dough, the kind you might want to overwork. Mom note – do not as this dough comes together quite easily.
Turn the dough out of the bowl and divide in half. Press each piece of dough into a disk, wrap in plastic and refrigerate for at least 2 hours. The dough can be kept in the refrigerator for a day or two, or it can be wrapped airtight and frozen for a month. Thaw, still wrapped, in the refrigerator. It is convenient to roll the dough into rounds, place parchment between each round and freeze them wrapped in plastic; this way you’ll need only about 20 minutes to defrost at room temperature before it can be filled, folded into a galette and baked.
I modified the Cheese and Tomato Galette from the same set of recipes my mom set for the following savory galette. It was so tasty and I wish I had more to eat right now. Yum, yum, yum.
Here’s what I did for a Cheese and Sausage Galette:
½ recipe galette dough, chilled
2 oz. Monterey jack cheese, shredded
2 oz. fresh mozzarella cheese, cut into chunks
½ c. yellow onion, sliced
2 Andouille chicken sausages, sliced (yay TJ’s!)
Olive oil
Heat a small saucepan over medium heat with a small amount of olive oil. Toss onions in oil and cook until soft and golden brown, about 8 minutes. Set aside.
Position a rack in the lower third of the oven and heat the oven to 400 degrees. Line a baking sheet with parchment paper. Put the dough on a lightly floured surface and roll it into an 11-inch circle that’s about 1/8 inch thick. Since the dough is soft, you’ll need to lift it now and then and toss some flour under it and over the top. Roll the dough up around your rolling pin and unroll onto a prepared baking sheet. I missed this step here and prepared mine on the counter and then had to move it. As a result, it looked much nicer on the counter. Oh well. It still turned out fine.
Mix cheeses and scatter over rolled-out dough, leaving a 2”-3” border. Scatter the onions over the cheese. Place the sliced sausage in concentric circles, one slice slightly overlapping the last, on top of the cheese and onion. Fold the uncovered border of dough up over the filling, allowing the dough to pleat as you lift it up and work your way around the galette.
(PS: Thanks Blogspot for turning this one sideways! You're a pal!)
Bake the galette for 35-40 minutes (35 was just about perfect for me, but you may want to start checking on it at 30), or until the pastry is golden and crisp and the cheese is bubbly. Transfer the baking sheet to a cooling rack and let the galette rest on the sheet for 15 minutes. Mom note – Slip a wide spatula or two smaller ones under the galette and gently place on your serving plate. Do this with careful determination. The galette will easily peel away from the parchment paper.
Serve warm or at room temperature.
The galette can be kept at room temperature for several hours and is best serve the day it is made.
We had ours with some mixed greens. It was such a tasty meal! The dough is crispy and light and just has a really, really good taste. Aaron compared the flavor to the crispy part of a croissant, which I think is a very apt description. I will most certainly be making the dough again and will try different types of savory galettes. It’s just so adaptable and wonderful.
Subscribe to:
Posts (Atom)