Showing posts with label breakfast. Show all posts

Saturday, August 10, 2013

Baked Ranchero Eggs with Blistered Jack Cheese and Lime Crema

I am the worst at blogging. This is an example. I meant to post this, after meaning to post it forever ago before that, almost a month ago. And these are really bad cell phone pictures, which aren't usually really bad, but these ones are. Believe me when I say this tastes a lot better than it looks here.

Baked Ranchero Eggs with Blistered Jack Cheese and Lime Crema via The Smitten Kitchen Cookbook:

Serves 4-6

1 jalapeno
3 c. whole tomatoes (from a 28 oz. can), fire roasted if possible
1 medium white onion, roughly chopped
1 large garlic clove, crushed and peeled
Salt and freshly ground pepper, to taste
1¾ c. cooked black beans (or from a 15 oz. can), drained (optional)

2 Tb. olive oil
4 small (6 inch) corn tortillas
Salt, to taste

12 large eggs
1¼ c. coarsely shredded jack cheese

2 Tb. freshly squeezed lime juice, from about 1 lime
1 c. crema mexicana or sour cream
¼ c. chopped fresh cilantro

Halved in 9 inch skillet or quartered and baked in 1-quart gratin dish

Make ranchero sauce first. Preheat oven to 450 degrees. First, taste your jalapeno for heat. Adjust the amount accordingly, halving or quartering the pepper, if needed, and toss into a blender. I like it spicy, so I just went for the whole thing. Add the tomatoes, onion, garlic, and several pinches of salt and pepper, and blend until smooth. Pout into a 12-inch ovenproof skillet, add black beans, if using them, and bring to a simmer. Cook for 10 minutes, or until it has reduced slightly.

Meanwhile, brush a baking sheet with 1 tablespoon of the olive oil. Cut the tortillas into ½-inch-wide strips, and arrange them on the oiled tray. Brush the tops of the tortilla strips with the remaining tablespoon of oil, and sprinkle with salt. Bake for 3 to 6 minutes, or until they are brown and crisp. Mine are a little thicker, so it needed to bake a little longer, more like 10 minutes. Turn them over once if needed. Remove the strips from the oven, then preheat broiler.

In a separate bowl, stir together the lime juice, crema, and a pinch of salt.
Once the sauce has thickened slightly, remove the pan from heat, and break the eggs across the surface of the sauce, distributing them as evenly as possible. Return to heat, cover the pan, and simmer the eggs gently in the sauce for about 10 to 12 minutes, until the whites are nearly but not completely opaque. Sprinkle the surface of the tomato-egg mixture with cheese, and broil until the cheese is bubbly and a bit blistered, just a few minutes.
Garnish with dollops of lime crema, broken-up pieces of tortilla strips, and cilantro. Serve immediately.
I ended up overcooking the eggs a bit while trying to get the whites to set. It still tasted really good, but without that unctuous yolky flavor and mouthfeel. I would definitely make this again. The sauce is awesome and it makes enough for using on another dish later on.


Friday, April 19, 2013

30 Before 30: Stuffed French Toast (#10)


One of my subgoals for this challenge was to try to not modify the recipes. It's something my mom and I do that drove my chef dad crazy. “You've never done it before, how can you change it?” (this from the guy that would cover all of his food in pepper before tasting it. Ha!). Well, as I've noted, doing a recipe perfectly from a cookbook, especially when you're doing many of them in a short period of time, is difficult. You're not always going to have everything you need in the house, but you might be really close. And it's early. And you're hungry. So modify.

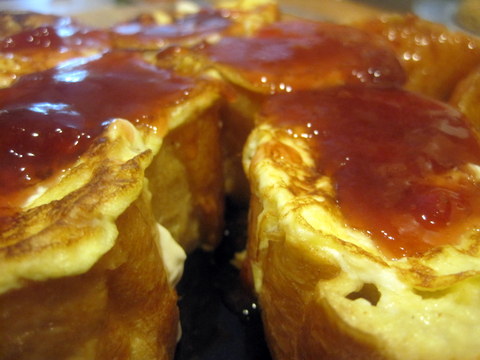
This is from my Alice Bay Cookbook and has lots of recipes out of the Skagit Valley in Northern Washington. I had to change some things. Like some big things. There are no walnuts in my version and I subbed in strawberry preserves for the apricot ones. I'm definitely missing the textural contrast of the nuts, but this is a really tasty breakfast regardless.

Stuffed French Toast modified from Walnut French Toast via Alice Bay Cookbook:

Makes 5-6 portions

1 8-oz. package cream cheese, at room temperature
1 tsp. vanilla
½ c. walnuts, chopped
16-oz. loaf French bread
1 c. whipping cream
½ tsp. vanilla
½ tsp. freshly ground nutmeg
12-oz. jar apricot preserves
½ c. orange juice

In a small bowl, beat cream cheese and 1 teaspoon of vanilla until fluffy. Stir in nuts. Don't feel bad if you don't have them.
Cut bread into 10-12 slices about 1½ inches thick. Cut a pocket in each bread by slicing from the top halfway to the bottom. Fill pockets with cream cheese.

In a medium bowl, beat eggs, cream, ½ teaspoon of vanilla, and nutmeg. Use tongs to dip “sandwiches” into egg mixture. Cook on a lightly greased griddle or skillet over medium heat until brown on both sides. Keep warm in oven.
In a small saucepan, heat preserves and orange juice. Drizzle on top of French toast and serve on warmed plates.

I think no matter the fruit you use, this is going to taste fantastically delicious and decadent.

Recipes Complete: 10
Recipes to Go: 20 

Sunday, April 14, 2013

30 Before 30: Sun-Dried Tomato and Cheddar Cheese Souffle (#3)


This is one of the easiest dishes I have ever made. It looks far too fancy for the amount of work you put in. I also love it because as it's a recipe for two, I don't need to scale it up or down. Mornings are meant for eggs and orange juice, not working with fractions. At least my mornings don't need that. I made this one again this morning with bacon and fresh rosemary. It is so easy to modify and it will make your brunch table a better place.

Sun-Dried Tomato and Cheddar Cheese Souffle via The Tillamook Cheese Cookbook:

Serves 2

1/4 c. butter
1/2 c. all-purpose flour
3 Tb. finely chopped, oil-packed, sun-dried tomatoes
1 c. milk, scalded
Pinch of salt
Pinch of nutmeg
Pinch of freshly ground black pepper
1/2 c. grated medium cheddar cheese
3 egg yolks
3 egg whites, beaten

Preheat oven to 400 degrees.

Combine the butter, flour, and tomatoes in a large saucepan.
Season the milk with the salt, pepper, and nutmeg. Add the seasoned milk to the tomato mixture and bring to a boil over medium-high heat. Remove from the heat, and add the cheese, egg yolks, and egg whites, and mix together. Pour the mixture into greased and floured souffle cups. Bake for 10 minutes.
They puff up beautifully and taste like the fanciest scrambled eggs you've ever had.

Recipes Complete: 3
Recipes to Go: 27

Tuesday, March 26, 2013

Roasted Winter Citrus


Okay, so it's the end of winter citrus time. I love spring (yay!), but seeing all of that gorgeous orange, yellow, pink, red tasty fruit wane is sad. Here's one last way to use it up before it's gone.

On a side note, this is my 19th recipe about something roasted in the title. I may need to break up with that term for awhile. With the weather warming up (eventually), that should help. Maybe.

Roasted Winter Citrus via Joy the Baker:

Serves as many as you like

Place a rack in the center of the oven and preheat oven to 350 degrees F.

Line a baking sheet with parchment paper.
Slice citrus (like grapefruit, blood oranges, and seedless tangerines) into small wedges. Drizzle with olive oil and sprinkle with a bit of salt and just a touch of sugar. Add a bit of dried herbs, like herbes de provence (I like the American version with lavender in it).
Roast for 18-20 minutes. Remove from the oven. Allow to rest for 10 minutes, then serve warm.

It's kind of weird, very delicious, and a nice way to say goodbye to winter.  

Tuesday, January 22, 2013

Sticky Lemon Rolls with Cream Cheese Glaze

One of the things I love most in this world is breakfast. Because I live in Portland, that means I join the throngs of people in love with brunch and, inevitably, waiting in line for brunch (seriously though, Screen Door is that good). Now that I've got a little man with an interesting sleep schedule (read: baby time is weird), I'm not doing so much standing in line. Though these tasty twists on a sticky roll are a bit time consuming, I think the steps would fit well into random baby sleep schedules. My glaze came out much thinner than is featured in the original, but was still very delicious. The bright flavor is perfect for winter mornings.

Sticky Lemon Rolls with Lemon Cream Cheese Glaze via The Kitchn:

Makes 12 large breakfast rolls

3 large lemons, at room temperature

For the dough-
1 envelope (0.25 ounces, or 2½ tsp.) active yeast

¾ c. milk, warmed to about 100°F (warm but not hot on your wrist)
½ c. (1 stick) unsalted butter, very soft, plus 3 Tb. more for roll assembly
¼ c. white sugar
2 tsp. vanilla extract
4½ c. all-purpose flour
½ tsp. salt
½ tsp. nutmeg
2 large eggs

For the sticky lemon filling-
1 c. sugar
¼ tsp. freshly-ground nutmeg
½ tsp. powdered ginger

For the lemon cream cheese glaze -
4 oz. cream cheese, softened
1 c. powdered sugar
Zest and juice the lemons. Divide the zest into three equal parts. One part will be used in the dough, a second part in the filling, and the final part will be sprinkled on top of the baked rolls for appearance and flavor.
Divide the juice into two equal parts, and set aside. Half of the lemon juice will be used in the lemon-sugar filling for the rolls. The other half will be used in the glaze.

To make the dough, in the bowl of a stand mixer sprinkle the yeast over the warmed milk and let it sit for a few minutes or until foamy. With the mixer paddle, stir the softened butter, sugar, vanilla, and one cup of the flour into this milk and yeast mixture. Stir in the salt, nutmeg, and one part (1/3) of the lemon zest. Stir in the eggs and enough of the remaining flour to make a soft yet sticky dough.

Switch to the dough hook and knead for about 5 minutes, or until the dough is elastic and pliable.

Lightly grease the top of the dough with vegetable oil, and turn the dough over so it is coated in oil. Cover the bowl with plastic wrap and a towel and let the dough rise until nearly doubled — about one hour.
In a small bowl, mix 1 cup sugar with the nutmeg and ginger, then work in the second part of the lemon zest (1/3) with the tips of your fingers until the sugar resembles soft sand. Slowly pour in one part (1/2) of the lemon juice, stirring. Stop when the sugar and lemon juice form a thick, clumpy mixture like wet sand. (You may use all of the reserved half of the lemon juice; you may stop before completely adding that half of the lemon juice, depending on how much juice you got from your lemons.)
To assemble the rolls, lightly grease a 13x9-inch baking dish with baking spray or butter. On a floured surface pat the dough out into a large yet still thick rectangle — about 10x15 inches. Spread the dough evenly with 3 tablespoons of very soft unsalted butter, then spread the lemon-sugar mixture over top. Roll the dough up tightly, starting from the top long end. Stretch and pull the dough taut as you roll, to keep the lemon sugar firm inside. Cut the long dough roll into 12 even rolls. Pinch the bottom of each roll closed to help keep the lemon sugar inside, and place each one, open and cut side up, in the prepared baking dish.
Cover the rolls with a towel and let them rise for an hour or until puffy and nearly doubled. (You can also refrigerate the rolls at this point. Cover the pan tightly with plastic wrap or a towel, and place it in the refrigerator for up to 24 hours. When you are ready to bake the rolls, remove the pan from the fridge, and let them rise for an hour before proceeding with baking.)

Heat the oven to 350°F. Place the risen rolls in the oven and bake for 35 minutes or until a thermometer inserted into a center roll reads 190°F.

While the rolls are baking, prepare the glaze. In a small food processor (or with a mixer, or a sturdy whisk), whip the cream cheese until light and fluffy. Add the remaining part lemon juice and blend until well combined. This is where mine got thin. I had a lot of lemon juice. The easy correction would be to add in even more powdered sugar, but I think it works out well either way. Add the powdered sugar and blend until smooth and creamy.
When the rolls are done, smear them with the cream cheese glaze, and sprinkle the final part (1/3) of the lemon zest over top to garnish. Let cool for at least 10 minutes before serving, but do serve while still warm.

These were a big hit and a fun, new way to have citrus for breakfast - maybe not in the healthy January way, but in the lazy Sunday way. 

Sunday, September 02, 2012

Zucchini Bread Pancakes


Zucchini – that little summer squash that overwhelms gardens and CSAs everywhere. What should you do with all of those green guys that are filling up your produce drawer? Zucchini bread is an obvious choice, but when I saw this recipe from Smitten Kitchen about zucchini bread pancakes, I was intrigued. It’s a rad new way to do breakfast, use up some zucchini, and it’s not all that bad for you. Aaron even ate them and he is a long time zucchini hater. Not bad for a morning’s work. Deb has lots of options for many of the ingredients. Below are my choices. Check out the original to make your own or just do what I did because I can tell you that these are awesome.

Zucchini Bread Pancakes from Smitten Kitchen:

Makes 10 to 12 pancakes

2 large eggs
3 Tb. olive oil
2 Tb. dark brown
¼ c. buttermilk
½ tsp. vanilla extract
2 c. shredded zucchini (from about 9 ounces whole, or 1 1/2 medium zucchini), heaping cups are fine
½ c. all-purpose flour
½ c. whole wheat flour
¼ tsp. salt
1 tsp. baking soda
1 tsp. ground cinnamon
1/8 tsp. ground nutmeg
Butter or oil, for coating skillet

For the topping (optional) -
1 Tb. maple syrup
3 Tb. plain Greek yogurt
If you’re doing the topping, mix together the maple syrup and yogurt in a small bowl. There. Done.
In a large bowl, combine eggs, olive oil, sugar, buttermilk and vanilla until smooth. Stir in zucchini shreds. In a smaller bowl, whisk together flour, salt, baking soda, cinnamon and nutmeg. Stir dry ingredients into zucchini batter, mixing until just combined.

Preheat oven to 200°F and place a tray on a middle rack. I skipped this step because even though it does ensure that your pancakes are cooked all the way through, it was already hot in my house and I couldn’t stand the idea of putting the oven on.

Heat a large, heavy skillet over medium heat. Once hot, melt a pat of butter in pan and swirl it around until it sizzles. Scoop scant ¼ cup dollops of batter in pan so the puddles do not touch. Cook until bubbles appear on the surface, about 2 to 3 minutes. Flip pancakes and cook another minute or two, until golden underneath. Repeat with remaining batter. Serve warm with maple syrup yogurt topping or butter and maple syrup or however you like your pancakes.
These do taste a lot like zucchini bread and you can almost pretend you’re being healthy. It’s pretty close.

Saturday, August 18, 2012

Toasted Almond Granola


Okay, so your oven is going to have to go on for a little bit for this one. But then you can eat some delicious granola on cool, cold things like yogurt or almond milk or fro-yo. Worth it. Joy the Baker always hits it out of the park and this granola recipe is no exception. Granola is rad, but can be spendy. Not when you make it yourself! Get to it!

Toasted Almond Granola from Joy the Baker:

Makes 8 cups

4 c. old fashioned oats
1 c. slivered raw almonds
1 c. whole raw almonds
½ c. sweetened shredded coconut
1 tsp.  ground cinnamon
½ tsp. salt
3 Tb. butter
¼ c. vegetable oil
¼ c. honey
½ c. brown sugar
1 tsp. pure vanilla extract

Place a rack in the upper third and middle of the oven and preheat to 325 degrees F.  Line one large or two small baking sheets with parchment paper and set aside.
Whisk together oats, whole almonds, slivered almonds, sweetened coconut cinnamon and salt.  Set aside.

In a medium saucepan, melt together butter, oil, honey and brown sugar until the sugar is dissolved and the mixture begins to boil.  Carefully whisk together so it’s well incorporated.  Add the vanilla extract.  Pour the warm mixture over the oat and almond mixture and toss together with a wooden spoon, ensuring that all of the oat mixture gets moistened by the sugar and oil mixture.
Spread mixture onto prepared baking sheet(s) and bake for about 25 to 30 minutes, removing the oats to stir and toss on the pan twice during baking.  Remove from the oven, let cool and store in an airtight container for up to two weeks.
This is tasty times morning, noon, and night. I also mixed in some raisins, dried cranberries, and M&Ms to make trail mix to take with me when I went to Juneau last month. Perfect anytime weather food, but especially good for hot mornings.

Wednesday, December 21, 2011

Jam Muffins

Wow, I made these a long time ago. And they were messy. And pretty good. But messy. Have extra homemade jam that you have no idea what to do with? Want to make them too? Follow along!

Jam Muffins from Serious Eats:

Makes 12 muffins

¾ c. all purpose flour
¾ c. white whole wheat flour
2 tsp. baking powder
½ tsp. salt
¾ c. milk
¼ c. vegetable oil
1 Tb. vanilla
1 egg
¼ c. honey
½ c. jam

Preheat the oven to 375 degrees and spray 12 standard-sized muffin tins with baking spray, or line them with paper liners. Combine the flours, baking powder, and salt in a medium bowl. Whisk to combine.

In a separate bowl, combine the milk, vegetable oil, vanilla, egg, and honey. Whisk to combine, making sure the honey is fully dissolved.

Add the wet ingredients to the dry and stir just enough to combine. It will be lumpy. Add the jam, and fold the mixture a few times to distribute it, but leave the mixture streaky. Portion the mixture evenly into the muffin tins. I topped mine with extra jam, which turned out to be kind of a mistake because the jam leaked a lot and I had to scrub my poor baking stone that was sitting underneath the muffin tray. Sad.

Bake at 375 degrees until the muffins are browned on top and a toothpick inserted in the center of the muffins comes out clean, about 20 minutes.
Remove the muffins from the pan and cool completely on a rack.

Like I said, these a pretty good, but very messy. Be careful with your jam mixing. I thought they also tasted a little gritty, so really make sure you get your dry and wet ingredients well mixed. I might fiddle with these some more, but if nothing else, it’s a great way to use jam.

Tuesday, December 06, 2011

Apple Cinnamon Coffee Cake

I love Joy the Baker. A lot. This was an interesting baking experience for me because the first of these cakes I didn’t love and that surprised me. The problem was in the rolling. I didn’t roll the cake quite tight enough and it tasted really bready and not appley enough. The second one, which was devoured with my girlfriends while watching Sex and the City 2 (cocktails required. It’s BAD.), was much better. And that’s not just the cocktails talking. Do what she says and make two. And roll them tight!

Apple Cinnamon Coffee Cake from Joy the Baker:

Makes 2 cakes

For the dough-
2 ¼ tsp (1 package) active dry yeast
¼ c. warm water, about 105 to 155 degrees F.
big pinch of sugar
6 Tb. granulated sugar
¾ c. (1½  sticks) unsalted butter, at room temperature
½ tsp. ground cardamom
½ tsp. salt
3 large eggs
4½  to 5 cups all-purpose flour
1 c. warm whole milk, 105 to 115 degrees F.

For the filling-
3 large apples, peeled and cut into small cubes (Honey Crisp for life!)
2 tsp. fresh lemon juice
¼ c. brown sugar
1 tsp. ground cinnamon
1 tsp. cornstarch
½  tsp. fresh ground nutmeg
pinch of salt

For the Streusel:
½  c. all-purpose flour
½ c. brown sugar
½ tsp. cinnamon
pinch of salt
pinch of cardamom
3 Tb. unsalted butter, at room temperature
1 egg and sugar for brushing and topping the dough before baking

To make the dough, in a small bowl, mix together yeast, warm water and pinch of sugar.  Stir together until yeast is dissolved and set aside for 10 minutes.  Yeast will foam up. 

In the bowl of an electric stand mixer, fitted with a paddle attachment, add the sugar, butter, cardamom, and salt.  Blend on medium speed until pale in color and fluffy, about 3 minutes.

Stop the mixer, scrape down the bowl, and add eggs and 1 cup of flour.  Blend on medium speed until thoroughly incorporated and creamy, about 1 minute.  Stop the mixer and add 2 cups more cups of flour, foamy yeast mixture, and warm milk.  Blend in medium speed until the flour disappears.  Mixture will be very wet. Add 1½  to 2 more cups of flour.  Blend until the flour is almost incorporated.
Dump the dough onto a lightly floured work surface.  Knead for 5 to 8 minutes by hand.  Dough will be glossy and just slightly sticky.  Place dough in an oiled bowl, cover with plastic wrap and a towel and let rest in a warm place for 1½ hours, or until doubled in size. Sometimes if my house is too cold, I’ll put the oven on warm. That usually works.

While the dough rises, make the apple filling and the streusel.

To make the apple filling, toss together diced apples, lemon juice, sugar, cinnamon, cornstarch, nutmeg and salt.  Leave at room temperature and set aside until ready to use.

To make the streusel filling:

In a small bowl, whisk together flour, sugar, cinnamon, salt, and cardamom.  Add butter and, using your fingers, work the butter into the flour mixture.  Break up the butter into the mixture, until thoroughly incorporated and crumbly.  Set aside.

Continue on with the dough. Line two baking sheets with parchment paper and set aside. I didn’t do this, but even though the pans for pretty messy, they cleaned up easily enough in hot water.
When the dough has doubled in size, dump it out onto a lightly floured work surface.   Use a large knife or a bench knife to divide the dough in two.  Roll each dough piece into about a 10×14-inch rectangle.  Sprinkle with half of the streusel mixture.  Add half of the apple mixture over the apples.  Add a bit of the apple juices too. 

Starting from the longest side, begin to roll the dough.  This isn’t like a cinnamon roll, you don’t have to roll it into a super tight swirl, but as I noted, make it pretty tight or it will be too bready.  Fold in about 1 1/2 to 1-inch folds.  Keep the seam on the bottom.

Repeat the same steps for the second piece of dough.

Carefully lift roll onto the prepared baking sheet. Now is a great time to freeze or refrigerate the coffee cake  dough for later baking. If you decide to freeze the dough, place it in the fridge to thaw the evening before you’d like to bake it.  Once it’s thawed, slice it according to the above directions.  Allow to come to room temperature, and allow to rise for another 30 minutes beyond that.  Wash with egg and sugar, then bake. This is what I did with my second loaf.

If you decide to refrigerate the dough, simple take it out of the fridge, slice according to the above directions.  Let come to room temperature, then allow to rise for 30 minutes beyond that.  Brush with egg and sugar, then bake.
Take a pair of clean scissors and slice into the dough leaving about 3/4-inch of dough still attached.  Slice at 1-inch intervals.  Carefully begin to curve the sliced dough into a semi-circle/horseshoe shape.  If some of the apple juices escape, that’s ok.  Cover with a towel and let rest in a warm place for 30 minutes.

Preheat the oven to 375 degrees.

Brush dough with egg wash and sprinkle with raw or granulated sugar.  Bake for 30 to 35 minutes, until golden brown and cooked through.
Remove from the oven, allow to cool for 15 minutes before serving.  Best served warm with cocktails.  Coffee cake will last, well wrapped at room temperature, for up to 3 days. I think we may have made it through most of the movie. Maybe. I think this would be a great addition to a brunch potluck, especially if you make two and keep one in the freezer. Bam! Instant brunching. 

Friday, September 16, 2011

Apple Dutch Baby

Dutch babies are a nostalgic breakfast for me. My mom used to always makes them for me for special breakfasts and whenever I visit, I can get one. The classic way to make it is to make a huge one in cast iron pan and share it, but you can do individual sizes. I made a smaller version to share with Aaron and did it in a casserole, which made it thicker than usual, but still tasty. Apple is a classic combo with the Dutch baby.

Apple Dutch Baby:

¼ c. milk +
¼ c. flour
for every egg
1 – 2 eggs from one person
3 – 4 for more
1 apple

Preheat oven to 425 degrees. Place enough butter to coat casserole. Warm in oven until melty.
Mix milk and flour with beaten eggs. Cover the bottom of the casserole with apple slices. Pour in batter and cover top with apple slices.  For a one egg baby, bake for 8-10 minutes. For two eggs, 10-12 minutes, and 12-15 for three eggs.
Remove when top is puffy. Serve with maple syrup, sour cream, and jam.

It’s easy, but still seems like a fancier breakfast. It would also be a welcome addition to a potluck brunch.

Friday, January 28, 2011

Chicken and Waffles


What do you do when you make too much pancake/waffle batter? You stick in the fridge and then have chicken and waffles for dinner. You can modify these any way you like, but make sure it's spicy or you're missing the point.

Chicken and Waffles:

Serves 2

For the waffles-
½ recipe waffle batter
1 head broccoli, diced small
½ c. cheese (white cheddar rocks!)
2 tsp. red pepper flakes
2 Tb. cayenne pepper
2 Tb. granulated garlic
2 Tb. dried minced onion
Freshly cracked pepper

For the chicken-
2 chicken breasts
2 eggs
Breadcrumbs
Flour
2 tsp. cayenne pepper
2 tsp. granulated garlic
Freshly cracked pepper
Salt to taste


To make the waffles, mix everything in with the batter, and get it going in a waffle iron. You should have enough batter to make four small waffles.

To make the chicken, mix in the cayenne pepper, garlic, pepper, and salt with some flour. Dredge the chicken through the flour, then the egg wash, and then the breadcrumbs. Cook in pan with hot olive oil over medium-high heat until cooked through.

 Place the chicken on a waffle, cover with hot sauce of your choice, and top with another waffle. Serve with syrup. These are sweet and spicy and so delicious. The broccoli adds color and a bit of texture and the cheese is a perfect complement to all of the spice. It’s hearty and works day or night.

Monday, August 30, 2010

Blackberry Lime Muffins


Two weekends ago, I went camping with a few of my girlfriends at Mt. Rainier National Park (Renai (in two parts) and Brittany have already posted about it). Car Portland was in charge of breakfast, so I decided to make muffins because it’s berry season and I love muffins. They were delicious and it was an amazing camping trip, made all the better because my fall semester just started and I know I’m going to be bogged down in grad school stuff once again. Incidentally, this will likely mean a slowdown in posts. As always, I’ll try to keep up. In the meantime, make these muffins. They are fantastic.

Blackberry Lime Muffins:

Makes 18 small muffins

1/2 c. whole wheat flour
3/4 c. all-purpose flour
1 c. oats
1 tsp. baking powder
1/2 tsp. baking soda
1/4 tsp. salt
1/4 c. sugar
1 c. homemade applesauce
1/2 c. Greek-style yogurt
1 egg, beaten
Zest and juice of 1 large lime
1 1/2 heaping c. Oregon blackberries

Heat oven to 375 degrees.

In a small bowl, mix together flours, oats, baking powder and soda, salt, and sugar. Set aside.

In a large mixing bowl, beat together applesauce and yogurt. Add in beaten egg and mix well. Add lime zest and juice. I ended up adding in a bit more because the cinnamon flavor of my applesauce was overpowering the zesty lime flavor profile I was going for.


Slowly mix in dry ingredients, making sure each addition is fully incorporated before adding the next. Fold in blackberries. Add mixture to cupcake liners, filling about 2/3 of the way full, and bake until a toothpick inserted into the center comes out clean, about 18-20 minutes.


These ended up being more dense than I had intended, but were still amazing. I would have used all whole wheat flour, but I made these the morning of the trip and ran out. In the future, I will likely increase the amount of flour a bit, but for the most part, I loved them. They are incredibly moist and the best part is how the blackberries and lime play together. It’s one of my favorite flavor combinations. What I think is great about muffin recipes is how much you can play around with them. In the future, I might take out the lime and sub in blueberries. Because my applesauce is so full of cinnamon, I wouldn’t change anything else or maybe I could add lemon instead. The world is your muffin!

Tuesday, May 11, 2010

Waffles

Once, oh so long ago (okay not that long ago), I declared that the buttermilk pancake recipe on the back of my buttermilk powder was the best thing in pancakes and the only one I made. Yeah, and then my dear friend Alton Brown (and by dear friend I mean I adore his food nerdliness on a regular basis) had a show about pancakes and I was hooked. And, as it turns out, they make for terrific waffles as well!

“Instant” Pancake Mix and Waffles from Good Eats:

3 batches of pancakes…or waffles! (About 12 pancakes per batch.)

6 c. all-purpose flour
1½ tsp. baking soda
3 tsp. baking powder
1 Tb. kosher salt
2 Tb. sugar
(Combine all of the ingredients in a lidded container. Shake to mix. Use the mix within 3 months.)
2 eggs, separated
2 c. buttermilk
4 Tb. melted butter
2 c. "Instant" Pancake Mix, recipe above

Turn on your waffle iron.


Whisk together the egg whites and the buttermilk in a small bowl. In another bowl, whisk the egg yolks with the melted butter. Combine the buttermilk mixture with the egg yolk mixture in a large mixing bowl and whisk together until thoroughly combined. Pour the liquid ingredients on top of the pancake mix. Using a whisk, mix the batter just enough to bring it together. Don't try to work all the lumps out. Normally, when doing pancakes, you add your fruit to the top after they’ve been placed on the griddle. This doesn’t work out as well for waffles, so I mixed in my fruit, which was dried cranberries and pomegranate seeds, right into the batch.


Pour in the batter. Don’t do what I did here, which is pour in far too much. Underestimate with waffles and you will be much happier. Let the iron do its thing. Pull the waffles when they are crisp at the edges. Serve with butter, jam, and maple syrup. Aaron got this jam at the Oregon Historical Society, where he volunteers, and it is amazing! I want to eat it on everything. Including more waffles.


Check out the original recipe here to see Alton’s fabulous tips on making pancakes with this stuff. I know I’ve said it before, but I think I may have found the perfect pancake/waffle recipe. I try to serve it to my friends whenever they come into town because pancakes and waffles are a good way to show your friends you love them. And it gives you an excuse to eat waffles!

Thursday, January 21, 2010

Oatmeal Cakes

I love oatmeal. It’s one of my favorite breakfasts. I came to love oatmeal even more when I discovered the glory that is steel cut oats. While I know many people don’t like oatmeal because it’s mushy, I do also enjoy rolled oats. However, steel cut oats are something else. They’re chewy and delicious and they’re a labor of love, taking longer to cook than rolled oats. I love them.

So the other day I made a massive amount of oatmeal and didn’t eat all of it because as much as I love it, I do have a limit. Anyway, I decided that instead of just heating up the rest of it later, I’d try something else. And this is that strange, delicious experiment.

Oatmeal Cakes:

1 c. cooked steel cut oats
Lemon zest
Dash of lemon juice
¼ c.-ish honey plus a bit more for garnish
Two big dashes of cinnamon
A bit of flour
Coconut oil


Heat coconut oil in a medium size saucepan over medium heat. Mix together all of the ingredients and form into palm size cakes (I have small palms, so you may want to make them a bit bigger). Cook each side until a nice light brown crust has formed. Serve with additional honey.

These didn’t stay together perfectly, but they were so good I didn’t care. The coconut oil adds an extra little bit of flavor and also makes these bad boys vegan, so there you go. It’s a fantastic breakfast. Next time, I’m going to mix in fruit.
Related Posts Plugin for WordPress, Blogger...