Thursday, March 29, 2012

Things I Love Thursday: Mar. 29, 2012

(see the rest of the exploding food here)
Has it really been this long since I've done one of these? Man, all of my links are probably old news by now, but maybe I've got some gems. And maybe I'll get back into the habit of doing these because they are fun. Maybe. Enjoy the show!

Social Media + Customers Hate You = Bad Idea: Old news, but hilarious. When I actually ate there, my good times were not so much about the food, but more about the kind of hidden upstairs area my friends and I would hang out in at the downtown location in Juneau. It involved a lot of squirting ketchup packets at each other and random teenage nonsense.

John Gorham Lands Cookbook Deal With McSweeney's: If you don't live in Portland, this is what you need to know - everything Gorham touches turns to restaurant gold. Toro Bravo? Down the street from my place and amazing. Tasty 'N Sons? Brunch from heaven (and also close by). Interurban? I've heard nothing but good things. So yeah, his cookbook sounds pretty darn exciting to me.

(Brad Pitt apparently eats in almost all of his movies. I think that's the premise behind the Ocean's movies...get money so Rusty (Brad) can eat more stuff.)
Wahlburgers - A Review: So Brad Pitt likes to eat food in film. Mark Wahlberg helps make food happen. I found out about his family's restaurant in December and recently Serious Eats went out to review it. And it turns out the burgers are pretty good. I don't know if they are drop your pants good, but it's nice to hear nonetheless. 

Mini Taco Bowls: You make them by flipping over a muffin tin and forming a bowl out of tortillas on the other side. How cool is that?

Mallory Motor Hotel 1965: Awesome shots of an old hotel menu here in Portland. Why yes I would like a $1.50 fruit plate. There were $.85 daiquiris. Yeah. The drink list itself is priceless.
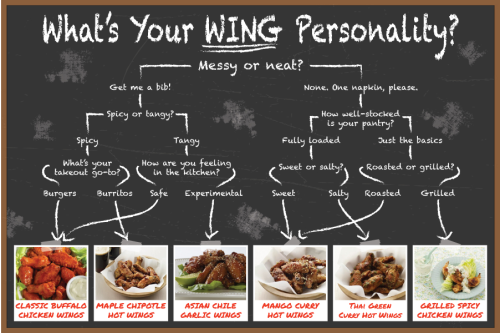
(wings aren't just for the Super Bowl. Ask Aaron.)
How To Eat Food: The candy corn one is my favorite. I do that every year. Lewis Black has a great bit about candy corn, but I can't find the video. The point is that candy corn is something you forget you don't like and then you eat it. And then remember. I think maybe hypnotism is involved.

Sprinkles Cupcake ATM: A real thing. And now I have to go to Beverly Hills just to check this out.

Why British Food Was Bad For So Long: I'll admit it: when in England, I mostly ate grocery store sandwiches. In my defense, they were really, really good sandwiches. The ploughman? Awesome. And Aaron wasn't eating Indian food yet, which is supposed to be a highlight of London. Despite my culinary non-adventures, this article is really interesting and shows a lot about how war and economics can have an effect on culture.
(perfect accompaniment to the above article)
I'm also loving: candied ginger chews; pickled jalapeƱos (actually, pickled anything); making soup up as I go along; bananas foster french toast from Screen Door; bao; perfect bagels; pizza dates; tacos all the time; surprise cupcakes from Cupcake Jones; free cookies; lunch on a patio for the .2 seconds it's actually nice here; Podnah's Pit twice in one week; happy hour always and forever; citrus! all of the citrus! tangelos & ruby red grapefruits & navels & everything; Hawaiian plate lunch; tea any time of day; adventures in Thomas Keller's cookbook; the surprises in my CSA; seriously - citrus.

What are you loving this week? Or in any of the weeks I didn't post?

Wednesday, March 28, 2012

Aaron's Cheesesteak

My food habits have changed quite a bit over the last few years. I eat all sorts of meat now and have started to venture into new meat territory. Well, new to me. So when Aaron suggested he make some cheesesteaks because the meat is really thin and I like everything else about them, I said okay. I’m glad I did because these are wonderful. This makes enough for two very hungry people and three regularly hungry people. All of this stuff saves well, so if you make a bunch for yourself, you can have sandwiches for a couple of days. No biggie.

Aaron’s Cheesesteak:

12 oz. thinly sliced steak
½ onion, sliced
½ - 1 green pepper, sliced
Olive oil
Salt and pepper to taste
Flour
Butter
Milk
Cheddar cheese, grated
Mayo
4-6 garlic cloves
Kosher salt
Even more pepper
2-3 French rolls (depending on how hungry you are)

To make the garlic mayo, smash the garlic cloves with some salt a la the fried lemon recipe. Mix in with some mayo.  Add some freshly cracked pepper. Set aside.
Coat onion and peppers in olive oil and cook in a large cast iron or other heavy bottomed pan over medium heat until soft. To prepare the steak, season liberally with salt and pepper. Add to onion and pepper mixture and cook until browned. Turn heat to low while you prepare the cheese sauce.

The cheese sauce is easy and just like this one for mac and cheese. Make a roux with a knob of butter and some flour and cook until lightly browned. Slowly add in some cold milk and mix until a good consistency. Add in some grated cheese until it looks cheesy enough (is it ever?) Add some pepper and salt if you’re so inclined (I usually am).
Spread some mayo on the French rolls. Fill with meat, pepper, and onions. Cover in cheese sauce. Eat over a plate because these bad boys are messy. And really, really satisfying. 

Tuesday, March 20, 2012

Beet and Ricotta Gnocchi

Aaron and I recently started splitting a CSA (Community Supported Agriculture) box with our friends Corey and Brian. Most of it hasn’t put out a lot of surprises (I know what to do with apples. It involves eating them), we recently got a couple of beets. Fortunately for me, I still star a million things in my reader and this recipe came up not too long before the box did. Et voila! Something new and different and fun.

Beet and Ricotta Gnocchi from Dixie Caviar:

Serves 2 with leftovers

1 medium or two small red beets, washed
1 lb. whole milk ricotta cheese
1 egg
1 c. grated Parmesan cheese, plus more for the table
Kosher salt and freshly ground black pepper
2/3 c. all-purpose flour, plus more for dredging
8 Tb. (1 stick) unsalted butter
Fresh sage leaves

Place a cheese cloth-lined colander over a bowl and drain the ricotta overnight, or up to 24 hours.

Preheat oven to 450 degrees. Wrap beets in aluminum foil and place on baking sheet. Bake until tender, approximately 45 minutes. Remove from the oven, open aluminum foil and let beets cool. Slip the skins off with your hands. Your hands will turn pink. Don’t worry, they’ll just get pinker with the next step. Grate the beets into a mixing bowl on the large hole of a box grater. Add the ricotta, eggs, Parmesan cheese, and salt and freshly ground black pepper to the beets. Mix well with a whisk or wooden spoon. Add 2/3 cup flour to the ricotta mixture and whisk together to mix. Set the mixture aside for a minimum of 2 hours in the refrigerator. Can be made up to two days ahead. Wash your hands…for now they will be unpink.
Use a spring form scoop to measure out the dough. Or just grab some hunks. Use your palms to form dough balls about the size of a ping pong ball. Roll the ball into a bowl of flour, carefully turning to lightly coat all sides, tapping off any excess. Lay each dumpling on a parchment-lined baking sheet. I skipped this step and just lined them up on my cutting board. Continue forming the gnocchi until all the mixture is gone.

Add the dough balls into a pot of gently simmering salted water and cook for about 4-5 minutes. Using a slotted spoon, remove them from the water as they are done and place them on a platter. Use a paper towel to soak up any excess water.
Meanwhile, melt the butter together with the sage leaves in a skillet over medium heat. Let the butter lightly brown and the sage leaves become nice and crispy, about 10 minutes. Add the cooked gnocchi to the skillet and toss with the butter to warm them up a bit. Season with salt and pepper, if desired. Serve immediately with fresh Parmesan for grating.

These are really, really interesting. Even if you’re not a huge beet lover, I’d give these a try. They add an earthy flavor to gnocchi and make for a really fun and colorful dish.

Wednesday, March 14, 2012

Boston Cream Pie Cupcakes

Yesterday I posted about the cheesecake that managed to be. Today are the slightly complicated, but somehow perfect cupcakes I made for the losing team, the New England Patriots. This makes me 2 for 3 for Super Bowl desserts and teams winning that I want. To be fair, I was the only one in NE garb for the Super Bowl and that’s only because I won a free jersey opening weekend at a bar. Everyone else was repping their team…none of which were playing.

But the food! The food was a winner and so was everyone there. So yes, these are a little complicated, but it is Martha Stewart. In the end, you know it’s going to be delicious.

Boston Cream Pie Cupcakes from Martha Stewart:

Yields 16-18

Cupcakes-
1½  c. all-purpose flour, plus more for tins
1½  tsp. baking powder
½ tsp. salt
½ c. whole milk
6 Tb. unsalted butter, softened, plus more for tins
3 large eggs
1 c. sugar
1 tsp. pure vanilla extract

Vanilla Cream-
2 large egg yolks
¼ c. sugar
2 Tb. plus 1/2 teaspoon cornstarch
Pinch of salt
1 c. whole milk
½ tsp. pure vanilla extract

Chocolate-Ganache Glaze
2/3 c. heavy cream
6 oz. semisweet chocolate, finely chopped
1 Tb. light corn syrup

The vanilla cream needs to cool for at least an hour, so do this part first. Whisk yolks until smooth. Mix sugar, cornstarch, and salt in a medium saucepan over medium heat. Add milk in a slow, steady stream. Cook, stirring, until mixture begins to bubble and thicken, about 5 minutes. Pour 1/3 of milk mixture into yolks, whisking constantly. Return mixture to saucepan, and cook over medium heat, stirring often, until thick, 2 to 4 minutes. Stir in vanilla.

Pass vanilla cream through a fine sieve into a bowl. Press plastic wrap directly on surface. Refrigerate until cold, at least 1 hour, or up to 2 days. It doesn’t take a lot of work, but give yourself more leeway than I did. I cut it really close to game time!
To make the cupcakes, preheat oven to 350 degrees. Butter and flour standard muffin tins. Whisk together flour, baking powder, and salt in a small bowl. Warm milk and butter in a saucepan over low heat. Beat eggs and sugar with a mixer on high speed until thick and pale, about 5 minutes. Beat in dry ingredients. Bring milk and butter to a boil. With mixer on low speed, add milk mixture to batter, and beat until smooth. Add vanilla. Divide batter among muffin cups, filling each halfway. Bake cupcakes until light gold, about 15 minutes. Let cool in tins for 10 minutes, then transfer to wire racks. Let cool.

While the cupcakes are baking, prepare the ganache glaze. Bring cream to a boil in a small saucepan. Remove from heat, and add chocolate and corn syrup. Let stand for 5 minutes. Whisk until smooth. Transfer to a bowl, and let cool, stirring often.
Using a serrated knife, cut each cupcake in half horizontally. Spread 1 tablespoon vanilla cream on each cupcake bottom. Sandwich with top. Spoon glaze over each, and serve immediately.

I had extra ganache and left it alongside so anyone could add more to their cupcakes. It was that good. These are very moist cupcakes with a perfect crumb. They look a little fancy too, which is fun. A little work, but worth it. You know what Martha would say, right?

Tuesday, March 13, 2012

New York Cheesecake

Remember how the Super Bowl happened over a month ago? Yeah, it was boring, but I made stuff for it. And then fell down the blogging hole and forgot to do anything about it at all. I’ve got posts for this and posts for other things to and I really will try to not be such a bad blogger. Really.

This was a cheesecake of disasters that managed to turn out really lovely. I forgot a block of the cream cheese, overbaked the crust, used the wrong size pan, and my stand mixer broke. Don’t worry, it was a 10 year old refurbished model, my whisk was bent, and my paddle was starting to go. So this whole thing was done with a hand mixer, my (clean) hands, and some determination. I’m sure under better circumstances this wonderful cheesecake would be even better. I’m listing the full, proper recipe below. In the future, I’m going to try this again. The cherry topping alone is worth it.

New York Cheesecake from Smitten Kitchen:

Serves many

Crumb crust
8 oz. (15 4 3/4 x 2 1/2-inch sheets of graham cracker) finely ground graham crackers or cookies such as chocolate or vanilla wafers
8 Tb. (1 stick) unsalted butter, melted
½ c. sugar
¼ tsp. salt

Very tall cheesecake filling:
5 (8 oz) packages cream cheese, softened
1¾ c. sugar
3 Tb. all-purpose flour
1 tsp. finely grated lemon zest
1 tsp. finely grated orange zest
5 large eggs
2 large egg yolks
½ tsp. vanilla

Cherry topping
10 oz. sweet or sour cherries, pitted (frozen is fine out of season)
2 Tb. lemon juice
¼ c. sugar
1 Tb. cornstarch
½ c. water

To make the crumb crust, stir together crust ingredients and press onto bottom and up the sides, stopping one inch shy of the top rim, of a buttered 9½” springform pan.  A larger pan, obviously, makes for a flatter cheesecake. So does forgetting one of the cream cheese blocks.

Preheat oven to 550 degrees. To make the filling, beat together cream cheese, sugar, flour and zest with an electric mixer until smooth. Add vanilla, then eggs and yolks, one at a time, beating on low speed until each ingredient is incorporated. Scrape bowl down between additions.

Put springform pan with crust in a shallow baking pan (to catch drips). Pour filling into crust (springform pan will be completely full) and baking in baking pan in the middle of the oven for 12 minutes or until puffed. Please watch your cake because some ovens will top-brown very quickly and if yours does too fast, turn the oven down as soon as you catch it. Mine sort of did. This was a complicated section. Reduce the temperature to 200 degrees and continue baking until cake is mostly firm (center will still be slightly wobbly when pan is gently shaken), about one hour more. Watch it doesn’t overbrown or the crust doesn’t start to burn.

Run a knife around the top edge of the cake to loosen it and cool the cake completely in springform on a rack, then chill it, loosely covered, at least 6 hours.

To make the cherry topping place all ingredients together in a medium saucepan. Bring to a boil. Once it is boiling, cook it for an additional one to two minutes then remove from heat. Cool completely.
Remove side of pan and transfer cake to a plate. If you had any wonky baking issues (yo), you might need to trim the cake flat. The next day I trimmed the edges and the burnt part of the crust. And then I snacked on a lot of it. There was easy to get to cheesecake!

Spread topping over chilled cheesecake. I kept this in the fridge for a few hours before Super Bowl. With a variety of desserts, it still was very popular. And very, very good.
Related Posts Plugin for WordPress, Blogger...