Thursday, September 06, 2012

Things I Love Thursday: Sept. 6, 2012

Oh my gosh, we're back! I have been looking at things and loving them...and then not blogging about it. Eh. You know. Let's let bygones be bygones and get to it.

There's lots of fabulous food news in my neighborhood and that's what I'm starting with. Though I was sad that Pix closed their Williams location, I was super stoked to hear that Kenny and Zuke's will be taking over the spot. Portland is a fabulous food town, but lately it has not been a fabulous bagel town (RIP Kettleman's). K & Z make a fab bagel, but it's all the way downtown and I'm lazy. Williams has a lot of good stuff and this will be just one more.

Even closer to home is the fantastic news that the geniuses behind Bunk Sandwiches are moving into the Under Wonder space. The new place will be called Trigger., will be open on more than just show nights, and are going to be Tex-Mex themed. Yeah, everything I could possibly want plus this quote "authentic gay cowboy cuisine". I'm in.

Pizza Ban Lifted in N. Korea: I didn't even know this was a thing, but I guess it is. Hooray for pizza!

(click image to enlarge)
What's Good at Trader Joe's?: It's not secret that I'm a huge TJ's fan, but sometimes those random tasty looking items you grab end up just being random and not so tasty. Obviously things change a lot, but this seems like an excellent resource to have. After all, I'm a librarian and we are nothing if not a breed of people who loved resources.

And speaking of libraries and resources, Southeast Portland recently got a kitchen tool lending library. It has everything from simple stuff like pots and pans to things you might not ever buy, like a dehydrator. 
Super, super cool.
Bon Appetit! 100 Years of Julia Child: Last month would have been Julia Child's 100th birthday and it's hard to imagine a more influential person in home cooking. I love the angle this article takes on Child's contributions to feminism and the advancement of women. Plus it includes the rad remix video you may have seen floating around. 

Chopped is my favorite cooking show. Serious Eats tells you why Kirsten and I aren't the only ones who go crazy for it. I had a dream I won it the other night. It was super convincing. And yeah, I rocked the dessert round.

Cake Mix Science: Jessie tests why can't you just bake the frosting into the cake? And then frost it again. Interesting and delicious results.
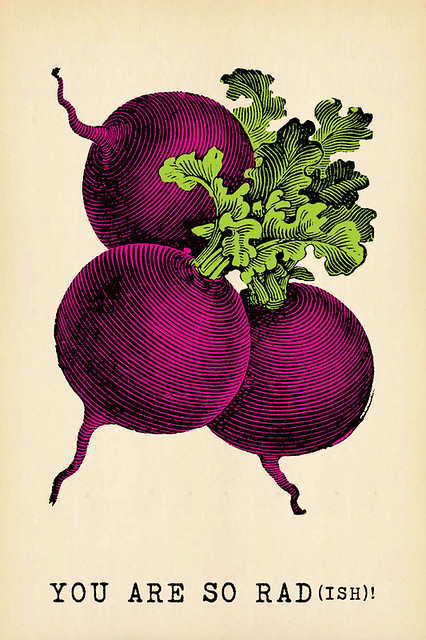
I'm also loving: Interurban's happy hour (esp. that quesadilla); after dinner snacks of olives, pickles, and sharp cheddar; the Green Machine at Bamboo. I mean, seriously, how can one sushi roll be that delicious?; Cock'n'Bull ginger beer; candied bacon in so many things; discount pizza because I came in 45 minutes before closing (I love my neighborhood); Killer Burger's peanut butter pickle bacon burger. Sounds like what? Tastes like WHA?omnomnomnom; cucumber salad; fro-yo; sparkling water; sharing chocolate milkshakes with my sweetie (d'awww); fancy mocktails.  

What are you loving this week?

Tuesday, September 04, 2012

Basil Vinaigrette


Basil. Delicious. Herbaceous. Sometimes going limp in your refrigerator. If you’ve got a lot of basil, this recipe might be just what you need. It’s fast and fantastic with meats and salads. I like it enough to go buy basil. I didn’t have a shallot at the time, so you’ll see my substitution below.

Basil Vinaigrette from Simply Recipes:

Makes about 1 cup

1 tsp. Dijon mustard
2 cloves garlic, chopped
2 Tb. chopped onion
½ tsp. salt
1 tsp. sugar
½ c. roughly chopped basil leaves
¼ c. white wine vinegar
¾ c. olive oil

Place the salt, sugar, mustard, garlic, onion, and basil in a food processor. Pulse several times to combine. Scrape the sides of the blender down with a spatula. Add the vinegar and pulse again.

Turn the processor on low and take off the cap in the center of the lid. Slowly pour in the olive oil. It may sputter a little out of the open cap, so hold your hand over it to minimize splashing. When the olive oil is incorporated, turn off the blender and scrape the sides down one more time. Cover and purée everything for 1-2 minutes.
It’s great with a summer green salad and also dynamite with grilled chicken because of its pesto-esque flavor. It will keep in the fridge for about a week.

Sunday, September 02, 2012

Zucchini Bread Pancakes


Zucchini – that little summer squash that overwhelms gardens and CSAs everywhere. What should you do with all of those green guys that are filling up your produce drawer? Zucchini bread is an obvious choice, but when I saw this recipe from Smitten Kitchen about zucchini bread pancakes, I was intrigued. It’s a rad new way to do breakfast, use up some zucchini, and it’s not all that bad for you. Aaron even ate them and he is a long time zucchini hater. Not bad for a morning’s work. Deb has lots of options for many of the ingredients. Below are my choices. Check out the original to make your own or just do what I did because I can tell you that these are awesome.

Zucchini Bread Pancakes from Smitten Kitchen:

Makes 10 to 12 pancakes

2 large eggs
3 Tb. olive oil
2 Tb. dark brown
¼ c. buttermilk
½ tsp. vanilla extract
2 c. shredded zucchini (from about 9 ounces whole, or 1 1/2 medium zucchini), heaping cups are fine
½ c. all-purpose flour
½ c. whole wheat flour
¼ tsp. salt
1 tsp. baking soda
1 tsp. ground cinnamon
1/8 tsp. ground nutmeg
Butter or oil, for coating skillet

For the topping (optional) -
1 Tb. maple syrup
3 Tb. plain Greek yogurt
If you’re doing the topping, mix together the maple syrup and yogurt in a small bowl. There. Done.
In a large bowl, combine eggs, olive oil, sugar, buttermilk and vanilla until smooth. Stir in zucchini shreds. In a smaller bowl, whisk together flour, salt, baking soda, cinnamon and nutmeg. Stir dry ingredients into zucchini batter, mixing until just combined.

Preheat oven to 200°F and place a tray on a middle rack. I skipped this step because even though it does ensure that your pancakes are cooked all the way through, it was already hot in my house and I couldn’t stand the idea of putting the oven on.

Heat a large, heavy skillet over medium heat. Once hot, melt a pat of butter in pan and swirl it around until it sizzles. Scoop scant ¼ cup dollops of batter in pan so the puddles do not touch. Cook until bubbles appear on the surface, about 2 to 3 minutes. Flip pancakes and cook another minute or two, until golden underneath. Repeat with remaining batter. Serve warm with maple syrup yogurt topping or butter and maple syrup or however you like your pancakes.
These do taste a lot like zucchini bread and you can almost pretend you’re being healthy. It’s pretty close.

Friday, August 31, 2012

Summer Fruit Galette

Summertime should be easy and so should summer desserts. Galettes are the best thing. Use the fruit you have and adjust the sugar as necessary. Berries will be release more juice, so make sure you fold those edges up nicely and use parchment paper for easy clean up. Below are the fruits I used, but feel free to change it up to anything you like.

Summer Fruit Galette:

Makes 2 8” galettes

1 full recipe galette dough
1 peach, peeled and sliced
2 small plums, sliced
2 apricots, sliced
2 Tb. lemon juice
¼ c. sugar
Citrus sugar for sprinkling

Prep the galette dough, let rest for at least an hour in the fridge, and bring back to room temperature while you prepare the fruit.
Mix the fruit in a medium size bowl. Toss with lemon juice and sugar and let sit at room temperature for about 30 minutes. Meanwhile, heat your oven to 400 degree and roll out your dough. It’s sticky, so you’ll need to add flour to your work surface and rolling pin. Work into about 10” circles and transfer to a parchment paper lined baking sheet.
Take macerated fruit and pile in the middle of each galette circle. Fold over edges to make a crust. Freeform it – galettes are not the time to be super fancy. Sprinkle edges with citrus sugar.
Bake for 30 minutes or until fruit is bubbling and you have a nicely browned crust. Let cool for at least 10 minutes before cutting into it.

Though I do say this is a summer dessert, I won’t tell anyone if you have some for breakfast. Promise.

Wednesday, August 29, 2012

Cherry Pie

Rainier cherries are one of my favorite summer fruits. I really wanted to turn them into a pie, but most recipes require sour cherries. That’s fine for some, but I wanted to use these bad boys, so I scoured my cookbooks and not surprisingly, I found a lot of cherry pie recipes. Thomas Keller’s Ad Hoc at Home (seen previously here and here) was the winner in using sweet cherries. He recommends Bings. I say Rainiers if you can get them. They rock just that much more.

As a side note, I’d like to mention that this is the best my pie crust, excluding the very different galette dough which I have used as pie dough here and here, has ever tasted. My friend Corey mentioned the crust to me specifically after I gave her a big piece for her and her husband to share. I am a big, big fan of this pie and you should be too.

Cherry Pie from Ad Hoc at Home:

Makes 1 double crusted pie

Crust-
2½ c. all-purpose flour plus more for rolling
1¼ tsp. salt
2½ sticks (10 oz.) unsalted butter, cut into ½” pieces and chilled
About 5 Tb. ice water

Filling-
2 Tb. cornstarch
2 Tb. water
7 c. sweet cherries, pitted
¾-1 c. granulated sugar
1 Tb. vanilla extract

1 large egg, beaten
Granulated sugar for sprinkling

Keller may prefer to make his pie doughs by hand, but I’m still a big fan of the food processor method. The instructions reflect my bias. It’s great to get your dough done ahead of time so you only have to worry about the filling/rolling out the dough, depending on if you have help/how fast you can pit cherries.

Combine the flour and salt in the work bowl of a food processor. Add in the butter and pulse a few times until the butter pieces are well incorporated and no larger than a pea. Drizzle ¼ cup of water over the top and pulse a few times until the dough just holds together when pinched.  Add the remaining tablespoon of water if the dough is very dry. Turn out of the food processor and don’t worry if it looks like a big pile of flour. Knead the dough until it is completely smooth and the butter is incorporated. This last part has always been what I have struggled with, but this time I just kneaded it more and didn’t try to add any additional water, which can make the dough tough instead of flaky and delicious.

Divide the dough in about half, with one piece slightly larger than the other. The larger piece will be for the bottom crust. Shape each half into a 1” thick disk, wrap tightly in plastic wrap, and refrigerate for at least 1 hour. As my mom always says, you have to give the gluten time to rest.

Combine the cornstarch and the water in a small bowl, stirring to dissolve the cornstarch into a slurry.

Put 5 cups of cherries in a large bowl and set aside. Put the remaining 2 cups of cherries I a food processor and blend into a puree. Don’t worry if there are some small pieces remaining. Taste the puree to check how sweet it is.

Combine the puree and sugar (¾ cup if the cherries are very sweet, up to 1 cup if they are more tart) in a medium saucepan, bring to a simmer over medium heat, and simmer for about 30 minutes, stirring often to prevent the bottom from burning, until the mixture has reduced to 1¼ to 1½ cups. Reduce the heat to medium-low and, stirring constantly, add the cornstarch slurry.

Bring to a boil, stirring, and cook until the mixture becomes translucent again. Remove from the heat, spoon a little of the puree mixture onto a plate, and let cool slightly, then rub it between your fingertips to feel for any remaining grains of cornstarch. If necessary, cook slightly longer to dissolve the cornstarch. Transfer the filling to a medium bowl and stir in the vanilla extract. Let cool completely.      

If the dough is too hard to roll, let it rest at room temperature for a few minutes or pound it a few times with a rolling pin. Or, in my case, do both. Lightly flour the work surface and the rolling pin. Lightly dust the top of the larger disk of dough with flour and roll it out to a 13-14” round, about 1/8” thick. Roll outward from center, rotating the dough frequently and adding a little flour to the work surface or dough as needed to prevent sticking. Fold the dough in half and transfer to a 9-10” pie plate, gently easing the dough into the corners and up the sides. Roll out the second piece of dough in the same manner, to a 12” round, about 1/8” thick. Place on a parchment lined baking sheet. Refrigerate both doughs for 15 minutes. Again, resting is important.

Position one oven rack in the bottom of the oven and the other in the center and preheat to 400 degrees.

Stir the puree into the whole cherries and pour into the pie shell. At this point, if the top crust is too hard to shape, let it rest at room temperature for a few minutes. Moisten the rim of the pie shell with some of the beaten egg. Cover the filling with the top crust and press the edges together to seal and create a raised edge to the crust. Trim away the excess dough that overhangs the rim. Brush the top crust with the beaten egg and sprinkle with sugar. Using  paring knife, cut a few slits in the top of the pie for steam vents. Put on the bottom rack and bake for 20 minutes.

Lower the heat to 375 degree, move the pie to the center rack, and bake until the crust is golden and the filling is bubbling, 20 to 30 minutes. Transfer the pie to a cooling rack to cool.
According to Keller, the pie is best served 2 to 3 hours after it is baked, but it can be kept at room temperature the day it is baked or wrapped and refrigerated for up to 3 days. To heat, warm in a 325 degree oven for about 15 minutes.
I started eating this about 20 minutes after it came out of the oven. It is a fantastic summer dessert, great with or without vanilla ice cream.


Tuesday, August 28, 2012

Nectarine Plum Cake


I love summer desserts. Fruit in summer is the best thing. Okay, fruit any season is the best thing, but it’s summer now, so let’s focus on that. This week I’m going to post a few summer dessert recipes because a) summer b) I like baking and c) yeah, okay, I promise to blog about something with garlic again soon, even though 4 of my last 7 post have included garlic. Anyway…

Sometimes I get crazy ideas into my head. Like – I really want cake and even though it’s 9 pm, I’m going to bake one. Fortunately this cake is a snap and you won’t be up forever waiting for cake. My grandma used to make me a peach cake every summer when she came to visit my family in Alaska. I didn’t have any peaches, but figured any stone fruit would work. This recipe looked similar to the one she used to make. I had to make some other substitutions because it was 9 pm – like no whole milk (I never have that in the house), different yogurt, and no zest, but including citrus sugar.  Citrus sugar is simply a jar of sugar I have that’s mixed in with the zest of oranges and lemons I have saved. Easy and a fun thing to have on hand. I think my version of this cake was pretty darn good too. Make it any ol’ time. Even late at night.

Nectarine Plum Cake modified from Peach Cake from Cooking From Scratch:

Makes one 9” cake

1½ c. flour
1 c. sugar
1½ tsp. baking powder
A dash salt
¾ c. milk
1 tsp. vanilla
1 egg
1/3 c. honey Greek style yogurt
1/3 c. vegetable oil
2 small-ish nectarines, sliced
2 small plums, sliced
2 Tb. citrus sugar (or regular sugar and include ½ tsp. lemon zest in the cake itself)

Preheat the oven to 350 degrees F. Mix the flour, sugar, and baking powder together in a bowl. In a separate bowl, mix the milk, vanilla, egg, yogurt, oil, and lemon zest (if using) together. Add the wet ingredients to the dry and stir completely. Spray a 9" round pan with oil. Pour the batter into the pan. Place the sliced fruit on the top of the batter. You don't need to press them in; the batter will rise up around them. Sprinkle with citrus sugar. Bake at 350 for 60 minutes or until the cake is nice and golden and a tester comes out clean. Let cool slightly before serving.

It’s not a heavy cake and reminds me a lot of the very best raspberry buttermilk cake, another summer favorite. Perfect with tea or for late night cake cravings. 

Friday, August 24, 2012

(Almost) Perfect Strawberry Jam


Ever have a recipe that doesn’t seem like it’s working out and then it mostly does? This is one of those recipes. By Lucy Baker (of The Boozy Baker that has shown up here and here in the blog), it was cooking strangely and ended up ½ pint short of the yield, causing me to waste a lid. And then it was opened and super delicious and it spreads really well. Yeah. Almost perfect.

(Almost) Perfect Strawberry Jam from Perfect Strawberry Jam via Serious Eats:

Yields 4 ½ pints

1½ c. sugar
2½ tsp. Pomona's Universal Pectin
4 c. coarsely chopped strawberries (from about 2 farm stand quarts)
1 Tb. freshly squeezed lemon juice
3 tsp. calcium water (included in the Pomona's packet)
¼ tsp. unsalted butter
1 c. honey


Whisk the sugar and pectin a medium bowl and set aside.

Combine the strawberries, lemon juice, calcium water, and butter in a large, heavy-bottomed pot and bring to a boil over medium-high heat. Add the honey and the sugar-pectin mixture and return the fruit mixture to a boil, stirring constantly. Boil hard for one minute. This takes a little longer than you might think, hence by comment about cooking strangely.

Remove pot from heat and skim any foam from surface of jam with cold metal spoon. Ladle jam into hot sterilized jars and process them in a hot water bath for 10 minutes.
It’s great with peanut butter or cream cheese or just on a spoon. Other similar pectin berries can replace the strawberries if you want to check this out right now and you can’t find those late season strawberries anywhere.

Saturday, August 18, 2012

Toasted Almond Granola


Okay, so your oven is going to have to go on for a little bit for this one. But then you can eat some delicious granola on cool, cold things like yogurt or almond milk or fro-yo. Worth it. Joy the Baker always hits it out of the park and this granola recipe is no exception. Granola is rad, but can be spendy. Not when you make it yourself! Get to it!

Toasted Almond Granola from Joy the Baker:

Makes 8 cups

4 c. old fashioned oats
1 c. slivered raw almonds
1 c. whole raw almonds
½ c. sweetened shredded coconut
1 tsp.  ground cinnamon
½ tsp. salt
3 Tb. butter
¼ c. vegetable oil
¼ c. honey
½ c. brown sugar
1 tsp. pure vanilla extract

Place a rack in the upper third and middle of the oven and preheat to 325 degrees F.  Line one large or two small baking sheets with parchment paper and set aside.
Whisk together oats, whole almonds, slivered almonds, sweetened coconut cinnamon and salt.  Set aside.

In a medium saucepan, melt together butter, oil, honey and brown sugar until the sugar is dissolved and the mixture begins to boil.  Carefully whisk together so it’s well incorporated.  Add the vanilla extract.  Pour the warm mixture over the oat and almond mixture and toss together with a wooden spoon, ensuring that all of the oat mixture gets moistened by the sugar and oil mixture.
Spread mixture onto prepared baking sheet(s) and bake for about 25 to 30 minutes, removing the oats to stir and toss on the pan twice during baking.  Remove from the oven, let cool and store in an airtight container for up to two weeks.
This is tasty times morning, noon, and night. I also mixed in some raisins, dried cranberries, and M&Ms to make trail mix to take with me when I went to Juneau last month. Perfect anytime weather food, but especially good for hot mornings.

Wednesday, August 15, 2012

Caramelized Onion Hummus


My friend Patrice and her now husband make some pretty tasty things. I’ve featured her loveliness on the blog before and this is another one that I’ve had saved in my reader for forever. Other than cooking the onions, this is a low heat recipe – perfect for the hot days of summer to typical Alaskan days.

Caramelized Onion Hummus from The Fantastic Mr. Feedbag:

 1 large medium onion, chopped
3 Tbsp. olive oil
1 tsp. honey
4 to 5 garlic cloves, halved
1 can of garbanzo beans (rinsed & drained) or around 2½ c. soaked & cooked
2 Tbsp. tahini
1 lemon, juiced
¼ c. of olive oil
2¼ Tb. plain yogurt
Sea salt & pepper to taste
1 Tb. Aleppo pepper for topping

Heat the 3 tablespoons of olive oil in a skillet over medium heat. Add chopped onions and honey stir and cook for 10 minutes. Add garlic and cook for another 10 minutes, stirring often. Remove onion, garlic, honey combo and let cool.
While onion mixture is cooling use a food processor to combine the rest of the ingredients. Add more olive oil or water for a creamier texture.  Add onion, garlic, honey mixture to bean mixture and process until smooth. Let it hang in the fridge for a couple of hours to cool and get even more delicious.

This is the creamiest, best tasting hummus I’ve ever had or made. I recommend it and not just because it came from a loving household.

Tuesday, August 14, 2012

Beet Hummus


I had this whole plan to do some things to eat in hot weather, but you need to have cool weather beforehand to make it. Yes, I had a plan even though I haven't posted since June. But it's all super hot again. If you can stand to put the oven on for a bit, say early in the AM or later in the eve, you can have super tasty treats when it just gets so hot that even looking at the oven is too much.
This beet hummus was one of the very first things I starred in my reader. I'm glad I finally got to it. My version was not as vibrant as the original, but I also ended up using candy cane beets that were in my CSA. Still, this is fun, fairly easy, and perfect with cool slices of carrot and cucumber. And crackers. And pita chips.

Beet Hummus from Simply Recipes:

Makes 2 cups.

½ lb. beets (about 4 medium sized beets), scrubbed clean, cooked, peeled, and cubed
2 Tb. tahini sesame seed paste
5 Tb. lemon juice
1 small clove garlic, chopped (I did more like 3)
1 Tb. ground cumin
1 Tb. lemon zest (zest from approx. 2 lemons)
Generous pinch of sea salt or Kosher salt
Fresh ground pepper to taste

To cook the beets, cut off any tops, scrub the roots clean, put them in a covered dish with about ¼-inch of water in a 375°F oven, and cook until easily penetrated with a knife or fork.

Place all ingredients in a food processor (or blender) and pulse until smooth. Taste and adjust seasonings and ingredients as desired.
Chill and store in the refrigerator for up to 3 days or freeze for longer storage.

This tastes kind of like salsa and hummus got together and made a delicious snack baby.

Saturday, June 16, 2012

Buttermilk Fried Chicken


This one was the first recipe Aaron saw in Ad Hoc at Home that he really, really wanted to try. There are a lot of steps, so make sure you get yourself organized well ahead of time before digging into this one. It is very, very delicious though and Aaron and I were very impressed with the results as were Corey and Brian.  Best part of this? Corey is not much of a fried chicken fan, but enjoyed this meal. If you’ve been disillusioned by fast food fried chicken, I think this will change your mind. I’m listing a quarter recipe of Thomas Keller’s brine below, but because Aaron wasn’t a big fan of it, you can use any brine you normally use with poultry. Do stuff to your taste. I’m also doing a half recipe as that is what we did. I normally list a full one, but I think you all can figure this out. This makes more than enough chicken by itself.

Buttermilk Fried Chicken from Ad Hoc at Home:

Serve 4 to 6

4 lb. chicken

For the brine-
1 lemon, halved
6 bay leaves
¼ bunch flat leaf parsley
¼ bunch thyme
2 Tb. honey
¼ head of garlic
Handful peppercorns
½ c. kosher salt
½ gallon water

For dredging and frying-
Peanut or canola oil
½ qt. buttermilk
Kosher salt and freshly ground black pepper

For the coating-
3 c. flour
2 Tb. garlic powder
2 Tb. onion powder
2 tsp. paprika
2 tsp. cayenne
2 tsp. kosher salt
½ tsp. freshly ground black pepper

Sea salt or kosher salt for garnish

To make the brine, combine all of the ingredients in a large pot, cover, and bring to a boil. Boil for 1 minute, stirring to dissolve the salt. Remove from heat and cool completely, then chill before using. The brine can be refrigerated for up to 3 days.

Cut the chicken into 10 pieces: 2 legs, 2 thighs, 4 breast quarters, and 2 wings. Pour brine into a container large enough to hold the chicken piece, add in the chicken, and refrigerate for 12 hours only.

Remove the chicken from the brine and discard the brine. Rinse the chicken under cold water, removing any herbs or spices sticking to the skin. Pat or let air dry. Let rest at room temperature for 1½ hours, or until it comes to room temperature.
If you have 2 large pots, about 6” deep, and a lot of oil, you can cook the dark meat and the white meat at the same time; if not, cook the dark meat first, then turn up the heat and cook the white meat. Aaron did the latter method. No matter what size pot you have, the oil should not come more than 1/3 the way up the sides of the pot. Fill the pot with at least 2” of oil and heat to 320 degrees. Set a cooling rack over a baking sheet. Have a second baking sheet ready.
Meanwhile, combine all of the coating ingredients in a large bowl. Transfer half the coating to a second large bowl. Pour the buttermilk into a third bowl and season with salt and pepper. Set up a dipping station: the chicken pieces, one bowl coating, the bowl of buttermilk, the second bowl of coating, and the second baking sheet.
Just before frying, dip the chicken thighs into the first bowl of coating, turning to coat and patting off the excess; dip them into the buttermilk, allowing the excess to run back into the bowl; then dip them into the second bowl of coating. Transfer to the baking sheet. Your hands will get messy, but it’s worth it.

Carefully lower thighs into the hot oil. Adjust the heat as necessary to return the oil to the proper temperature. Fry for 2 minutes, then carefully move the chicken pieces around in the oil and continue to fry, monitoring the oil temperature and turning the pieces as necessary for even cooking, 11 to 12 minutes, until the chicken is a deep golden brown, cooked through, and very crisp. Meanwhile, coat the drumsticks, and place on the baking sheet.
Transfer the cooked thighs to the cooking rack skin side up and let rest while you fry the remaining chicken. Putting the pieces skin side up will allow excess fat to drain. Make sure that the oil is at the correct temperature and cook the chicken drumsticks. When the drumsticks are done, lean them meat side up against the thighs to drain, then sprinkle the chicken with sea salt.

Turn up the heat and heat the oil to 340 degrees. Meanwhile, coat the chicken breasts and wings. Carefully lower the chicken breasts into the hot oil and fry for 7 minutes, or until golden brown, cooked through, and crisp (as you will with all the pieces). Transfer to the rack, sprinkle with salt, and turn skin side up. Cook the wings for 6 minutes or until done as before. Transfer the wings to the rack and turn off the heat.

Rest the chicken for 7 to 10 minutes before serving to allow it to all cool down. If it is too cool because of the timing of cooking everything, place in a 400 degree oven for a minute or two so the crust is crispy and the chicken hot.
We served these with biscuits, mashed potatoes, and green beans. If you plan it out, this makes for a great weekend meal. At the very least, it’s worth trying once. 

Saturday, June 09, 2012

Roasted Chicken with Root Vegetables


Not too long ago I managed to get a copy of Thomas Keller’s Ad Hoc at Home for super cheap at Title Wave. Even though the weather has been warm (and then cold and then warm), chicken recipes, especially Thomas Keller’s chicken recipes, make for great weekend dinners. That’s why this Saturday and next Saturday I will be posting two recipes Aaron and I have made recently from Ad Hoc. They are good meals to share with family and friends and I’m excited to master them in the future.

Today is all about roasted chicken. Try to get one as close to the size listed below to match the roasting time. And nothing is better than a good meat thermometer. We like to get many of our meats from New Seasons because they specialize in ethically and locally raised animals. If it is available and affordable to you, why spend the time making a wonderful family meal based around sad, hormone laden chicken?

The root veggie part is great because you can use whatever it is you have available to you. I’m listing below what is in the recipe itself, but I’ll mention here that we used sweet potatoes, Yukon gold potatoes, leeks, an onion, and carrots. Use what you like because it’s your dinner. This is a long process, so make sure you give yourself plenty of time for prep and cooking.

Roasted Chicken with Root Vegetables from Ad Hoc at Home:

One 4-4½ lb. chicken
Kosher salt and freshly ground pepper
6 garlic cloves, smashed and peeled
6 thyme sprigs
2 large leeks
2 tennis ball sized rutabagas
2 tennis ball sized turnips
4 medium carrots, peeled, trimmed, and cut in half
1 small yellow onion, trimmed, leaving root end intact, and cut into quarters
8 small red-skinned potatoes
1/3 c. canola oil
4 Tb. unsalted butter, room temperature

Remove the chicken from the refrigerator and let stand at room temperature for 1½-2 hours, or until it comes to room temperature.

Preheat oven to 475 degrees.

Remove the neck and innards if they are still in the cavity of the chicken. Using a paring knife, cut out the wishbone from the chicken for easier carving later. Generously season the cavity of the chicken with salt and pepper, add 3 of the garlic cloves and 5 sprigs of thyme, and massage (yeah, I know) the inside of the bird to infuse it with the flavors. Truss the chicken.

Cut off the dark green leaves from the top of the leeks. Trim off and discard any darkened outer layers. Trim the root ends, cutting around them on a 45-degree angle. Slit the leeks lengthwise almost in half, starting ½” above the root ends. Rinse the leeks well under warm water.

Cut off both ends of the rutabagas. Stand them on end and cut away the skin, working from the top to the bottom and removing any tough outer layers. Cut into ¾” wedges. Repeat with the turnips, cutting into wedges to match the size of the rutabagas.

Combine all of the vegetables and the remaining garlic cloves and thyme sprig in a large bowl. Toss with ¼ cup of the oil and season with salt and pepper. Spread the vegetables in a large cast iron skillet or a roasting pan.

Rub the remaining oil all over the chicken. Season generously with salt and pepper. Make a nest in the center of the vegetables and nestle the chicken in it. Cut the butter into 4 or 5 pieces and place over the chicken breast. Put the chicken in the oven and roast for 25 minutes. Reduce the heat to 400 and roast for an additional 45 minutes, or until the temperature registers 160 in the meatiest portions of the bird (the thigh and under the breast where the thigh meets the breast) and the juices run clear. If necessary, return the bird to the move for more roasting and check every 5 minutes.


Transfer the chicken to a carving board and let rest for 20 minutes. Just before serving, set the pan of vegetables over medium heat and reheat the vegetables, turning them and glazing them with the pan juice. Cut the chicken into serving pieces, arrange over vegetables and serve.

Obviously not a warm weather dish, but it is perfect when the temperature dips. The taste is incredible and it just feels so homey and warm. Give it a shot when putting your oven on doesn’t sound like the worst idea ever.

Wednesday, June 06, 2012

Pear Apple Crisp


Do you want to do a quick dessert with whatever fruit you have in the house? I recommend a crisp. This one is more of a fall to early spring version, but you can make it spring to summer with strawberries and rhubarb or peaches and cherries. Or really anything that you like and looks amazing. This really is the best way to make a seasonal dessert. Adjust the spices and sugar to your liking.

Pear Apple Crisp modified from The New Moosewood Cookbook:

About 6 servings

4 peeled and sliced tart apples
2 peeled and sliced pears
2-3 Tb. lemon juice
¼ c. sugar
1¼ c. rolled oats
1 c. flour
¼ c. brown sugar
1 tsp. cinnamon
A dash each of allspice and nutmeg
½ tsp. salt
½ c. melted butter

Preheat oven to 375 degrees.

Combine the apples and pears in a 9” square pan. Sprinkle with sugar.


Mix together the remaining ingredients (from rolled oats down) in a medium sized bowl. Distribute over the top of the fruit and pat firmly into place. Bake uncovered for 35 to 40 minutes or until the top is crisp and lightly browned and the fruit is bubbling around the edges. Serve at any temperature from hot to room. Best with ice cream.
 Super easy and you probably have a lot of this stuff already, especially if you like to bake. It packs up nicely for picnics and would be a welcome addition to any potluck. I love crisps and now I’m thinking of doing another one. I do love summer peaches!

Wednesday, May 16, 2012

Sweet Potato and Black Bean Quesadilla with Swiss Chard Pesto


It’s been hot here lately folks. And that’s a mostly nice thing. What it means is that cooking usually doesn’t take long in the kitchen because no one wants to be in there. I love this recipe from Closet Cooking because it used a bunch of my CSA, packs a ton of protein, is mostly good for you, and is ridiculously delicious. The quesadilla recipe itself is for one, but with the amount of everything else you’re making, you can easily double or triple the quesadillas you make. Have some friends over or something. All the modifications were based on what I had available at home/could find at the store.

Sweet Potato and Black Bean Quesadillas with Swiss Chard Pesto slightly modified from Closet Cooking:

Serves 1

Quesadilla-
1 tortilla
½ c. (or less) shredded cheddar cheese
¼ c. chipotle roasted sweet potatoes and chipotle black beans
1 Tb. swiss chard pesto

Chipotle Roasted Sweet Potatoes and Black Beans-
2 large sweet potatoes, scrubbed, dried and cut into ½” cubes
2 Tb. oil, separated
2 Tb. chipotle in adobo sauce, minced and separated
2 tsp. ground cumin, separated
1 small onion, diced
2 clove garlic, chopped
1 (19 ounce) can black beans, drained and rinsed

Swiss Chard Pesto-
1 bunch swiss chard, coarsely chopped
1 handful cilantro, coarsely chopped
1 jalapeño, coarsely chopped
2 cloves garlic
¼ c. pine nuts, toasted
½ c. olive oil
½ lime, juiced
Salt and freshly pepper to taste
To make the sweet potatoes and black beans, toss the sweet potato in 1 tablespoon each of oil and chipotle and 1 teaspoon of cumin, place on a baking sheet in a single layer and roast in a preheated 400F oven until tender, about 30-40 minutes. Do this early in the day if it’s going to be a hot one.

Meanwhile, heat the remaining tablespoon of oil in a small sauce pan over medium heat. Add the onion and sauté until tender, about 3-5 minutes. Add the garlic, remaining chipotle and cumin and sauté until fragrant, about 1 minute. Add the beans and cook until warm, a few minutes. Mix with the sweet potatoes.

To make the pesto, puree all of the ingredients together in a food processor. You can do this a day or two ahead of time. There will be a lot, so try it out on a bunch of stuff.
To assemble the quesadilla, place the tortilla in the pan, sprinkle half of the cheese over half of the tortilla, then top with the chipotle roasted sweet potatoes and chipotle black beans, swiss chard pesto and the remaining cheese. Fold the tortilla in half coving the filling and cook until the quesadilla is golden brown on both sides and the cheese is melted, about 2-4 minutes per side. Serve garnished with more salsa, some sour cream or yogurt and whatever other toppings you like.


Monday, May 14, 2012

Ravioli


Ravioli is super easy to make, especially once you’ve already got the hang of making pasta. You can fill it with anything you like, easily changing a meat based recipe like this one to a vegetarian one. The best part is that this doesn’t take long at all.

Ravioli:
Serves 2 with leftovers
1 recipe egg pasta
½ lb. ground meat (turkey, beef, or some combination of what you like)
¼ c. ricotta
4 garlic cloves, minced
Salt & pepper
Basil
Oregano
1 egg, beaten
Sauce of your choice

Prepare the pasta. Roll it out as you would for long noodles, but leave in sheets. Set aside to dry.


Mix together all other ingredients except egg. Roll into balls and evenly space them across the dried pasta sheets, leaving another sheet to place on top of this one. When all of the meat (or pasta) is used up, brush the beaten egg in the spaces between the filling balls. This acts as a binder for the top sheet. Take the other sheets and press them down on top of the meat filled side. Create pockets for the filling, pressing down firmly to remove as much air as possible from each pocket.

Using a knife or a pastry cutter, cut the pockets into squares. Place the ravioli into a pot of boiling salted water. Like all fresh pasta, these do not take long to cook, 3-4 minutes at the most. Serve warm with any sauce (marinara is always good).

A fast and very tasty way to do a weekday meal. I like that the basic idea lends itself to many different types of ravioli, depending on what you like to use to fill it. 
Related Posts Plugin for WordPress, Blogger...