Showing posts with label garlic. Show all posts

Saturday, October 19, 2013

Heirloom Tomato Tart

Summer might be over, but Portland keeps hanging on to the sun. The leaves are falling off of the trees though and it is definitely fall. Maybe you stashed some tomatoes away in your freezer. Make this and pretend it's still August.

Heirloom Tomato Tart via Joy the Baker:

Makes 1 9 by 9 tart

For the sun dried tomato pesto sauce -
1 8 oz. jar sun dried tomatoes, some of the oil reserved
2 cloves garlic, peeled
1 small red chili, seeds remove and coarsely chopped
Big pinch of granulated sugar
1 scant tsp. salt
3-4 Tb. olive oil from the sun dried tomato jar
For the Tart-
1 9×9-inch sheet all-butter puff pastry, thawed but still cold
Small handful fresh basil leaves
4 oz. goat cheese
3 small heirloom tomatoes, sliced about ¼-inch thick and drained on paper towels
Handful of cherry tomatoes, sliced in half and seeds removed
1 Tb. fresh thyme leaves
Olive oil
To make the sun dried tomato pesto sauce, combine sun dried tomatoes, garlic cloves, chopped
chili, sugar, salt, and oil in the bowl of a food processor. Blend until combined, but still slightly
coarse. The mixture does not need to be completely smooth. Taste and season as needed. You'll get some extra. It's fantastic on other things, like toasted bread.

Place a rack in the upper third of the oven and preheat oven to 400 degrees F. Line a baking
sheet with parchment paper and set aside.
Unfold a chilled sheet of puff pastry. Roll lightly with a rolling pin just to flatten completely. Place on the prepared baking sheet and spread about half of the pesto sauce over the puff
pastry, leaving about a ½-inch border around the edges. Coarsely tear basil leaves over the
sauce. Crumble goat cheese over the sauce. Arrange heirloom tomatoes in a single layer over
the goat cheese and press down slightly. Try to cover as much of the sauce as possible as it can
burn in the oven if exposed. Add a few cherry tomato halves. Sprinkle generously with fresh
thyme and drizzle with olive oil.
Bake for 15 to 18 minutes until puffed and golden brown. Remove from the oven and allow to rest
for at lease 10 minutes before serving.


It's kind of like pizza, but so much fancier. Close your eyes and dream of summer.

Sunday, August 11, 2013

40 Cloves Chicken

It's a cloudy day here in Portland. This is the perfect recipe for a day like today. It is amazingly easy and even more delicious. It's a fantastic one to share. Make sure you have a loaf of crusty bread with this. You'll need it for dunking in the oil.

40 Cloves Chicken via Good Eats:

Serves 6

1 3-to-4 lb. broiler/fryer chicken, cut into 8 pieces
Kosher salt, to taste
Freshly ground black pepper
2 Tb. plus ½ c. olive oil (not extra-virgin)
5 sprigs fresh thyme
40 cloves garlic, peeled.

Heat the oven to 350 degrees.

Season the chicken all over with salt and pepper. Coat the chicken pieces on all sides with 2 tablespoons of oil.


In a 12-inch straight-sided oven-safe saute pan over high heat, cook the chicken for 5 to 7 minutes per side, until nicely browned. Remove the pan from the heat; add the remaining ½ cup of oil, the thyme, and garlic cloves. Cover and bake for 1½ hours.

Remove the pan from the oven and set aside for 15 minutes with the lid on. Serve family style.


We've done this one several times. It's nice picking up a already cut up chicken, tossing it in the freezer, and then defrosting it just for a day like today. Perfect Sunday supper. Or midweek. Peeling all that garlic can be a pain, but it is so worth it. The garlic becomes so soft and spreadable, you'll have extra from sandwiches and bread for a couple of days. Just give it a shot. You'll love it.

Saturday, August 10, 2013

Baked Ranchero Eggs with Blistered Jack Cheese and Lime Crema

I am the worst at blogging. This is an example. I meant to post this, after meaning to post it forever ago before that, almost a month ago. And these are really bad cell phone pictures, which aren't usually really bad, but these ones are. Believe me when I say this tastes a lot better than it looks here.

Baked Ranchero Eggs with Blistered Jack Cheese and Lime Crema via The Smitten Kitchen Cookbook:

Serves 4-6

1 jalapeno
3 c. whole tomatoes (from a 28 oz. can), fire roasted if possible
1 medium white onion, roughly chopped
1 large garlic clove, crushed and peeled
Salt and freshly ground pepper, to taste
1¾ c. cooked black beans (or from a 15 oz. can), drained (optional)

2 Tb. olive oil
4 small (6 inch) corn tortillas
Salt, to taste

12 large eggs
1¼ c. coarsely shredded jack cheese

2 Tb. freshly squeezed lime juice, from about 1 lime
1 c. crema mexicana or sour cream
¼ c. chopped fresh cilantro

Halved in 9 inch skillet or quartered and baked in 1-quart gratin dish

Make ranchero sauce first. Preheat oven to 450 degrees. First, taste your jalapeno for heat. Adjust the amount accordingly, halving or quartering the pepper, if needed, and toss into a blender. I like it spicy, so I just went for the whole thing. Add the tomatoes, onion, garlic, and several pinches of salt and pepper, and blend until smooth. Pout into a 12-inch ovenproof skillet, add black beans, if using them, and bring to a simmer. Cook for 10 minutes, or until it has reduced slightly.
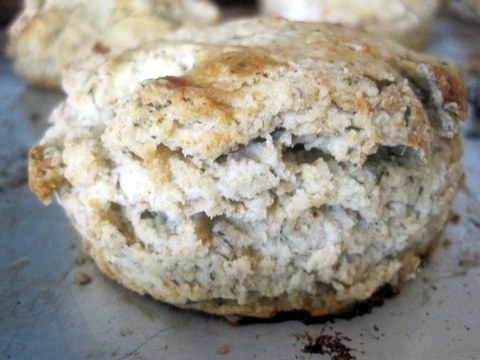
Meanwhile, brush a baking sheet with 1 tablespoon of the olive oil. Cut the tortillas into ½-inch-wide strips, and arrange them on the oiled tray. Brush the tops of the tortilla strips with the remaining tablespoon of oil, and sprinkle with salt. Bake for 3 to 6 minutes, or until they are brown and crisp. Mine are a little thicker, so it needed to bake a little longer, more like 10 minutes. Turn them over once if needed. Remove the strips from the oven, then preheat broiler.

In a separate bowl, stir together the lime juice, crema, and a pinch of salt.
Once the sauce has thickened slightly, remove the pan from heat, and break the eggs across the surface of the sauce, distributing them as evenly as possible. Return to heat, cover the pan, and simmer the eggs gently in the sauce for about 10 to 12 minutes, until the whites are nearly but not completely opaque. Sprinkle the surface of the tomato-egg mixture with cheese, and broil until the cheese is bubbly and a bit blistered, just a few minutes.
Garnish with dollops of lime crema, broken-up pieces of tortilla strips, and cilantro. Serve immediately.
I ended up overcooking the eggs a bit while trying to get the whites to set. It still tasted really good, but without that unctuous yolky flavor and mouthfeel. I would definitely make this again. The sauce is awesome and it makes enough for using on another dish later on.


Tuesday, May 14, 2013

Kale Caesar Salad with Grilled Goat Cheese


Kale is everywhere. It's hearty. It's good for you. I seem to get it in my CSA every week. I do love kale, but sometimes it starts to be a little much. You need to do something different with it. Hence taking a caesar dressing and using raw kale leaves. And since I was by myself, I got to put a bunch of goat cheese on it. Though I mentioned in the tapenade recipe about using Thai fish sauce as a replacement for anchovies, I learned it first when making this. I made it for one as an entree, but it could easily work for two as a salad course.

Kale Caesar Salad with Grilled Goat Cheese:
(Caesar Dressing modified via 1,000 Mexican Recipes)

Serves 1

Dressing-
½ c. olive oil
2 Tb. red wine vinegar
1 Tb. lemon juice
2 Tb. Thai fish sauce
2 large cloves garlic, chopped
1 tsp. Dijon mustard
¼ c. freshly grated Parmesan cheese
½ tsp. freshly ground pepper, or to taste

2 slices hearty Italian bread (like ciabatta), cut into chunks
2 Tb. olive oil
2 tsp. dried herbs (oregano, basil)
Freshly cracked black pepper, to taste

Large handful torn kale leaves
3 oz. chevre, divided
1 egg, beaten
¼ c. panko
Olive oil

Make the croutons first. Heat oven to 375 degrees. Toss bread cubes in olive oil, herbs, and pepper. Place on a baking sheet and bake until golden brown, 10-15 minutes.

Make the dressing by placing the oil, vinegar, lemon juice, Thai fish sauce, garlic, and mustard in a food processor. Pulse until thoroughly combined. Add the Parmesan and black pepper. Blend until creamy and smooth. This make enough for a few salads, but I love caesar dressing so much I needed to make it all. It keeps well for up to 3 days, so just go for it.
Cut the chevre into 1 ounce chunks. Place chunks in egg to coat, then roll them in the panko. Heat a pan over medium heat until oil is shimmering. Add the coated goat cheese and cook until bottom side is golden brown, about 2 minutes. Turn over and cook until golden, about 1 minute more. Remove from heat.
Dress kale, toss throughly, and top with goat cheese and croutons.

Tangy, crunchy goat cheese and earthy kale are a fantastic combo, especially with the zip from the caesar dressing. I might be able to eat this every week.


Tuesday, April 30, 2013

30 Before 30: Grissini (#32)


Just one more. I made these the day of my birthday and they are so easy. I may have oversalted mine a tad, so be careful when Keller says to put the salt in a small part of the work area. Despite a little too much salt, they are amazing. So so amazing. I preferred the short ones to the long ones, but deciding which is best is part of the tasty fun.

Grissini via Ad Hoc at Home:

Makes 24 small or 12 large grissini

½ c. warm water (110 to 115 degrees)
1 Tb. active dry yeast
1½ c. all-purpose flour, plus additional as needed
1/3 c. fine semolina flour
¼ c. freshly grated Parmigiano-Reggiano
1 tsp. ground fleur de sel or fine sea salt
2 Tb. olive oil, plus additional for brushing
Coarsely ground black pepper
Combine the water and yeast in a small bowl. Let stand for 10 minutes, then stir until the yeast is completely dissolved.

Combine the flours, cheese, and salt in a large bowl. Make a well in the center of the dry ingredients. Stir the oil into the yeast mixture, then pour into the well and mix together with a fork. Once the dough comes together, transfer to a lightly floured board and knead, adding a dusting of all-purpose flour as necessary. You may end up using up to an additional ¼ cup, until a smooth dough forms. Shape the dough into a ball and roll on the board to coat very lightly with flour.

Transfer the dough to a medium bowl, cover with a damp towel, and let rest in a warm place for about 15 minutes, or until it has risen slightly. Position the oven racks in the lower and upper thirds of the oven and preheat the oven to 400 degrees. Line two baking sheets with parchment paper.
Turn the dough out onto the floured work surface and, using a dough scraper or sharp knife, cut the dough in half. Cut one half into 12 pieces for short grissini or 6 pieces for long grissini. Roll each piece into a rope 9 inches long for short grissini or about 15 inches long for long grissini. You can leave them round or twist or flatten them, or a combination of the two. The thinner or flatter they are, the crispier the result; thicker grissini may be doughier, if that is your preference. Transfer to one of the parchment-lined baking sheets as you form them.
Coarsely grind a light dusting of pepper onto a section of the work surface; it is easier to control the amount of pepper that will be rolled onto the grissini by keeping the are small. Alternately, omit the pepper and sprinkle the grissini with fleur de sel or seeds. I did both pepper and salt. Lightly brush the grissini with olive oil. I used the garlic oil I had made the day before. One at a time, roll in the pepper and return to the parchment; grind additional pepper as needed. Repeat with the remaining dough. The grissini can be held for up to an hour on the baking sheets in a cool spot. Or, to hold them longer, cover the parchment paper, wrap the baking sheets in plastic wrap, and refrigerate for up to 6 hours.
Bake the grissini, switching the position of the pans and rotating them halfway through baking, until golden and crisp, 16 to 18 minutes. Cool on the pans on a rack. Store in an airtight container for up to 1 week.

30 Before 30 was hard work and so much fun. It was difficult digging through my fridge and cookbooks and matching things up and I loved the challenge.

Now back to our regularly scheduled irregular blogging.

Recipes Complete: 32
Recipes to Go: -2

Monday, April 29, 2013

30 Before 30: Sweet Onion Tapenade (#30)


What's faster than tapenade? This is just a little slower because of the onions, but it is very bold and perfect with cheese and wine and pickles.

I also used a tablespoon and a half of Thai fish sauce instead of the anchovy. Why? It's made from the first pressing of anchovies. Easier and always on hand.

Sweet Onion Tapenade via Ad Hoc at Home:

Makes about 1½ cups

3 Tb. canola oil
2 c. chopped red onions
1 salt-packed or oil-packed anchovy
¼ c. whole milk
1 c. pitted Kalamata olive, rinsed and drained
1 tsp. capers, rinsed and drained
1 medium garlic clove
¼ c. plus 2 Tb. extra virgin olive oil
Heat the canola oil in a large frying pan over medium heat. Add the onions, reduce the heat to medium-low, and cook slowly, adjusting the heat as necessary to keep the onions from coloring, for about 30 minutes, until very soft. Transfer to a food processor.

Meanwhile, soak the anchovy in the milk for 30 minutes. Drain and rinse under cold water.

Add the anchovy, olives, capers, garlic, and olive oil to the food processor and blend, scraping down the sides as necessary and blend, scraping down the sides as necessary, to a coarse puree.
Refrigerate in a covered container for up to 1 week.

Recipes Complete: 30
Recipes to Go: 0

You'd think that's it, but it was my 30th birthday. So there are actually 2 more. I love to overdo it.

30 Before 30: Garlic Confit and Oil (#26)


For my 30th birthday, I decided to have a wine and cheese party. Wine and cheese needs friends – like dips, pickles, fun sides. Everything ended up coming from Ad Hoc at Home. I've been drooling over the lifesavers section ever since I got it and these were quite the party additions. It was a great birthday and this is a great start to the end.

Garlic Confit and Oil via Ad Hoc at Home:

1 c. peeled garlic cloves
About 2 c. canola oil
Cut off and discard the root ends of the garlic cloves. Put the cloves in a small saucepan and add enough oil to cover them by about 1 inch. None of the garlic cloves should be poking through the oil.

Set the saucepan over medium-low heat. The garlic should cook gently: very small bubbles will come up through the oil, but the bubbles should not break the surface; adjust the heat as necessary and/or move the pan to one side of the burner if it is cooking too quickly. Cook the garlic for about 40 minutes, stirring every 5 minutes or so, until the cloves are completely tender when pierced with the tip of a knife. Remove the saucepan from the heat and allow the garlic to cool in the oil.

Refrigerate the garlic in a covered container, submerged in the oil, for up to 1 week.

The gloves are amazing mushed on baguette and the oil is great to cook with and use for brushing on breads.

Recipes Complete: 26
Recipes to Go: 4

Thursday, April 25, 2013

30 Before 30: Pretty Beets and Carrots (#21)


Beets are wearing me out. I love them, but I've gotten so many through my CSA, I'm not sure how many more I can eat. Fortunately I found another recipe to deal with them and it is pretty darn delicious. It works in the place of slaw as well as salad, so feel free to throw it on a sandwich. Just drain it a bit first or you may end up with purple hands. I skipped the lettuce and the arrangement and just mixed it all together.

Pretty Beets and Carrots via Moosewood Restaurant New Classics:

Serves 4

1 large red beet, peeled
1 large carrot, peeled
1 walnut-sized piece of fresh ginger root
2 Tb. vegetable oil
3 Tb. cider vinegar
1 garlic clove, minced
Salt and ground black pepper to taste
¼ c. minced scallions
6 green or red lettuce leaves (optional)

Coarsely grate the beet and then the carrot to yield about 1½ cups of each. Place in separate bowls and set aside.

Grate the ginger finely and combine it with the oil, vinegar, and garlic. Toss the beets in half the dressing and add salt and pepper to taste. Mix together the scallions, carrots, and the remaining dressing. Add salt and pepper, if you like.

Arrange the lettuce on a platter, mound the carrot mixture in the center, and spoon the beets around it. Or just mix it all up. Depends on how you want to present it, really.
Serve chilled or at room temperature.

I love the faux pickled flavor of this dish and how quickly you can create it, especially if you have a grater attachment for a food processor.

Recipes Complete: 21
Recipes to Go: 9

Wednesday, April 24, 2013

30 Before 30: Celery Root with Melted Onions (#19)


One thing that has been great about this challenge is using my cookbooks to help me out with some of the seemingly random contents of my CSA. Celery root, or celeriac, is something I know about (thanks Chopped), but have never used. Now that I've made this, I'm totally down with it. This would be a perfect addition to any fall or winter meal, especially around the holidays.

Celery Root with Melted Onions via Ad Hoc at Home:

Serves 6

4 large celery root (about 4 lb. Total)
8 Tb. unsalted butter, cut into 8 pieces
1 Tb. thyme leaves\
4 cloves garlic crushed, skin left on
½ c. chicken or veggie stock, plus more if needed

Cut off the top and bottom of each celery root. Stand each one up on a cut side and cut off the skin in strips, from top to bottom, working around the celery root. Quarter each one lengthwise and then, with a Japanese mandoline or knife (or food processor with a slicing attachment, like I did), cut crosswise into thin slices.
Heat two large saute pans over high heat until hot. Add 2 tablespoons of the butter to each pan, the pull the pans off the heat and let butter brown. Add one-quarter of the celery root to each and cook over medium heat for 1 minute, without stirring. Add one-quarter of the thyme and 1 garlic clove to each pan and cook, stirring from time to time, until the celery root is tender throughout, 9 to 10 minutes total cooking time. Season to taste with salt and pepper. Drain the celery root on paper towels. Pour off any excess fat from the pans (and remove any thyme); discard the garlic cloves. Repeat with the remaining celery root.
Add the melted onions to one of the pans and cook to give them a little color, about 3 minutes. Drain the onions to remove the excess fat, and return them to the pan. Add the celery root, stir to combine, and season with salt and pepper as needed. Increase the heat to high and swirl in ½ cup stock. Bring to a simmer, adding additional stock or water if needed to create a creamy dish. Transfer to a serving bowl.

Celery root tastes like a cross between super intense celery and a potato. I really enjoyed this dish, especially paired with Aaron's pork chops.

Recipes Complete: 19
Recipes to Go: 11

30 Before 30: Melted Onions (#18)


Thomas Keller really emphasizes the importance of basics and this importance really can't be overstated. These melted onions were an essential component of the next post and because of that I decided to give them their own post. These work well for sandwiches, added into sauces or salads, or as something to snack on while you're working on the rest of the meal (hmm, what?, who does that?).

Melted Onions via Ad Hoc at Home:

Makes 2 cups

8 c. sliced onions (about 3 large onions)
Kosher salt
8 Tb. unsalted butter, cut into 8 pieces
1 sachet (1 bay leaf, 3 thyme leaves, 10 black peppercorns, 1 garlic clove, smashed and peeled)

Lay out a 7-inch square of cheesecloth. Put the bay leaf, thyme, peppercorns, and garlic near the bottom of the square and fold the bottom edge up and over them. Roll once, tuck in the two ends of the cheesecloth, and continue to roll. Tie the cheesecloth at both ends with kitchen twine.

Put the onions in a large saute pan, set over medium-low heat, sprinkle with 2 generous pinches of salt, and cook, stirring from time to time, for about 20 minutes, until the onions have released much of their liquid.
Stir in the butter, add the sachet, cover, and cook slowly over low to medium-low heat for another 30 to 35 minutes. The onions should look creamy at all times; if the butter separates, or the pan looks dry before the onions are done, add a bit of cold water and stir well to re-emulsify the butter. The onions should be meltingly tender but not falling apart or mushy. Season to taste with salt.

Once cooled, the onions can be refrigerated for up to 3 days.

These would be perfect with day after Thanksgiving sandwiches and they are so wonderful with an interesting side dish as you'll see in the next post.

Recipes Complete: 18
Recipes to Go: 12

Tuesday, April 23, 2013

30 Before 30: Garlic-Rye Biscuits (#15)


What goes best with corned beef? Rye bread. Here's another instance of changing a bunch of stuff. I have rye flour on hand, not dark rye. I didn't have dried onion flakes, but dried garlic stepped in. Because of that, I used garlic powder instead of onion powder. So onion-rye biscuits became garlic-rye biscuits and were delicious. Plus more biscuits this month!

Garlic-Rye Biscuits modified from Onion-Rye Biscuits via King Arthur Whole Grain Baking:

Makes 12-14 biscuits

2 c. rye flour
1 c. unbleached bread flour
1 Tb. dried garlic flakes
2 tsp. garlic powder
2½ tsp. baking powder
½ tsp. baking soda
¾ tsp. salt
½ c. cold unsalted butter
1 large egg
¾ c. buttermilk, plus more for brushing
2 Tb. dill pickle juice
1 Tb. dried dill

Preheat the oven to 400 degrees. Lightly grease a baking sheet or line it with parchment paper.
Whisk together the flours, baking powder, baking soda, and salt in a large mixing bowl. With a fork, two knives, a pastry cutter, or a food processor, cut in the butter until the mixture resembles coarse crumbs.

Whisk together the egg, buttermilk, and pickle juice in a small bowl or a large measuring cup. Add, all at once, to the flour mixture, and blend lightly and quickly with a fork until the mixture is evenly moistened. Add dill.

Turn the dough out onto a floured work surface, and using a bench knife or a dough scraper, fold the dough over on itself three or four times until it comes together.
Pat the dough out or roll very lightly with a rolling pin (just pat it out) until it's ¾-inch thick. Cut the dough into squares or rounds with a biscuit cutter and transfer the biscuits to the prepared baking sheet. Stack the scraps on top of each other, fold them as you did for the original dough, and pat out and cut again. Brush the tops with more buttermilk.
Bake until the tops are golden brown, 20 to 22 minutes. Remove from the oven and serve warm, or cool on a rack.

These are a perfect match for corned beef and were great with the pasta salad as well.

Recipes Complete: 15
Recipes to Go: 15

Monday, April 22, 2013

30 Before 30: Bow Tie Salad with Sun-Dried Tomatoes (#14)


Aaron made more of his amazing corned beef and I decided to make a whole lunch out of it. When thinking deli food, deli cookbooks are the way to go. This is an easy recipe to go with any fabulous lunch.

Bow Tie Salad with Sun-Dried Tomatoes via The 2nd Ave. Deli Cookbook:

Serves 6

1 lb. bow tie noodles
1½ c. sun-dried tomatoes, chopped into ½” pieces
¼ c. very finely chopped red onion
2 Tb. finely chopped scallions
½ c. extra virgin olive oil
1½ Tb. red wine vinegar
1½ Tb. balsamic vinegar
1 Tb. fresh squeezed lemon juice
1 tsp. very finely chopped garlic
3 Tb. very finely chopped parsley
1½ tsp. sugar
½ tsp. paprika
1 tsp. salt
¼ tsp. freshly ground pepper

Cook bow tie noodles, rinse in cold water, and drain. Set aside.

Place all ingredients in a large bowl, and toss thoroughly. Serve chilled.

Fast. Easy. Tasty.

Recipes Complete: 14
Recipes to Go: 16

Friday, April 19, 2013

30 Before 30: Sauteed Carrots with Vinegar and Oregano (Carote in Scapece) (#13)


When making the rigatoni, I realized how much we needed a vegetable with dinner. I'm loving this challenge for forcing me to do different things with vegetables. Carrots are not something I thought about when looking for Italian dishes, but this was a homerun.

Sauteed Carrots with Vinegar and Oregano (Carote In Scapece) via Marcella's Italian Kitchen:

For 4 to 6 persons

2 lb. carrots
3 Tb. extra virgin olive oil
3 or 4 garlic cloves, peeled and cut in half
½ c. wine vinegar
½ tsp. granulated sugar
1 tsp. oregano
¼ tsp. chopped hot red pepper
Salt

Peel and wash the carrots and slice them into rounds ¼-inch thick. Bring a pot of water to a boil and drop in the carrots. Cook them just until they are slightly tender but still crunchy, not fully cooked. Drain and set aside.

Choose a skillet large enough to accommodate the carrots later, put in the oil and the garlic, and turn on the heat to medium high. When the garlic becomes colored a light nut brown, remove it, put in the carrots, and turn up the heat to high. Cook the carrots for a minute or two, stirring them frequently.
Add the vinegar, sugar, oregano, hot pepper, and salt. Continue cooking, stirring from time to time, until all the liquid has evaporated. Transfer the carrots to a serving platter and serve either lukewarm or at room temperature.

Absolutely a new favorite.

Recipes Complete: 13
Recipes to Go: 17

30 Before 30: Bruschetta al Pomodoro (#12)


Okay, so real bruschetta is best grilled, but your broiler is a good substitute. And sun-dried tomatoes can work for fresh. That makes this super fast and perfect with pasta.

Bruschetta al Pomodoro via Marcella's Italian Kitchen:

Serves up to 6

4 fresh, ripe, firm plum tomatoes
4 large or 6 small fresh basil leaves, or a few pinches of oregano
Six ½-inch-thick slices good, crusty country-style bread
A hot charcoal grill
3 or 4 garlic cloves, peeled and mashed
Salt
Black pepper in a grinder
3 Tb. extra virgin olive oil

Wash the tomatoes, split them in half lengthwise, pick out as many seeds as possible with the tip of a paring knife, and dice the tomatoes into ¾-inch cubes.

Wash the basil leaves, shake them thoroughly dry, and tear them by hand into tiny pieces. For more pungent flavor, a few pinches of oregano can be substituted for the basil.

Grilled the bread on both sides (or stick it under the broiler briefly, toasting both sides). While still hot, rub one side of each slices with the mashed garlic. Spread over it the tomatoes and basil or oregano, sprinkle with salt and a grinding of pepper, and top with a sprinkle of olive oil. Serve at once.

It's amazing how wonderfully the garlic melts onto the bread. This is a fantastic appetizer and easily adapted to what you have in the fridge.

Recipes Complete: 12
Recipes to Go: 18 

Wednesday, April 17, 2013

30 Before 30: Mustard and Bourbon-Glazed Pot Roast (#7)


If you want to talk about adventures in cooking, making a pot roast was, for me, a great adventure. I've never really cooked beef before, especially a big hunk like that. Give me some fish or chicken or most seafood and I've got it. Ground meats? Okay. But a big piece of chuck? That was a totally new one on me. Aaron went through his Great Meat Cookbook (greatest birthday present ever? It's in the running at least) and when he found this one, he told me I was making it during my challenge month. And you know what? It turned out just fine.

Of course it was extra confusing for my first big meat adventure because you need to use the cooking instructions from a different recipe if you're not grilling. The directions below are for braising in the oven. Fortunately it sounded much more complicated than it ended up being. Give it a shot. If I can do it, you can too.

Mustard and Bourbon-Glazed Pot Roast via The Great Meat Cookbook:

Serves 6 with leftovers

Mustard-Spice Rub-
2 tsp. chopped fresh thyme
2 tsp. chopped fresh rosemary
1 tsp. dry mustard powder
2 tsp. paprika or California chile powder
2 tsp. freshly ground black pepper
2 tsp. salt

Mustard Glaze-
¼ c. Dijon mustard
2 tsp. chopped fresh rosemary

1 4 lb. boneless chuck-eye roast, tied, or 4 lb. Flat-cut brisket
½ c. homemade beef stock, canned low-sodium chicken broth, or water, plus more if needed
½ c. bourbon
2 tsp. unsulfured molasses
1 Tb. Coarse-grain mustard
2 large onions, halved and thinly sliced, about 4 c.
4 garlic cloves, peeled
Salt and freshly ground black pepper

To make the rub, combine all the ingredients in a small bowl. If using brisket, to keep its flat shape and ensure that it does not break apart during cooking, tie several loops of butcher's twine around the diameter and length of the roast. Sprinkle the rub generously over both sides of the roast. If time allows, wrap the roast in plastic wrap and refrigerate overnight.

Preheat the oven to 325 degrees.
In a cast iron skillet, sear the roast over medium high heat until nicely browned, 3 to 5 minutes per side. Transfer the roast to a large Dutch oven. Whisk together stock, bourbon, molasses, and mustard in a small bowl and pour over the meat. Scatter the onions and garlic on top. Cover, place in oven, and cook for 1 hour.

Turn over the roast so that the onions are now on the bottom, and add more stock or water if needed. Continue to cook, uncovered, for 1 hour, checking every 20 to 30 minutes to make sure there is still liquid in the pot and to stir the onions so that they brown evenly; add more stock or water if needed.

Replace the lid on the pot and cook for 1 hour more if using chuck, 1½ to 2 hours if using brisket, or until the meat is tender; check every 30 minutes. For best results, let cool, then remove the meat, wrap in plastic wrap, and refrigerate overnight; refrigerate sauce separately. I did the initial refrigeration, but not this one.

If not refrigerating, remove the meat from the cooking liquid. Scrape any onions adhering to the meat into the cooking liquid. Remove the twine and pat the meat dry. Discard the fat from the cooking liquid.

Make the glaze by combining ¼ cup of the cooking liquid and onions, the mustard, and rosemary in a food processor or a blender and puree. Brush some glaze over one side of the meat and place glaze side down in a pan heated over medium heat. Brush the top of the roast with more glaze. When the glaze turns brown, turn over the meat and brown the other side.

Meanwhile, reheat the cooking liquid (if need be. Mine was still hot) and season to taste with salt and pepper. Remove the twine if necessary, slice the meat into ½-inch-thick slices, ladle over the cooking liquid, and serve.

This was pretty good for my first attempt. I did overcook the meat a little, but that was also because we did a half size roast and it could have used maybe 30 minutes less braising time. However, the sauce was amazing and if I had done the second refrigeration, this would be a very easy midweek meal.

Recipes Complete: 7
Recipes to Go: 23

Tuesday, March 12, 2013

Potato Tacos with Avocado and Tomatillo Salsa

Apparently I like tomatillos and recipes that are really easy. Want something mid-week and fast and maybe a little different? Try this. Make mashed potatoes. Fry it up in some tortillas. Make some salsa. Bam bam bam – dinner.

Potato Tacos with Avocado and Tomatillo Salsa via Serious Eats:

Serves 4 (or 2 mega hungry people)

2 avocados
4 medium tomatillos, husked, rinsed, and quartered
1 large garlic clove, quartered
1 jalapeno, stemmed, seeded, and chopped
½ c. cilantro leaves, chopped
½ tsp. salt
1 lb. Yukon Gold potatoes, peeled, chopped into ½-inch pieces
4 oz. queso fresco, divided, crumbled
Salt and black pepper
12 corn tortillas
¼ c. vegetable oil
½ c. Mexican crema, or sour cream
1½ c. iceberg lettuce, shredded (or better lettuce because yeah)

For the avocado salsa, cut avocados in half lengthwise, and remove large seeds. Scoop out flesh and place in blender along with tomatillos, garlic, chiles, cilantro, ¼ cup water, and salt. Process until it is a coarse puree. Set aside. The avocado sauce won’t turn brown because of the tomatillos. You can also eat a bunch of it while you're working on other stuff.

To make the potato tacos, bring large pot of water to boil over high heat. Add potatoes and cook until tender, about 10 minutes. Drain in a colander. Mash the potato in large bowl, or pass through potato ricer. Mix in half of the queso fresco. Season mixture with salt and pepper to taste.
Spoon two tablespoons of potato mixture into each tortilla. Fold each over, and secure each with one tooth pick, weaving in and out to keep each in a “U” shape.
Pour oil into large 10-inch cast iron pan set over medium-high heat. When oil is shimmering, add enough tacos as will fit in a single layer, probably three. Cook until crisp and golden on each side, about 30 seconds for each, flipping with pair of tongs. When done, remove tacos, draining as much oil as you can. Place on paper towels and repeat process until all tacos are cooked.
Serve tacos with salsa, crema, and lettuce.

So good. So fast. Did I mention how good they are?
Related Posts Plugin for WordPress, Blogger...