Showing posts with label bread. Show all posts

Tuesday, April 30, 2013

30 Before 30: Grissini (#32)


Just one more. I made these the day of my birthday and they are so easy. I may have oversalted mine a tad, so be careful when Keller says to put the salt in a small part of the work area. Despite a little too much salt, they are amazing. So so amazing. I preferred the short ones to the long ones, but deciding which is best is part of the tasty fun.

Grissini via Ad Hoc at Home:

Makes 24 small or 12 large grissini

½ c. warm water (110 to 115 degrees)
1 Tb. active dry yeast
1½ c. all-purpose flour, plus additional as needed
1/3 c. fine semolina flour
¼ c. freshly grated Parmigiano-Reggiano
1 tsp. ground fleur de sel or fine sea salt
2 Tb. olive oil, plus additional for brushing
Coarsely ground black pepper
Combine the water and yeast in a small bowl. Let stand for 10 minutes, then stir until the yeast is completely dissolved.

Combine the flours, cheese, and salt in a large bowl. Make a well in the center of the dry ingredients. Stir the oil into the yeast mixture, then pour into the well and mix together with a fork. Once the dough comes together, transfer to a lightly floured board and knead, adding a dusting of all-purpose flour as necessary. You may end up using up to an additional ¼ cup, until a smooth dough forms. Shape the dough into a ball and roll on the board to coat very lightly with flour.

Transfer the dough to a medium bowl, cover with a damp towel, and let rest in a warm place for about 15 minutes, or until it has risen slightly. Position the oven racks in the lower and upper thirds of the oven and preheat the oven to 400 degrees. Line two baking sheets with parchment paper.
Turn the dough out onto the floured work surface and, using a dough scraper or sharp knife, cut the dough in half. Cut one half into 12 pieces for short grissini or 6 pieces for long grissini. Roll each piece into a rope 9 inches long for short grissini or about 15 inches long for long grissini. You can leave them round or twist or flatten them, or a combination of the two. The thinner or flatter they are, the crispier the result; thicker grissini may be doughier, if that is your preference. Transfer to one of the parchment-lined baking sheets as you form them.
Coarsely grind a light dusting of pepper onto a section of the work surface; it is easier to control the amount of pepper that will be rolled onto the grissini by keeping the are small. Alternately, omit the pepper and sprinkle the grissini with fleur de sel or seeds. I did both pepper and salt. Lightly brush the grissini with olive oil. I used the garlic oil I had made the day before. One at a time, roll in the pepper and return to the parchment; grind additional pepper as needed. Repeat with the remaining dough. The grissini can be held for up to an hour on the baking sheets in a cool spot. Or, to hold them longer, cover the parchment paper, wrap the baking sheets in plastic wrap, and refrigerate for up to 6 hours.
Bake the grissini, switching the position of the pans and rotating them halfway through baking, until golden and crisp, 16 to 18 minutes. Cool on the pans on a rack. Store in an airtight container for up to 1 week.

30 Before 30 was hard work and so much fun. It was difficult digging through my fridge and cookbooks and matching things up and I loved the challenge.

Now back to our regularly scheduled irregular blogging.

Recipes Complete: 32
Recipes to Go: -2

Wednesday, April 24, 2013

30 Before 30: White Cheddar, Sage, and Bacon Biscuits (#20)


More biscuits this month? Yes, more biscuits. I love quick breads because if you don't know what you're doing for dinner until later in the day, you can still have a tasty, homemade bread with it. These are meant for breakfast, but I think biscuits belong at every meal. I halved this one, but accidentally forgot to halve the buttermilk, making for a very wet and sticky dough. I worked in some more flour and they ended up more like a drop biscuit than a rolled one. It was an amazing mistake because they were fantastic. I'm sure they're great in normal proportions as well.

White Cheddar, Sage, and Bacon Biscuits via The Tillamook Cheese Cookbook:

Makes approximately 9 biscuits

2 c. all-purpose flour
2 tsp. baking powder
2 tsp. sugar
¾ tsp. baking soda
½ tsp. salt
2 Tb. finely chopped fresh sage leaves
5 Tb. cold unsalted butter, cut into ½-inch pieces
5 bacon slices, cooked crisp, chopped
¾ c. grated white sharp cheddar cheese
¾ c. buttermilk

Place the rack in the middle of the oven and preheat to 425 degrees.

Sift together flour, baking powder, sugar, baking soda, and salt and place in a large bowl. Stir in the sage and, using your fingertips, blend in the butter until the mixture is crumbly and resembles coarse meal.

Stir in the bacon and the cheese. You probably should have made more bacon because let's be serious, you snacked on some of it. Add the buttermilk, and stir just until the mixture begins to form a dough. Gather the dough into a ball, and on a lightly floured surface, knead gently 8 times.
Pat out the dough into a round, ¾-inch thick. Cut the dough with a biscuit cutter (or small drinking glass), and place 1-inch apart on a baking sheet. Bake the biscuits for 15 minutes, or until golden brown.

Cheddar and bacon are natural partners. The addition of sage was not something I would have thought of on my own, but a very welcome one indeed. Seriously, biscuits are far too amazing.

Recipes Complete: 20
Recipes to Go: 10 

Tuesday, April 23, 2013

30 Before 30: Garlic-Rye Biscuits (#15)


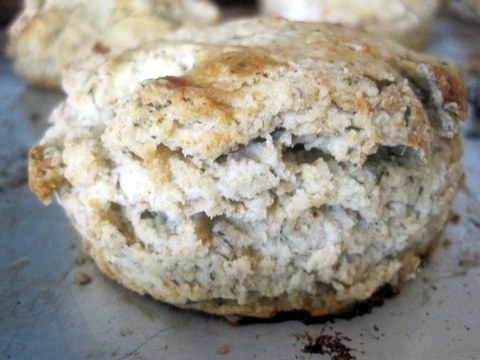
What goes best with corned beef? Rye bread. Here's another instance of changing a bunch of stuff. I have rye flour on hand, not dark rye. I didn't have dried onion flakes, but dried garlic stepped in. Because of that, I used garlic powder instead of onion powder. So onion-rye biscuits became garlic-rye biscuits and were delicious. Plus more biscuits this month!

Garlic-Rye Biscuits modified from Onion-Rye Biscuits via King Arthur Whole Grain Baking:

Makes 12-14 biscuits

2 c. rye flour
1 c. unbleached bread flour
1 Tb. dried garlic flakes
2 tsp. garlic powder
2½ tsp. baking powder
½ tsp. baking soda
¾ tsp. salt
½ c. cold unsalted butter
1 large egg
¾ c. buttermilk, plus more for brushing
2 Tb. dill pickle juice
1 Tb. dried dill

Preheat the oven to 400 degrees. Lightly grease a baking sheet or line it with parchment paper.
Whisk together the flours, baking powder, baking soda, and salt in a large mixing bowl. With a fork, two knives, a pastry cutter, or a food processor, cut in the butter until the mixture resembles coarse crumbs.

Whisk together the egg, buttermilk, and pickle juice in a small bowl or a large measuring cup. Add, all at once, to the flour mixture, and blend lightly and quickly with a fork until the mixture is evenly moistened. Add dill.

Turn the dough out onto a floured work surface, and using a bench knife or a dough scraper, fold the dough over on itself three or four times until it comes together.
Pat the dough out or roll very lightly with a rolling pin (just pat it out) until it's ¾-inch thick. Cut the dough into squares or rounds with a biscuit cutter and transfer the biscuits to the prepared baking sheet. Stack the scraps on top of each other, fold them as you did for the original dough, and pat out and cut again. Brush the tops with more buttermilk.
Bake until the tops are golden brown, 20 to 22 minutes. Remove from the oven and serve warm, or cool on a rack.

These are a perfect match for corned beef and were great with the pasta salad as well.

Recipes Complete: 15
Recipes to Go: 15

Wednesday, April 17, 2013

30 Before 30: Parmesan-Pine Nut Biscuits (#8)


Boy do I ever love a biscuit. This won't be the only biscuit recipe this month either. I had decided to make soup (more on that later) and needed a quick bread to go with it, as late in the day soup decisions often go. Since the point of this challenge is to try to use my cookbooks and try new things, I opened up my King Arthur Whole Grain Baking book for the first time in forever and boy, do they have a lot of biscuit recipes I want to try. So many! Even though Aaron is not a fan of nuts in baked things, I went for this one anyway because it just sounded so good! And it totally was. Much better than the soup we ended up having.

Parmesan-Pine Nut Biscuits via King Arthur Flour Whole Grain Baking:

Yield: 1 dozen to 14 biscuits (I almost never reach yield on biscuit recipes because I like my biscuits big and fluffy. I also did a half recipe on this one.)

2 c. white whole wheat flour
½ c. unbleached bread flour
2½ tsp. baking powder
½ tsp. baking soda
¾ tsp. salt
½ c. cold unsalted butter
1 c. freshly grated Parmesan cheese, plus more for the tops
1 c. pine nuts
1 Tb. finely chopped fresh rosemary (optional. Do it. It's so good!)
1 large egg
1 c. buttermilk, plus more for the tops

Preheat the oven to 400 degrees. Lightly grease a baking sheet or line it with parchment paper.

Whisk together the flours, baking powder, baking soda, and salt in a large mixing bowl. With a fork, two knives, a pastry cutter, or a food processor, cut in the butter until the mixture resembles coarse crumbs. Stir in the Parmesan cheese, pine nuts, and rosemary (if using. Which you should).

Whisk together the egg and buttermilk in a small bowl or a large measuring cup. Add, all at once, to the flour mixture, and blend lightly and quickly with a fork until the mixture is evenly moistened.

Turn the dough out onto a floured work surface, and using a bench knife or a dough scraper, fold the dough over on itself three or four times until it comes together. I used a bowl scraper since I don't have a bench knife (I know, I know).

Pat the dough out or roll very lightly with a rolling pin (just pat it out) until it's ¾-inch thick. Cut the dough into squares or rounds with a biscuit cutter (or a small drinking glass like I always do. I also don't have a biscuit cutter.). Transfer the biscuits to the prepared baking sheet. Stack the scraps on top of each other, fold them as you did for the original dough, and pat out and cut again. Brush the tops with more buttermilk, and sprinkle with more cheese if desired (duh).
Bake until the tops are golden brown, 20 to 22 minutes. Remove from the oven and serve warm, or cool on a rack.

These are herbaceous, earthy, and very satisfying. 

Recipes Complete: 8
Recipes to Go: 22

Sunday, October 23, 2011

Deli Rye Bread

If it’s one thing I have learned from my deli cookbooks, it’s that delis and Jews are not messing around when it comes to portion sizes. I love rye bread and if you do too, you’ll still need some friends to get through this delicious, gigantic loaf. I made this for reubens specifically, but this bread is wonderful for all sorts of sandwiches. You may just want to make half as much.

Deli Rye Bread from Deli:

1 package (or 2¼ tsp.) dried yeast
2½ c. warm water (100-115 degrees)
2 Tb. kosher salt
1 Tb. caraway seeds
3 c. rye flour
1 c. mashed potato (1 medium potato)
5-6 c. unbleached all purpose or bread flour
Cornmeal

Combine the yeast with warm water in a large bowl. Stir with a fork or small whisk. Add the salt and caraway seeds. Stir in rye flour, one cup at a time, the potatoes, and the white flour, one cup at a time, until a soft dough is formed. Starting with the flour I was using my stand mixer with a dough hook.

Turn the dough out onto a floured surface. Knead vigorously for 20 to 25 minutes. You can get a lot of kneading done in the stand mixer, which is what I did. Either way, you want the dough to become smooth, nonsticky, and elastic. Knead in up to 1 cup additional flour, if necessary (hence the 5-6 cups). Let the dough rest while you wash, dry, and grease the bowl. Knead the dough a few more times, form into a ball, and place it in the bowl. Turn it to coat with oil. Cover with a clean kitchen towel and put ina  warm, draft-free place to rise until doubled in bulk, 1 to 1½ hours. It has risen sufficiently when you can gently poke a finger into the dough and the hole remain after a few minutes’ wait.

Flour your first and punch down the dough. Knead a few times, then shape into a round, plump loaf and place it on a large, cornmeal sprinkled baking sheet (or your awesome baking peel to later put on your baking stone. That is all awesome).   Cover with a clean kitchen towel and place in a warm, draft-free place to double in bulk. Meanwhile, preheat the oven to 375 degrees.
When loaf has doubled, slash it lightly in two places with a sharp knife. Brush it with cold water. Bake it from 1 to 1½ hours (mine was done in 1), until a knuckle rap produces a hollow sound. Brush with water twice during the baking process. Let cool thoroughly on rack.
And then make sandwiches! This had one of the best crusts I’ve ever gotten on a bread. The addition of potatoes was a surprise to me, but this bread really works. Next time though, I’m going to half size. Or maybe just make more people come over and eat bread with me.

Tomorrow is the reuben sandwiches this all was for.

Tuesday, July 12, 2011

Double Crust Pizza with Mustard Greens, Ricotta, and Caramelized Onions

Kirsten made me an amazing birthday dinner and I promised to return the favor. I knew I had to impress and I also know that I make an awesome pizza. What better way to celebrate someone's birthday than make a crazy pizza you've never made before? If you think so too, you're much like me. Fortunately, I have a lot of bravado in the kitchen and just assume everything will work out, even when you change the broccoli raab to mustard greens because that's more easily accessible. It did and we were very happy and very full. The sangria helped, especially because I put them in Kerr and Ball mason jars. Because K and B. Get it? Yeah, I'm awesome. And now, pizza!

Double Crust Pizza with Mustard Green, Ricotta, and Caramelized Onions slightly modified from Herbivoracious:

Serves 4

½ recipe pizza dough (I subbed in ½ c. whole wheat flour)
Extra-virgin olive oil
2 large white onions (or 3 medium), thinly sliced
Kosher salt
1 lb. mustard greens, cut into 1/2" lengths
½ tsp-ish crushed red pepper (I like it spicy!)
1 lb. fresh ricotta (drain if runny)
Zest of ½ orange

Heat a large skillet over medium-low heat. Add two tablespoons olive oil, the onions, and 1/2 teaspoon of kosher salt. Cook, stirring occasionally, until completely tender and deeply caramelized, at least one hour. If they start to burn at all, lower the heat. You can do this step the day before and refrigerate (which I recommend).

Add two more tablespoons (or just two new ones if you do this the next day, like me) of olive oil and raise heat to medium high. When the oil is shimmering, add the mustard greens, 1/2 teaspoon of salt, and the chili flakes and cook, stirring occasionally until completely tender. We aren't looking for crisp-tender here, these greens should be fully hammered, about 15 minutes. If it is getting there, add a few tablespoons of water and cover to steam them a bit. Taste and add more salt if needed. I did this and they were perfect. It always amazes me how a huge pile of greens can shrink so much.

Place a pizza stone in the oven (if you have one) and preheat to 475 degrees. Dust a peel generously with cornmeal (if you have one). Roll out half of the dough to a 12 inch circle and place on the prepared peel. I did all of this on a pizza pan I have that my parents gave me when I moved to Portland. It’s not as amazingly perfect as a pizza stone + peel combo, but it does work really, really well. Brush the dough with olive oil. Spread the ricotta over the dough, leaving a 1-inch margin all the way around. Top the ricotta with the caramelized onions, mustard greens, and orange zest. Roll the other half of the dough out to the same size and lay in on top. Press and crimp the edge all the way around. Cut a few vent holes in the top. Brush the top with more olive oil.
Bake until golden brown, about 25 minutes. Rotate it once after about 15 minutes to make sure it bakes evenly. Carefully remove from the oven. Allow to cool at least 10 minutes before slicing and serving.

This is so ridiculously good! The spicy mustard greens are cooled by the ricotta and the orange zest adds some brightness. I’ll admit that Kirst and I each had another piece even though I had made a cake as well because it was just so good! Yeah, you’ll be hearing about that cake soon.

Wednesday, June 22, 2011

Whole Wheat Banana Bread

(Tea + banana bread = great way to wake up)
I love bananas. A lot. But do you ever go through phases with foods? I do. I really did intend to eat these bananas, but they got all brown and that’s when I say banana bread! I wanted to try out something from my King Arthur Flour Whole Grain Baking book I picked up at Title Wave a few months ago and wouldn’t you know it, it had a banana bread recipe. I took out the walnuts because Aaron doesn’t really like them, but if you’re into it, add a half cup of walnuts before baking.

Whole Wheat Banana Bread from King Arthur Whole Grain Baking:

One loaf

½ c. unsalted butter
½ c. packed brown sugar
¾ tsp. baking soda
½ tsp. salt
½ tsp. cinnamon
¼ tsp. ground nutmeg
1 tsp. vanilla
1½ c. mashed ripe banana
¼ c. honey
2 large eggs
2 c. whole wheat flour

Preheat the oven to 350 degrees. Lightly grease a 9x5” loaf pan.

Beat together the butter, sugar, baking soda, salt, cinnamon, nutmeg, and vanilla in a medium bowl until smooth. Add the banana, honey, and eggs, beating until smooth. Add the flour and stirring until smooth. Spoon the batter into the prepared pan and let it rest at room temperature, uncovered, for 10 minutes.

Bake the bread for 50 minutes or until a cake tester inserted into the center comes out clean. Remove the bread from the oven and all it to cool for 10 minutes before turning it out of the pan onto a rack to cool completely.

This is the moistest banana bread I have ever had. Ever. It is so good and you would have no idea there is whole wheat in it. If you forget about your bananas until they’re brown, I’d recommend this one.

Friday, June 10, 2011

Pizza with Bacon, Onions, and Cream

My friend Adam recently finished his master's thesis and I wanted to celebrate that achievement. The best way to celebrate, in my opinion, is with food. I have far too many recipes starred in my reader, so I decided to tackle a couple of them that would work well for a midweek meal. Smitten Kitchen always comes through - for both the midweek easy (like this pizza) to the I'm going to spend all day Saturday making this. I also have my go-to pizza dough recipe thanks to my mom and I had everything I needed in the house, so this was a snap to put together.

Pizza with Bacon, Onions, and Cream from Smitten Kitchen:

Serves 3 with another pizza and a side

½ pizza dough recipe
Olive oil, for oiling baking sheets
½ c. fromage blanc or ricotta (I had ricotta on hand)
½ c. crème fraîche or sour cream (same)
1 Tb. all-purpose flour
Salt and freshly ground pepper
¼ lb. thickly sliced smoky bacon, cut crosswise into ¼” strips
½ medium onion, thinly sliced

Preheat oven to 450°F. In a medium skillet, cook the bacon over medium heat until the fat is rendered and the bacon crisps up. I accidentally burned some of the bacon, so I added in some turkey bacon and combined the two. Remove with a slotted spoon and drain on paper towels. Add onion to skillet and cook until softened and beginning to caramelize.

Whisk together (or blend together in a food processor, if you want it silky-smooth) ricotta and sour cream with flour, then season with salt and freshly ground black pepper.

Divide the dough into 2 pieces. Roll each piece out to a rough round, about 1/8 inch thick. If the dough becomes difficult to roll, let it rest for 10 minutes, then continue. I reserved one of the rounds for a pizza that Aaron made using marinara as the base.


Oil a large baking sheet. Transfer the dough. Spread the cheese mixture over the rounds to within 1/4 inch of the edge. Sprinkle with the bacon and onion. Bake on the bottom shelf of the oven for about 12 minutes, or until the crust is golden brown. Cut into wedges and serve.
I loved this pizza! I've never made a pizza like this one before, but it was tangy and rich and had great contrasting textures. Adam said he doesn't usually like white pies, but this one was good. We have a winner for the weekdays. I love experimenting with pizza and I'm glad have made another tasty pie.

Friday, March 25, 2011

Bread and Onion Panade with Spicy Greens


Until I read this recipe, I had never heard of a panade before. Think of it as a savory bread pudding. It’s a great main dish and also works really well as an accompaniment. Be warned, this is a time consuming dish. However, you can make the whole thing and refrigerate it for the next day just prior to the baking step. I bet the flavors would be really good if allowed to sit too, like stuffing.  This is an amazingly tasty dish (especially with my requisite extra garlic) and provided me with my first opportunity to cook with mustard greens. Tackle this. It’s not difficult, just long.

Bread and Onion Panade with Spicy Greens from Serious Eats:

Serves 8

¾ lb. good-quality sourdough bread, cut into 2-inch cubes
2 Tb. unsalted butter
1½ lb. onions, sliced into thin half-moons
Salt
7 cloves garlic, minced
½ lb mustard greens (or broccoli rabe or Swiss chard), cut into fine ribbons
Freshly ground black pepper
1 c. Cheddar- Gruyère (or Parmesan or just plain Gruyère)
4 c. broth (homemade is best)
Olive oil

Preheat the oven to 350°F and lightly grease the baking dish or Dutch oven with olive oil or butter. Spread the bread cubes on a large baking sheet and toast for 45 minutes in the oven while preparing the rest of the ingredients.

Heat the butter in a deep, heavy skillet over medium heat. When the butter foams up, add the onions and sprinkle them lightly with salt. Cook over low heat for about 25 minutes, stirring occasionally. When they are soft, turn up the heat a notch or two and cook them for another 5 to 10 minutes or until they are golden brown. Stir frequently to keep them from burning.
Turn down the heat and add the garlic. Cook for 5 minutes or until golden and fragrant. Add the greens and cook, stirring frequently. Sprinkle the greens with salt and pepper as they cook. When they are wilted and soft, take them off the heat.
Layer half of the toasted bread cubes in the bottom of the prepared dish. Spread half of the greens mixture over the bread cubes and pack it down into the gaps between the bread. Sprinkle with about half of the cheese. Make another layer of the remaining bread cubes and remaining greens. Cover with the remaining cheese. Heat the broth to a simmer in a small saucepan and carefully pour it into the baking dish. The bread and greens will look rather drowned and soupy; this is correct. Drizzle the top with olive oil. 
Cover and bake for 45 minutes, then uncover the dish and bake for another 20 to 30 minutes, or until the top is golden brown and crisp. Let stand for at least 10 minutes before serving hot.

I’ve had this alone, with a burger, with salad, standing up in my kitchen. I am a little bit in love with it. The bitterness of the greens plays well with the bread and the richness of the cheese. Trader Joe’s has an amazing cheddar gruyère mélange that I highly recommend in general, but it worked especially well for this. It was devoured at Thanksgiving and again at my parent’s house over Christmas. Take the time to make this, you’ll look like a superstar.

Friday, March 04, 2011

Southern Cornbread

Aaron made jambalaya for dinner the other night for our friends Chris and Sarah and I wanted to add something to it. I recently got a copy of Baking Illustrated from Title Wave, where I volunteer on Fridays. It has several variations of cornbread, but when I saw Southern style, I knew that’s what I had to do for jambalaya. It just makes sense.

What I love about this cookbook already is all of the helpful hints and tips for every recipe. For example, I didn’t have the right type of pan to cook the cornbread in, so it told me to double the recipe and put it in bread pan. And I did and it was tasty. Below is the doubled recipe.

Southern Cornbread from Baking Illustrated:

Makes one 9” loaf

8 tsp. bacon droppings or 2 tsp. vegetable oil plus 2 Tb. melted butter (I went with the latter option)
2 c. yellow cornmeal, preferably stone-ground
4 tsp. sugar
1 tsp. salt
2 tsp. baking powder
½ tsp. baking soda
2/3 c. rapidly boiling water
1½ c. buttermilk
2 large egg, beaten lightly

Adjust an oven rack to the lower-middle portion and heat the oven to 450 degrees.

Measure 2/3 cup cornmeal into a medium bowl. Whisk the remaining cornmeal, sugar, salt, baking powder, and baking soda together in a small bowl; set aside.
Pour the boiling water all at once into the 2/3 cup cornmeal; stir to make a stiff mush. Whisk in the buttermilk gradually, breaking up lumps until smooth, then whisk in the egg. When the oven is preheated, stir the dry ingredients into the mush mixture until just moistened. Pour the oil and butter mixture into the batter and stir to incorporate, then pour the batter into the pan.
Bake until golden brown, about 20 minutes. Remove from oven and instantly turn the cornbread onto a wire rack; cool for 5 minutes, then serve immediately.

This is the first time I’ve made a different style cornbread and I have to say I’m impressed. It’s dense and moist and worked really well with the jambalaya. This week I’ve been mixing it in with my soup, which I’m eating a lot of. It works because this bread rocks.

Tuesday, August 31, 2010

Grilled Garlic Flat Bread

Sometime earlier this month, Aaron said that whenever I make fancy things or fun new things, I make stuff that I like (which generally means lots of goat cheese). So I said I would make him a dinner filled with stuff that he really likes. And it turned out pretty well, I think. I was inspired by Kirsten, who showed me a collection of three ingredient summer recipes from Real Simple magazine. This is part one of the appetizers, which is of course modified.

Grilled Garlic Flat Bread modified from Grilled Flat Bread with Thyme from Real Simple:

Serves 2-3

¼ pizza dough recipe
3 garlic cloves, chopped
3 Tb. plus 1 tsp. olive oil, divided
¼ tsp. sea salt
¼ tsp. cracked black pepper

Mix together 3 tablespoons of the olive oil with the garlic, sea, and pepper. Set aside.


Coat pizza dough with 1 teaspoon olive oil and shape into an oval. Grill over medium heat until puffed, cooked through, and slightly charred, 3 to 4 minutes per side. Transfer to a cutting board, brush with the garlic mixture, and cut into pieces.

It's crunchy, garlicky, and delicious. It's a fairly fast appetizer and you can dress it up in so many different ways using so many different herbs. I love a versatile dish and I will be playing with this one even after grilling weather has past.

Monday, July 26, 2010

Cheddar Scallion Biscuits

A post? From me? You don't say!

So here's something you might already know: summer school is rough! I am almost on the other side, with a research proposal, a class weekend, and an exam to go. The research proposal is almost done, class is this weekend, and the exam is something we do with our classmates. I am starting to remember it's summer.

And what do I do? Post a recipe from when Portland was going through Juneuary. These biscuits were made to go with some awesome salmon chowder, which made sense because we had salmon and it was cold outside.

These biscuits come from Smitten Kitchen, which Kirsten turned me on to when we first started talking food. They are so good, dead easy, and you'll want to eat them with everything. I subbed out the blue cheese for cheddar as Aaron's not a big blue cheese fan. As she notes in the original recipe, it's a fine substitution. I loved it!

Cheddar Scallion Biscuits modified from Blue Cheese Scallion Drop Biscuits from Smitten Kitchen:

Makes 12 biscuits

2¼ c. all-purpose flour
2½ tsp. baking powder
2 tsp. sugar
¾ tsp. baking soda
1 tsp. salt
6 Tb. cold unsalted butter, cut into 1/2-inch cubes
1½ c. coarsely grated cheddar cheese
4 scallions, finely chopped
1 c. well-shaken buttermilk (I used 4 Tb. buttermilk powder)

Preheat oven to 450°F. Whisk together flour, baking powder, sugar, baking soda, and salt in a bowl, then blend in butter with your fingertips until mixture resembles coarse meal. I did this whole portion in a food processor. It's faster and it still works. Stir in cheddar cheese and scallions. Add buttermilk and stir until just combined. If you use buttermilk powder, like I did, mix the powder in with the dry ingredients. Use the equivalent amount of water at this point for the buttermilk.


Drop dough in 12 equal mounds about 2 inches apart onto a greased large baking sheet. Bake in middle of oven until golden, 16 to 20 minutes. Mine were perfect at 16.

These are so incredibly flaky and delicious. I do love my regular biscuits, but man, these are good. They'd make for an awesome brunch item as well!

We had it with chowder, which was ridiculously thick as the picture above demonstrates. Although super thick chowder doesn't sound so great now, I promise you it was great in Juneuary. And those biscuits were a perfect partner.

Saturday, May 29, 2010

Dark Herb Bread

This is only a slightly modified James Beard recipe. It’s modified a bit because I misread rye meal as rye flour. It still was awesome and made for great toast with soup.

Dark Herb Bread modified from Beard on Bread:

Makes 1 large loaf

2 packages (or 2 Tb.)
1 Tb. granulated sugar
1½ - 2 c. warm water (100-115 degrees)
3 c. whole-wheat flour
1 c. rye flour
1½ c. unbleached all-purpose flour
¼ c. olive oil
1 Tb. salt
1 tsp. freshly ground black pepper
2 Tb. parsley, finely chopped
1 tsp. rosemary
4 cloves garlic, thinly sliced

Combine the yeast, sugar, and ½ cup of the warm water in a mixing bowl and allow to proof. Mix whole-wheat flour, rye flour, and 1 cup of the all-purpose flour. Add the olive oil, salt, and pepper and mix well. Add the yeast mixture and 1 cup of warm water. Mix, adding additional water if necessary, to make a firm, slightly sticky dough. Mix in herbs and turn the dough out on a floured board and knead until smooth and rather elastic, about 10 to 15 minutes, adding as much as ½ cup flour as you require. As always, I did most of this in a stand mixer. Form into a ball, place in a well-oiled bowl, and turn to coat with the oil. Cover and let rise in a warm place until doubled in bulk, about 1½-2 hours.

Punch the dough down and knead again for about 5 minutes, then shape into a loaf to fit in a well-oiled 10 x 5 x 3-inch tin. Cover and allow the dough to rise again until it is above the rim of the loaf tin. Slash the loaves lengthwise (or crosswise) about ½” deep with a knife. Insert the garlic slices into the loaf.

Bake in a preheated oven of 400 degrees for 20 minutes, then reduce to 350 degrees, and continue baking for 30 minutes, or until the loaves sound hollow when rapped on top and bottom. Remove the garlic slices. Cool on racks before slicing.

Tuesday, March 30, 2010

Bagels

I have been a lifelong bagel eater and pretty much a lifelong bagel snob. My folks are from NYC and my grandma still lives in Brooklyn. Every summer when she would come visit us in Alaska, she’d bring along a big box of crunchy, chewy, perfect Brooklyn bagels and bialys. My dad would make lox and we’d have a fantastic spread. The day the last bagel was gone was always a sad one. Years later, my dad took to making bagels, with some helpful hints from a Brooklyn bagel baker (I love alliteration), and they were awesome. So of course before I made these, I called him to let him know I was going to do it. I also let him know that these were a grand part of my Jewish brunch. I think I did him proud. The recipe below is the half recipe, except for the salt and sugar amounts listed as they are primarily for the water bath for the bagels.

Bagels from Deli:

Makes 8-9 bagels (I got 9)

1 Tb. or 1 package dried yeast
1 c. warm water (100-115 degrees)
3 Tb. kosher salt
3 c. bread flour
4 Tb. sugar
1 egg
Kosher salt
Dried onion
Fresh garlic, chopped
Poppy seeds

Combine the yeast and warm water in a large bowl. Stir with a fork or a small whisk. Add ½ Tb. salt. Stir in all of the flour, one cup at a time. Use a whisk until the mixture becomes stiff, then switch to a wooden spoon. Or use your stand mixer. Whichever.

Use a handful of flour to flour your work surface. Turn the dough out and knead rhythmically and vigorously, add more flour as you knead, until the dough is smooth, springy, nonsticky, and elastic. I did almost all of this in my Kitchenaid, turning it out and kneading it by hand at the end, but I just had to post the original instructions because I find them so hilariously in-depth. This dough should be quite stiff. It is kneaded sufficiently when you can pole it with your finger and the indentation springs back. Total kneading time will be 10 to 15 minutes.

Cover the dough with a cloth and let it rest while you wash, dry, and oil the bowl. Knead the dough a few more turns, then form it into a ball and place in the bowl. Turn to coat with oil. Cover the bowl and put it in a warm, draft-free place until it doubles in bulk, about 1 hour. It has risen sufficiently when you can poke a finger in the dough (there’s lots of finger pokin’ in this recipe!) and the hole remains after about 5 minutes. Poke very gently or the dough will collapse.


When doubled, flour your first and punch the dough down. Knead a few times, then allow to rest for a few minutes. Divide the dough into 8-9 equal pieces. As you work with one piece, keep the remainder covered with a kitchen towel. Spread another towel out on a clean work surface. Roll each piece of dough between your hands to form a smooth ball. Flatten slightly and use your thumb to form a hole in the center about 1” in diameter (more pokin’!). Place finished circles on towel-covered surface.

Cover bagels lightly with plastic wrap and let rise for 20 to 30 minutes, until puffy, but not quite doubled. In the meantime, preheat the oven to 450 degrees. Combine 5 quarts of water, the sugar, and the remaining salt. Bring to a boil. Definitely do this right after letting the bagels rise again. It took forever to come to a boil. Have one large or two small baking sheets lightly greased and ready to go.


Adjust the water bath to remain at a gentle boil. Four or five at a time, drop the bagels into the water. Cook for 3 minutes, turn with tongs, and cook for 2 to 3 more minutes on the second side. Remove with a skimmer or slotted spoon, and place briefly back on the towel to drain. Place on baking sheet. The whole process is similar to the one you use to make pretzels, so I felt very comfortable doing this. It’s really easy anyway.


Beat the egg with 1 tablespoon of water. Brush on the top of each bagel with this mixture, and sprinkle with kosher salt, poppy seeds, or the chopped garlic. Or all of the above. Or none. Or anything else you can think of. I made one salt, two poppy seed, two plain, and four garlic. Bake in preheated oven for 20 to 30 minutes, until golden brown and crusty. Remove from baking sheets and let cool on racks. According to the original recipe, these freeze beautifully, which is something I considered before going for the half recipe.

These were fantastic. Not as crunchy as I would have liked all the way around, but the bottoms were great. The best part, though, is that my dad is going to look this recipe over (he has the same book) and tell me his modifications and secrets. So they’ll be even better next time! These went really well with the next two parts of Jew brunch, which are coming up next, and tomato and sliced red onion. I forgot to get capers (boo on me!). To take out a bit of the bite of the red onion, I soaked them in water briefly.

Anyway, on to the rest of brunch!

Monday, November 30, 2009

Challah-Apple Stuffing

This is basically the same stuffing I made last year, but this time there were no issues. The reason I didn’t post it for Thanksgiving ’08 was due to the fact that the stuffing kept drying out and I continued to add things to it, so while really delicious in the end, I had no idea what was actually in it or at least not well enough to tell other people about it.

I’m marking this down as vegetarian even though I used chicken stock. I used about half veggie stock and my intention had been to solely use veggie stock, but I didn’t defrost quite enough. Make your challah for this at least a few days ahead of time to cube it and dry it out. I skip the glaze and poppy seeds when making it for stuffing. I modified the original recipe heavily (it calls for pecans, raisins, and mushrooms, among other things and uses corn oil instead of butter), so this one is quite different from what’s in the book. I think it’s amazing. You can replace the butter with olive oil or another tasty oil if you’d like, but I think the butter gives it great taste.

Challah-Apple Stuffing modified from 2nd Ave. Deli:

13 c. challah, cubed (pretty much one loaf)
3 tart apples (Jonagold, McIntosh, or Granny Smith work well), cored and chopped
3 c. onion, chopped
2 c. celery, chopped
1-2 Tb. seasonings (I used a bit of sage, rosemary, oregano, and ground pepper)
About 6 Tb. unsalted butter
1½ - 2 c. veggie stock


In a very large skillet (I use my wok), heat 2 tablespoons of butter, add onion and celery and sauté until onion is brown. Remove with a slotted spoon to a large bowl. Add another 2 tablespoons of butter, and sauté apples until lightly browned.


Add onion and celery back to the skillet, mix together and add in challah. Stir around until well mixed. Sprinkle in stock, making sure all of the bread is moistened. Add seasonings and toss stuffing. Add in a bit more butter, stir until melted. Toss mix until everything is warm and delicious. Transfer to a bowl and serve.


Seriously, this is so very tasty. I love the heck out of it. The apples and the challah are perfect friends. I know this is technically dressing and not stuffing, but whatever it is, it’s good.

Friday, October 30, 2009

Pizza Dough and Two Pizzas

Back in the day, I made this focaccia and turned it into pizza. Afterward my mom sent me a recipe for pizza dough and I have been sitting on it for some time. Last night I decided to go for it, especially because my good friend Steffani is in town. I love pizza because it’s good any time and everyone loves it in some way. You can make it with any topping you like and make it so many different ways. This dough is so easy and it is very, very delicious. I did the half recipe, but I’m writing out the full one here.

Pizza Dough from The Romagnoli’s Table (via my mom):

Makes 4 12” rounds or 4 10x15” rectangles

5 c. unbleached flour
4½ tsp. active dry yeast
2 c. warm water
1 tsp. salt
Olive oil

Place warm water in a warm bowl and add yeast. Allow to proof, about five minutes. Add half the flour and salt to bowl. Begin mixing slowly and move to a higher as the flour becomes incorporated. Keeping adding flour until it whaps against the side of the bowl.

Place a bit of flour onto a board and knead a bit more. Add a bit more flour if it sticks to the board. The dough should be smooth and bouncy. Clean out your mixer bowl and oil it. Place dough in bowl. Cover with plastic wrap and a towel in a warm place until doubled in bulk, about 1 to 1½ hours.

About a half hour prior to the completed rise time, heat your oven to 450 degrees. Lightly dust your pans with flour I did mine with cornmeal).

Punch the dough down and cut into fourths (half if you do the half recipe). Make round balls and allow to rest for 5-10 minutes. Roll out into circles, make sure to leave a ½” border. Place the rolled out dough onto floured pans. Push the dough with your fingers and around the pan to make a slight border to hold your toppings.


Cover in your favorite toppings. On one, we used homemade pesto, grilled garlic and onions, fresh sliced tomatoes, grated mozzarella, cheddar, and parmesan cheeses, and slices of fresh mozzarella. On the other we used tomato basil marinara, smoked turkey sausage, chicken andouille sausage, the cheese mix listed above, and the onion garlic mix listed above.


Bake for about 20 minutes.


Serve with a tasty mixed green salad and enjoy.

This was a big hit and I love having multiple ways to make pizza. This was also good for breakfast this morning.
Related Posts Plugin for WordPress, Blogger...