Wednesday, February 22, 2012

Roasted Garlic Jelly

Of the three homemade gifts I made for this past holiday season (previously seen here and here), this one was by far the most complicated, but is by no means difficult. Like most canning projects it is necessary to get all of your equipment and ingredients in order and ready to go when you start in order to facilitate the process and, in general, not frustrate the heck outta yourself or get hot jelly on your fingers. That last part might happen anyway. I really enjoyed the end result (there was a little extra) and I also really liked reading through the Ball Home Preserving book. Though I’ve only made one of the recipes from it, I’m intrigued by many of the others, especially the pickles. Give this jelly a try. Like most savory jellies, it is really good poured over cream cheese and served with crackers, but it is also good as an addition to sandwiches and as a glaze for grilled meats.

Roasted Garlic Jelly from The Ball Complete Book of Home Preserving:

Makes 4 half-pint jars

3 medium heads garlic
1 Tb. olive oil, divided
1 Tb. balsamic vinegar, divided
1 c. dry white wine
2/3 c. water
½ c. white balsamic vinegar
1 tsp. whole black peppercorns, crushed
3 Tb. lemon juice
3 c. granulated sugar
2 3 oz. pouches liquid pectin

Preheat oven to 425 degrees. Using a sharp knife, cut off the tops of garlic heads, exposing cloves. Place each head on a small square of aluminum foil set on a baking sheet. Top each head with 1 tsp. olive oil and 1 tsp. balsamic vinegar. Scrunch foil loosely around garlic heads. Make sure to cover the tops or the vinegar will burn off quickly and it’ll make the peeling part later more of a pain, as I learned. Roast in oven until garlic is golden and very soft, 45 to 60 minutes. Let stand until cool enough to handle. Separate cloves, pinching each one to extract the soft roasted garlic. Discard skins. It might get messy here. It’s worth it.

In a medium stainless steel saucepan, combine roasted garlic, wine, water, white balsamic vinegar, and peppercorns. Bring to a boil over medium heat. Reduce heat and boil gently for 5 minutes. Cover, remove from heat and let steep for 15 minutes.

Transfer garlic mixture to a dampened jelly bag or strainer lined with several layers of cheesecloth set over a deep bowl. I went the cheesecloth route. Let drip, undisturbed, for about 30 minutes. Measure 1 2/3 cups garlic juice. If you do not have the required amount (like me) add up to ¼ cup dry white wine or water. Meanwhile, prepare canner, jars, and lids (see here and here and get a canning book!)

Transfer garlic juice to a large, deep stainless steel saucepan. Stir in lemon juice and sugar. Over high heat, stirring constantly, bring to a full rolling boil that cannot be stirred down. Stir in pectin. Boil hard, stirring constantly, for 1 minute. Remove from heat and quickly skim off foam.

Quickly pour hot jelly into hot jars, leaving ¼” headspace. Wipe rim. Center lid on jar. Screw band down until resistance is met, then increase to fingertip tight.

Place jars in canner, ensuring that they are completely covered with water. Bring to a boil and process for 10 minutes. Wait 5 minutes, then remove jars, cool, and store.

For my very first attempt at jelly, I was really pleased. It came out exactly the way I wanted it to and it tasted great. It was well worth the time at the end when it felt like everything was going to fall apart with the boiling and stirring and skimming, but it all worked out. I would definitely make this again. 
And thus, finally, concludes the homemade gift giving I did this year. Hopefully in the future I’ll be faster about posting things like this. Hopefully. At the very least I’m glad I was able to share (digitally) some tasty gifts.

Wednesday, February 15, 2012

Cardamom Apple Cider Butter


As I mentioned before, I unfortunately did not get any pictures of the making process or end result, other than the jar, of this delicious gift. For a great shot of it, you should check out Ashley English’s Canning & Preserving book. My dear friend and fellow blogger Renai is a big fan of hers. She also got some of this apple butter for Chrisannukah/her birthday. I think it was appropriate.

If you’ve made applesauce before, this recipe will seem very familiar. It is absolutely delicious and mine made more than the yield, which was great for me since I got to eat a lot of it and share it with my family before gifting it to them (it’s nice to have a test audience even if they are your intended audience). I highly recommended grinding your own cardamom as the flavor is so good and such a welcome punch to the already delicious apples. I don’t have a spice or coffee grinder, but find that my mortar and pestle works very well. Make this while apples are still in season.

Cardamom Apple Cider Butter from Canning & Preserving with Ashley English:

Yields 6 half pints

5 lb. cooking apples, peeled, cored, and coarsely chopped
1½ c. apple cider
2½ granulated sugar
1 Tb. ground cardamom or the seeds of 4 cardamom pods ground

Place the apples and cider in a large stainless steel post. Bring to a boil over medium-high heat. Reduce the heat and simmer for 25 minutes, stirring constantly to prevent sticking. If additional liquid is necessary, add water in 2 tablespoon increments. (I did not need this.) Remove from heat.

Once the cooked apple mixture is slightly cooled, puree it using a food processor or immersion blender or by pressing it through a food mill or fine meshed sieve. I did mine in batches in a food processor. Blend the apples until smooth but not runny.

Return puree to the pot, add the sugar and cardamom, and bring the mixture to a gentle boil over medium heat. Reduce the heat to low and simmer for 25 to 30 minutes until the apple butter thickens and clings to a spoon. Stir often to prevent the mixture from sticking. Remove from heat.

While the apple butter cooks, sterilize 6 half pint mason jars, lids, and screw rings. English’s canning instructions are easy to follow, but I’m not going to type everything up as they are very detailed. If you’re going to can, you should get a canning book. I have some directions here (from a previous jam recipe) to get you started and what is listed in the recipe are included here. Fill a canner or large stockpot with water and set over medium-high heat. Bring just to the boiling point. Place the lids in a small saucepan, fill with water, bring to a boil, turn off the heat, and set the pan aside.

Place the hot jars on top of a kitchen cloth on the counter. With the help of a canning funnel, pack he apple butter into the jars, reserving ¼” (6 mm) headspace. Use a nonmetallic spatula to remove any trapped air bubbles and wipe the rims clean with a damp cloth. Place on the lids and screw bands, tightening only until fingertip-tight.

Using a jar lifter, place the jars in the canner. Process for 10 minutes in boiling water.

Let them stand for 5 minutes off heat and uncovered before moving them to a kitchen cloth to cool and finish processing. You know they’re sealed when the lid curves down. Decorate (or at least date) the jars and give away and eat a bunch. Or both.

This is really good on pancakes/waffles, toast, chicken, by the spoonful. It makes for a lovely gift too, if you can stand to share it.

Tuesday, February 14, 2012

Valentine's Day

Argh, okay, I'm a liar. I had fully intended to post those other two homemade gift recipes a couple of weeks ago and then didn't. I'm sorry for being a bad blogger.

By way of apology, here is an adorable video of otters eating fish frozen into heart shaped ice.


Happy Valentine's Day!

Monday, January 30, 2012

Ginger Liqueur

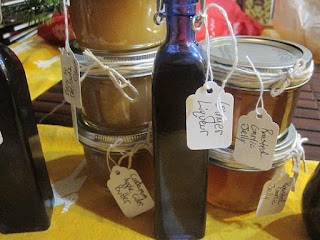
Photo via Kirst
Ginger is one of the greatest things you can put in a drink. I know I’ve mentioned my love of whiskey gingers before (and it’s kind of part of how Kirst and I became such good friends). I saw this recipe before the holidays and thought there’s a great idea for presents. And, as a bonus, I made twice as much as the recipe called for an ended up with a whole jar to myself. It was quickly added to many hot toddies. I was waiting to post this until all the gifts had been given out and I had to wait on the last one which I just recently gave away to Corey and Brian after they finally got settled here in Portland. This is super, super delicious and really easy and makes for a really good gift, no matter the time of year.

Ginger Liqueur from Serious Eats:

Makes about 2 cups

2 oz. ginger root
1 vanilla bean
1 c. sugar
1½ c. water
1 orange
1½ c. brandy
Peel the ginger and cut it into thin slices. Split the vanilla bean in half lengthwise. Bring the ginger, vanilla, sugar, and water to a boil. Reduce heat to medium-low and simmer until ginger is soft—about 20 minutes. Let the syrup cool. Do not strain yet.  
Zest the orange and place the zest only in a sealable glass container along with the syrup and brandy. Seal and shake, then let this mixture steep for one day. After one day, remove the vanilla bean and let the mixture steep for an additional day.

Strain mixture through a coffee filter into your bottle or jar for storage. This is where it can get a little complicated. You need to remove all of the debris via a mesh strainer and then let it go through the filter to make it a clear liquid. I decided not to and just removed the heavy pieces. I like the vanilla flavor a lot and the little flecks of vanilla bean were not a problem for me. Let it sit for one more day before using to let flavors mellow.

This is fantastic tasting by itself, but it really does add some incredible flavor to your other favorite drinks. Ginger fans all around will love this and even if you’re not super into ginger, I’d recommend it.

I’ll be posting about my other two homemade gifts this week (and that will explain the canning pot in the second photo), though unfortunately I did not take photos of the process for either and ate my parts too quickly for the end results too. BUT! They are both really wonderful and I think you can take my word for it. I may even get testimonials to prove my point.

Tuesday, January 24, 2012

Stuffed Squash with Quinoa

I don’t know about your neck of the woods, but Portland has been having some lame weather. Pouring rain, 14 seconds of snow (I miss snow!), and then more rain. This is the kind of dish for those days. It’s hearty and warm and can be easily vegan without the cheese. I love cheese, but if you don’t, go ahead and not use it. That makes more for me!

Stuffed Squash with Quinoa:

Serves 2

One acorn squash (or your favorite type)
1 c. uncooked quinoa
1 bunch chard chopped, stems removed and set aside
4 cloves garlic, minced and divided
1½ c-ish broccoli
Olive oil
Your favorite herbs for seasoning (I used thyme, oregano, and rosemary)
Salt and pepper to taste
Olive oil
Parmesan cheese (optional)
Goat cheese (optional)

Preheat oven to 350. Cut squash in half [edited to add: scoop out any seeds and extra gunk before baking] and place face down on an oiled baking sheet. Bake for about 30 minutes or until the squash is fork tender. Set aside and allow to cool. Leave oven on.

While the squash is baking, prepare quinoa. Add quinoa and 2 cups of water to a medium size pot, bring to a boil, and simmer for about 10-15 minutes. Fluff and mix in 1 clove of garlic, salt, pepper, and some herbs and goat cheese, if using. Set aside.

Add olive oil to a large skillet and toss in chard stems, broccoli, and remaining garlic and cook over medium heat until stems are slightly soft. Add in chard leaves and cook until wilted and reduced. Mix in herbs.  Add in quinoa and mix together thoroughly. Set aside.
Once squash has cooled enough to touch, flip over and add in some parmesan cheese, if using. Fill squash halves with the chard-quinoa mixture and top with additional parmesan. Return squash to oven until cheese is melted, 2-3 minutes. There will likely be some of the mixture remaining. Eat that while the squash is back in the oven.

This will fill your belly and make you happy. [Edited to add: scrape up the squash with your filling to get a complete and tasty bite.]

Tuesday, January 17, 2012

Spicy Roasted Pumpkin Seeds

Oh man, remember when you were eating lots of pumpkin pie and other pumpkin related things? Did you make delicious and spicy pumpkin seeds? I did. And then totally didn’t blog about it. So here you go friends! Hopefully this will help you out in the future because they were very, very good.

Spicy Roasted Pumpkin Seeds from Serious Eats:

1½ c. pumpkin seeds
2 Tb. olive oil
1 Tb. red pepper flakes
½ tsp. smoked paprika
¼ tsp. cayenne pepper

Preheat oven to 350 degrees.

Scoop out the inside of your pumpkin, and separate seeds from pulp. Don't worry if there's a little pulp left on the seeds when you roast them—it only adds flavor. Just remove the biggest pieces so that the seeds are easy to toss.

In a bowl, toss the seeds with the oil, coating thoroughly. Add salt and seasonings. Spread seeds in one even layer across a greased baking sheet (or you can use a cookie sheet covered in aluminum foil).
 
Bake for 30 minutes, or until the seeds are golden brown. Stir the seeds every so often while they're baking, so that they toast evenly. Cool and serve. And see how long they last (hint: not very.)

Sunday, January 15, 2012

Spankopita

Want something maybe a little different to go with your Sunday supper? Try spanakopita. It looks much more difficult than it actually is, tastes wonderful, and looks pretty darn cool. Don’t do Sunday supper? Make this anyway. Don’t have enough feta or spinach? Do what I did a sub in some yummy chard and ricotta. It will all be delicious in the end. Even cold for breakfast.

Spanakopita from The New Moosewood Cookbook:

Makes about 8 servings

2 Tb. olive oil plus a little more for the pan
2 c. minced onion
½ tsp. salt
1 Tb. dried basil
1 tsp. dried oregano
2½ lb. fresh spinach, stemmed and finely chopped
5 medium cloves garlic, minced (or 6 or 7 or 9. Whatever.)
3 Tb. flour
2-3 c. crumbled feta cheese, about 1 lb.
1 c. cottage cheese
Black pepper, to taste
1/3 c. olive oil
1 lb. phyllo pastry, 16 to 20 leaves, thoroughly defrosted

Preheat oven to 375 degrees. Lightly grease a 9x13” baking pan.

Heat the oil in a Dutch oven or deep skillet. Add onion, salt, and herbs, and sauté for about 5 minutes, or until the onion softens. Add the spinach, turn up the heat, and cook, stirring, until the spinach wilts, 5 to 8 minutes. Stir in the garlic. Sprinkle in the flour, stir, and cook over medium heat 2 to 3 more minutes. Remove from heat.

Mix in the cheese, then correct the seasonings, adding black pepper to taste along the way.

Place a sheet of phyllo in the prepared pan, letting the pastry edges climb up the side. Brush it all over with olive oil, then add another sheet. Keep going until you have a stack of 10 oiled sheets. Don’t let it creep too high up the edge or it’ll crumble a lot if you try to transport it.

Add the filling, spreading it evenly to the edges. Continue layering and oiling the remaining phyllo on top of the filling. Oil the top layer. Gently with a serrated knife in a sawing motion cut the unbaked spanakopita into squares. Bake uncovered for about 45 minues, or until golden and crispy. Serve hot or warm.
Phyllo gets kind of a bad rap because it can be difficult to work with and dry out quickly. You just have to be faster. This was not that difficult to put together and it was tasty for days afterward. Give it a try.
Related Posts Plugin for WordPress, Blogger...