Thursday, January 09, 2014

Mini Pear Pies

The reason I hardly ever blog is I have this baby guy and he takes up a lot of my time and when he's sleeping or otherwise occupied with block stacking or chasing the dog around, I tend to zone out on silly phone games or cute pictures of animals on the Internet. So not blogging. I do think about it, though, and I continue to take pictures of the food I make (a thing I still do when not helping a baby stack blocks or be nice to the dog who puts up with a lot from a small thing that tries to climb on him all the time). Another thing I do is hang out with a great group of moms. So baking + hanging out with moms = trying to show off and bring tasty things to meet ups. I haven't done this in awhile, but this was an early hit.

I should probably try to show off again. And blog. But you know, block stacking.

Mini Pear Pies slightly modified from Mogwai Soup:

Makes 12 mini pies

5 pears, pealed and chopped
½ c. sugar
Peel of one lemon
1 Tb. lemon juice
Pinch of ground ginger
Pinch of cinnamon
Pinch of allspice
2 cardamom pods, crushed
Pinch of salt
1 Tb. of corn starch
A few Tb. of water
Butter or oil
1 egg beaten with a tablespoon of water

Make your amazing pie dough. Roll it out. Let it rest in the fridge. While you prep the filling, let the dough get to room temp and then roll it out. I used a not often used martini glass (a confluence of watching a lot of Sex and the City and turning 21) to cut out the bases and a drinking glass to do the tops.
Add all the filling ingredients except corn starch to a saute pan and cook on medium heat. After 10 minutes add the cornstarch and cook for 5 more minutes, if it is thickening too much you can add a few tablespoons of water. Cool off a bit before filling your pies.
Butter or oil the cups of a 12 cup muffin tin. Push in the bottoms of the pies, curling them up over the edge about ½ inch. Put about 1½-2 tablespoons of filling into each pie. Go for too little at first rather than too much. You still need to seal them. Cover with the tops and seal the edges with a fork. Brush with egg wash and sprinkle with some sugar.

Bake it at 400 degrees for about 30 minutes, checking after 20 or until nicely golden brown.
Cool in pan until you can push them out and cool on a rack. Transfer to some happy mommies or, you know, your mouth. Good times for everybody! Plus they look really fancy.

Wednesday, November 13, 2013

Roasted Beets with Balsamic Glaze

Fall and winter mean root vegetables. Sometimes you just can't think of another way to make beets. That's where this recipe comes in handy. It's a great side or an addition to a fall salad.

Roasted Beets with Balsamic Glaze via Serious Eats:

Serves 4

6 medium beets (2 bunches, or about 3½ lb.)
1 tsp. kosher salt
2 Tb. extra virgin olive oil
1/3 c. inexpensive balsamic vinegar
1 Tb. maple syrup

Preheat the oven to 400 degrees. Line a baking sheet with aluminum foil. Remove the leafy stems and roots of the beets and peel each one with a vegetable peeler. Cut the beets in 1 1/2-inch chunks. Place the cut beets on the prepared baking sheet and toss with the olive oil and salt. Roast for until the beets are tender when pierced with a thin-bladed knife, 35 to 40 minutes, tossing once with a spatula midway through.
Meanwhile, combine the vinegar and maple syrup in a small skillet. Cook over medium heat until the liquid is reduced by about half (it should lightly coat the back of a metal spoon). Pay close attention and be sure not to over-reduce it; it goes from sweet and syrupy to burnt and hard very quickly. Toss the glaze with the roasted beets and chill until ready to serve.


Easy!

Tuesday, November 12, 2013

Harrison's First Birthday Cake

The biggest reason my blogging has become so infrequent is I've got this little man around that takes up so much of my time. It's fantastic. This past Friday was his birthday, so we went with the family to Lincoln City to celebrate one year of Harrison.

Of course I made him his own cake. It was a process that took a couple of weeks and lots of test cakes. Some were too snack cake, some were disgusting (that's what I get for trying sugar free), and some were just meh. But I found one that was just right and then, as I do, started to modify. I used the frosting from my favorite baby food blog/book (thanks Renai!) and along with some exploding writing icing and a bit of cinnamon, we had a cake.
Harrison tried to eat a slice whole. I'd say that's a success.

Harrison's First Birthday Cake adapted from Martha Stewart and Wholesome Baby Food:

Makes 1 9" 2 layer cake

For the cake -
1 c. all-purpose flour
1 c. whole wheat flour
1½ tsp. baking powder
1 tsp. baking soda
¾ tsp. salt
¼–½ tsp. cinnamon
½ c. sugar
½ c. butter, melted
½-¾ c. yogurt
2 eggs
1 tsp. vanilla
2 ripe bananas, mashed (about 1 c.)

For the frosting -
1 8 oz. package cream cheese, softened
¾ c. sugar
1/8 tsp. salt
1 tsp. vanilla extract
1½ c. heavy cream

Place a rack in the center of the oven and preheat to 300 degrees. Butter and flour two 9x2 round cake pans. Set aside. In a large bowl, combine the flours, baking powder, baking soda, salt, cinnamon, and sugar. Blend in the melted butter, mixing together until moist. Add half of your yogurt and combine.

In a separate bowl, combine the other half of the yogurt with the eggs and blend into the flour mixture. Add the vanilla and mashed bananas. Beat for 1 minute. Divide the batter between the two cake pans and place in center of oven. Bake for 35 to 40 minutes. When cake is done, top should be a golden brown and a toothpick inserted into the center should come out clean.

Cool cakes on a cooling rack in pans and then invert onto rack to cool completely.

While cakes are cooling, make the frosting. In a large bowl, beat cream cheese, sugar, salt, and vanilla until smooth. In a small bowl, whip the heavy cream until stiff peaks form. Fold into the cream cheese mixture.
When the cake have cooled, place one top side up on a cake stand or inverted plate. Place a big dollop of frosting in the center and spread evenly across the top. This is going to be that tasty middle layer of frosting, but don't go too bananas (haha), you need enough to frost the rest of the cake. Place the other cake top side down over this frosting layer. Put a huge amount of frosting in the center of the top and spread it across and down the sides. Keep turning the cake until you've frosted the whole thing. Stick a large knife or spatula or anything long you can find to remove the cake from the plate and onto another one. This is a great two person process, so wrangle someone in to help you.

Once on the other plate, stick in the fridge for at least 10 minutes to let the frosting firm up a bit before doing any further decorating.
Slice it up and watch an adorable one year old get his first piece of cake. Also, some other people ate it, but you know, priorities. 

Monday, October 21, 2013

Thai Mango with Coconut Sticky Rice

One of my favorite desserts is mango sticky rice. I lean toward the fruit side of the dessert world and this one is perfect for those cravings. It's so much easier than you think and the results are so perfect.

Thai Mango with Coconut Sticky Rice via The Kitchn:

Makes 2-4 servings

1 c. Thai sweet or sticky rice
1 can coconut milk, unshaken
3 Tb. raw or white sugar, divided
1 tsp. salt, divided
½ tsp. cornstarch (or tapioca flour, available in Asian groceries or in gluten-free section)
2 ripe mangos
Toasted sesame seeds and mint, to garnish

Soak 1 cup of dry sticky rice in water for about 1 hour. Drain the rice and rinse it thoroughly. Then pour about 1 cup of water into a saucepan, and place the rice in a steamer insert inside the saucepan. Cover tightly and steam over low to medium heat for 20 minutes.

While the rice is steaming, make the first sauce. You will make two coconut sauces to go on the rice: One thin one to mix into the rice itself, and then a thicker sauce to spoon over top. Start by opening the can of coconut milk and spooning out the thick cream on top.

Place the thicker coconut cream in a small bowl. You should have approximately 1/2 cup, give or take a bit. Pour the thinner, lighter coconut milk left in the can into a small saucepan. It will be a little over 1 cup. Stir in 2 tablespoons sugar and 3/4 teaspoon salt. Warm over medium heat, stirring frequently, for 5 minutes. Do not let the sauce boil.
By now the rice is probably done. The grains should be tender and shiny. Spoon the rice out into a bowl. It will be clumpy. Slowly pour the warm coconut milk over the rice in the bowl, stirring frequently. You want the milk to coat the rice but not leave puddles. Keep stirring, and stop pouring in coconut milk when it looks like the rice is saturated. You may not use all of the milk. Set the rice aside to finish absorbing the coconut milk; after 15 minutes or so it should have soaked up any milk that is still liquid.

While the rice is standing, make the coconut topping sauce. Rinse out the coconut milk saucepan, and pour in the coconut cream that you took off the top of the can. Stir in 1 tablespoon sugar, and 1/4 teaspoon salt. In a separate bowl, whisk together a few teaspoons of water and the cornstarch. Whisk this cornstarch slurry into the coconut cream and cook over low heat for about 3 minutes, or until the mixture thickens considerably. Set aside.

To cut up the mango, first cut off the bottom so it can stand upright. Slice away the skin in thin strips, until the mango is completely peeled. Cut off the flesh in slices, starting with the broad cheeks on each side, then the thinner strips that will come off either side. Try not to eat all of the mango when you're doing this. It's hard, I know, but the end result is worth it.
To serve, place about 1/3 cup cooked sticky rice on each plate, and arrange mango slices around it. Drizzle with the coconut topping sauce, and sprinkle with a few toasted sesame seeds. Garnish with a mint sprig, and eat while still warm.

So good. So so good.


Saturday, October 19, 2013

Heirloom Tomato Tart

Summer might be over, but Portland keeps hanging on to the sun. The leaves are falling off of the trees though and it is definitely fall. Maybe you stashed some tomatoes away in your freezer. Make this and pretend it's still August.

Heirloom Tomato Tart via Joy the Baker:

Makes 1 9 by 9 tart

For the sun dried tomato pesto sauce -
1 8 oz. jar sun dried tomatoes, some of the oil reserved
2 cloves garlic, peeled
1 small red chili, seeds remove and coarsely chopped
Big pinch of granulated sugar
1 scant tsp. salt
3-4 Tb. olive oil from the sun dried tomato jar
For the Tart-
1 9×9-inch sheet all-butter puff pastry, thawed but still cold
Small handful fresh basil leaves
4 oz. goat cheese
3 small heirloom tomatoes, sliced about ¼-inch thick and drained on paper towels
Handful of cherry tomatoes, sliced in half and seeds removed
1 Tb. fresh thyme leaves
Olive oil
To make the sun dried tomato pesto sauce, combine sun dried tomatoes, garlic cloves, chopped
chili, sugar, salt, and oil in the bowl of a food processor. Blend until combined, but still slightly
coarse. The mixture does not need to be completely smooth. Taste and season as needed. You'll get some extra. It's fantastic on other things, like toasted bread.

Place a rack in the upper third of the oven and preheat oven to 400 degrees F. Line a baking
sheet with parchment paper and set aside.
Unfold a chilled sheet of puff pastry. Roll lightly with a rolling pin just to flatten completely. Place on the prepared baking sheet and spread about half of the pesto sauce over the puff
pastry, leaving about a ½-inch border around the edges. Coarsely tear basil leaves over the
sauce. Crumble goat cheese over the sauce. Arrange heirloom tomatoes in a single layer over
the goat cheese and press down slightly. Try to cover as much of the sauce as possible as it can
burn in the oven if exposed. Add a few cherry tomato halves. Sprinkle generously with fresh
thyme and drizzle with olive oil.
Bake for 15 to 18 minutes until puffed and golden brown. Remove from the oven and allow to rest
for at lease 10 minutes before serving.


It's kind of like pizza, but so much fancier. Close your eyes and dream of summer.

Thursday, October 17, 2013

Cardamom Moscow Mule

Sometimes you just need a cocktail – one that is crisp, refreshing, and a little different. Try this one on for size. It's really easy and you may already have everything you need at home except for the copper mug. A regular glass will do.

Cardamom Moscow Mule via Honestly Yum:

Makes 2-ish

For the mule-
2 oz vodka
½ oz lime juice
4 oz. cardamom ginger ale
Lime wheel and pinch of ground cardamom for garnish

For the ginger ale-
2 tsp. finely grated ginger
5 cardamom pods
½ c. evaporated cane sugar
½ c. water
1 c. sparkling water
To make the ginger ale, peel and finely grate the ginger. Set aside. Crack open the cardamom pods and grind the seeds using a spice grinder or mortar and pestle. Set aside. Add sugar and water to a small saucepan over medium heat until sugar dissolves. Add ginger and ground cardamom and simmer for 10 minutes. Remove from heat and let cool to room temperature.
Once the syrup has cooled, strain through a fine mesh strainer. Transfer to a large jar or bottle and add sparkling water. Keep the ginger ale chilled in fridge while you make the rest of your drink.

Crush ice, either using a Lewis bag or food processor. Fill your cup halfway with crushed ice. Add the vodka, lime juice, and cardamom ginger ale, then top off the remainder of your cup with crushed ice. Cut a lime wheel and lay it on the top of the cocktail for garnish. Sprinkle a little ground cardamom on top of the cocktail for some added spice.


If you love ginger, you'll love this one. It's got bite, it's crisp, it's totally perfect for ladies night. I also really like the ginger ale just on its own.  

Wednesday, August 14, 2013

Char Siu Bao

Bao is magic. It is a delicious steamed bun filled with perfection. I go into the kitchen with new recipes all the time, but rarely do they come out just as perfect as these did. This was a project Kirsten and I had been dreaming about for so long. It was worth the wait. It was so wonderful and Aaron is harassing me to make it again. These were the first things we started on dumpling day, but they were the last ones ready. Take the time and make these happen in your life.

Char Siu Bao via Jessica Gavin:

Makes about 24 buns that don't last long

Filling-
2 c. barbecue pork (char siu), ¼ inch dice
2 Tb. oyster sauce
4 Tb. granulated sugar
1 Tb. peanut oil
2 tsp. sesame oil
4 Tb. peanut oil
4 tsp. shallots, minced
3 Tb. all-purpose flour
12 Tb. chicken stock
2 Tb. dark soy sauce

Bun Dough-
1 Tb. granulated sugar
¼ c. warm water (105°F)
2¼ tsp. active dry yeast
4 c. all-purpose flour
2 Tb. lard or shortening
½ c. extra-fine granulated sugar
1 c. whole milk, warm (105°F)
1 Tb. vegetable oil
1 Tb. baking powder mixed with 1½ Tb. water


To make the filling, heat the oil over medium heat and sauté the shallots 2 minutes or until light brown. Add the flour, stir to combine, and cook 1 minute.

Add the chicken stock, stir well, and cook 2 minutes. Add soy sauce and cook one minute. Remove from heat and stir in cut pork and seasoning ingredients. Chill until very firm.

To make the dough, dissolve sugar in warm water, sprinkle yeast over; let stand 2-3 minutes, and then stir to mix well. Let set until it starts to foam, 10 minutes.

Sift flour and make well in the center. Whisk together the lard/shortening, sugar, yeast mixture, and milk. The fat will not completely dissolve into the liquid.

Combine liquid mixture with the flour; gradually incorporate the flour with the liquid to make dough. Knead the dough for 10 minutes, sprinkling with flour as necessary.

Use the oil to grease the outside of the dough; cover and let rest in warm area 1½ hours or until doubled in size.

Punch dough down and flatten out to about ¾ inch thick. Spread the baking powder mixture evenly on the dough. This acts as a stabilizer. Roll dough up and knead about 10 minutes, or until smooth and satiny. The dough should be firmer than regular white bread dough. Cover and let rest 30 minutes.

Divide the dough into four equal parts. Roll one part by hand to form a rope approximately 9 inches long and 1¼ inch in diameter. Mark into 6 equal parts, 1½ inch long. Holding the dough with one hand, grip at the first mark with the thumb and index finger of the other hand and tear away briskly to break off a small dough piece. Continue breaking until you have 24 pieces. Flatten each piece of dough with your palm. Using a rolling pin, roll each into a round disk, making quarter turn with each roll. Roll to leave the center thick; thinner edges are easier to pleat. I had difficulty getting these as thin as I wanted which led to slightly chewier bao, but they still tasted wonderful, so don't worry if you can't get them quite right.
Place about 1 tablespoon of filling at the center of each dough round, flat side up. Gather the edges by first pleating counterclockwise, and then twisting to seal securely. Place the bun round side up on a square piece of parchment paper (2.5 X 2.5 inches).
Let buns rest, covered for at least 30 minutes.

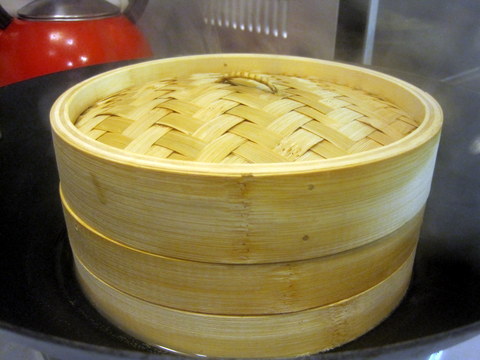
Steam on high heat for 8 to 10 minutes. Do not uncover the steamer any time during the steaming. If a flat lid steamer is used, wrap the lid in a kitchen towel to prevent condensed steam from dripping on the buns.

Eat with dipping sauce and spicy Chinese mustard. These were so, so, so good! I'm excited to try to make different fillings. The dough is super easy and comes together perfectly. I recommend doing this recipe with another person. Having Kirsten work on the filling while I made the dough cut down on our waiting to eat bao time.

These were the perfect end to dumpling day and I can't wait to make the time to make them again.
Related Posts Plugin for WordPress, Blogger...