I mentioned earlier that I had a failure involving my delicious oven-roasted tomatoes. This is that failure plus my later success. Not everything works out in my kitchen, as much as I would like it to. I got my idea for these tarts from some over-priced ones available at a certain food store in a certain area where I used to work. Though tasty, my coworker said that I could make them and they would be better. I thought so too.
After making the tomatoes, I got to making these tarts. I figured I’d make four big ones, so Aaron and I could have leftovers. I made the pastry dough (previously seen here), grilled some onions, cut up my tomatoes, chopped some garlic, sliced sausage and grated cheddar cheese for Aaron’s, crumbled goat cheese, and set them aside to stuff the dough. I rolled the dough out, filled it, folded it over the stuffing, and baked them sort of like pies.
For whatever reason, they just didn’t work. The dough was flaky, but not tasty. The insides were fine. Overall, not terrible, but definitely not great. I ended up taking the inside out of the second one and using it to make a delicious grilled cheese sandwich. I feel like cell phone pictures are appropriate for these as they are also not terrible, but really not great.
Anyway, I wouldn’t be defeated! I changed tacks and went for a tart more like this one, which was featured in Renai’s blog. Instead of doing pastry dough, though, I went for galette dough because it is wonderful and really does make for a fabulous tart. I did exactly what I did before for the other tarts and got these delicious ones instead. Success! I would definitely make either of these as an appetizer for a fancy dinner party or a regular party. Very tasty indeed!
As for my original idea, I shall return to it someday. I like the idea of it and it could be that it was just a bad day for pastry. I’ve made that dough before, obviously, and it usually comes out just about perfect, so I’m willing to try again. Or maybe I can use the galette dough and fold them into pockets. I’ll experiment and report back. After all, although not everything goes right in my kitchen, it usually does.
Saturday, October 31, 2009
Friday, October 30, 2009
Garlic!
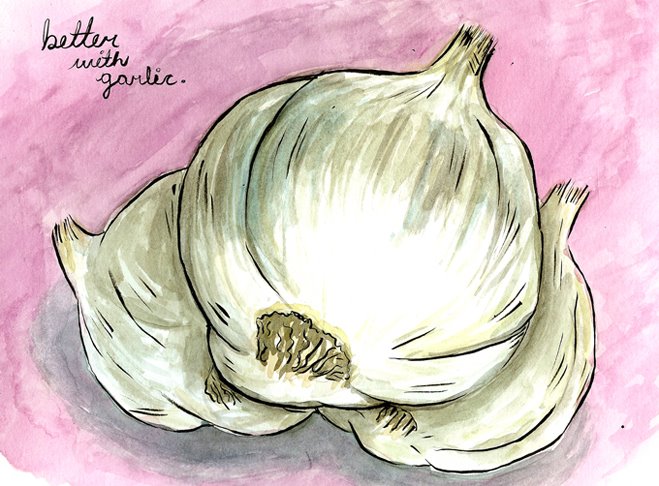
Better with Garlic is going to get even better. Why? Because I planted garlic! Thirty plants, to be exact. These are Polish softneck and purple glazner that came from my parents' garden in Cave Junction (I told you they're rad!). I'm super excited to see these pop up and to cook with them.
As an added benefit, I also have a bunch of this garlic that I didn't plant that I get to eat. The pizzas from a couple of days ago? Covered in awesome, naturally grown garlic. Hooray for garlic!
Mexican Cookies
What happens when you combine Mexican brownies and chocolate chip cookies? You get these cookies that seem to resemble snickerdoodles more than a combination of the above. They’re very tasty though!
This happened because my friend David’s parents were in town and he was having a pizza party at his place. Of course I had to bring something over! But alas, no peanut butter M&Ms! I did have some crushed Ibarra chocolate and all the fixings for regular chocolate chip cookies, so off I went.
The base was the chocolate chip cookies plus a bunch of cinnamon and chile powder. Then in went the crushed Ibarra, some more cinnamon, a bit more chile powder, and mini chocolate chips. I scooped them out onto a cookie sheet, sprinkled raw sugar and cinnamon on top, and baked for about 10 minutes at 375 degrees.
I thought they were fabulous and they went over very well at the party, but I think they would’ve been a better combination of the two with more Ibarra and more chile powder. Unfortunately I only have a cell phone picture of it, so just try to imagine delicious, moist, cinnamon-y cookies that were consumed very quickly.
Pizza Dough and Two Pizzas
Back in the day, I made this focaccia and turned it into pizza. Afterward my mom sent me a recipe for pizza dough and I have been sitting on it for some time. Last night I decided to go for it, especially because my good friend Steffani is in town. I love pizza because it’s good any time and everyone loves it in some way. You can make it with any topping you like and make it so many different ways. This dough is so easy and it is very, very delicious. I did the half recipe, but I’m writing out the full one here.
Pizza Dough from The Romagnoli’s Table (via my mom):
Makes 4 12” rounds or 4 10x15” rectangles
5 c. unbleached flour
4½ tsp. active dry yeast
2 c. warm water
1 tsp. salt
Olive oil
Place warm water in a warm bowl and add yeast. Allow to proof, about five minutes. Add half the flour and salt to bowl. Begin mixing slowly and move to a higher as the flour becomes incorporated. Keeping adding flour until it whaps against the side of the bowl.
Place a bit of flour onto a board and knead a bit more. Add a bit more flour if it sticks to the board. The dough should be smooth and bouncy. Clean out your mixer bowl and oil it. Place dough in bowl. Cover with plastic wrap and a towel in a warm place until doubled in bulk, about 1 to 1½ hours.
About a half hour prior to the completed rise time, heat your oven to 450 degrees. Lightly dust your pans with flour I did mine with cornmeal).
Punch the dough down and cut into fourths (half if you do the half recipe). Make round balls and allow to rest for 5-10 minutes. Roll out into circles, make sure to leave a ½” border. Place the rolled out dough onto floured pans. Push the dough with your fingers and around the pan to make a slight border to hold your toppings.
Cover in your favorite toppings. On one, we used homemade pesto, grilled garlic and onions, fresh sliced tomatoes, grated mozzarella, cheddar, and parmesan cheeses, and slices of fresh mozzarella. On the other we used tomato basil marinara, smoked turkey sausage, chicken andouille sausage, the cheese mix listed above, and the onion garlic mix listed above.
Bake for about 20 minutes.
Serve with a tasty mixed green salad and enjoy.
This was a big hit and I love having multiple ways to make pizza. This was also good for breakfast this morning.
Tuesday, October 20, 2009
Out-of-Print Cookbooks
So here's the deal folks. My camera is dead. I am hoping to get a new one soon, but for now, you get this not cooking post and coming soon, camera phone photos! Wahoo!
This is a really interesting article though. As a part of my MLS degree, I am now a student member of the ALA. That's Master of Library Science and American Library Association, ps. You can see it here.
This is my favorite one of all:
Although the one by Vincent Price is probably pretty tasty...so tasty it's spooky!
Labels:
cookbooks
Friday, October 09, 2009
Oven-Roasted Tomatoes
I had a very special plan for these tomatoes that turned out to be not so special. More on that later. These on their own, however, are fantastic. I’ve been reading this food blog since I started blogging and I love, love, love her take on food. While she does have better access to things that I don’t (like mangoes), our takes on food are similar. It’s nice to see someone out there that loves good food as much as I do (you know, besides this lady. Oh, and her.)
I saw her oven-roasted tomato post forever and a day ago and stored it away in my noggin. As my not so special little project didn’t work out, I’ve been eating these by themselves (so tasty), in salads, on sandwiches, and anywhere I put goat cheese (so everywhere! Ha!). These are amazingly tasty and an awesome way to use up your bumper crop of tomatoes, especially if you know how to properly can things. The only thing I would change is the tomatoes I used or the time they were in. My grape tomatoes, for the most part, got a little crispy, but the romas were fine. And I do love a roma tomato.
Oven-roasted Tomatoes from 80 Breakfasts:
Ripe tomatoes, about 1-1.5 kilos (I had a somewhere under 1 kilo)
Olive oil for drizzling and for storing
Sea salt and freshly cracked black pepper
2 garlic cloves, peeled and lightly crushed
Preheat the oven to 400 degrees. Line a baking tray with aluminum foil and brush with oil. Slice the tomatoes in half lengthways and place snugly side by side in the baking tray, seeded side up. Mine weren’t quite so snug as I didn’t have as many as the original recipe did. Drizzle with some olive oil and sprinkle with salt and pepper.
Bake for around 15 minutes or until you see the tomatoes sizzling and coloring, then lower the temperature to 300 degrees for another 1½ hours until they are a little shriveled but not completely dried out. Leave tomatoes to cool then transfer them to a clean/sterilized jar. Place the 2 garlic cloves in the jar and cover everything with olive oil. Store in the fridge.
A note from the original site states that she did not follow any approved procedures for sterilizing and canning. These are immediately refrigerated and consumed shortly after. They are not for long-term storage. But you won’t want them for long term storage. You will want to eat them immediately. I mean, look at how pretty they are. They are begging for some creative recipe. Or just to be eaten in general.
Labels:
garlic,
tomato,
vegan,
vegetarian
Subscribe to:
Posts (Atom)