Wednesday, September 10, 2014

Black and Blue Pie

This whole post is about to get super Portland on you. Like Portlandia-esque Portland. This is a pie I made for my tattoo artist as a tip for my last tattoo. I made it with local berries. And local flour (hey Bob's Red Mill). And local butter (Tillamook). Also I'm wearing black and red flannel right now.

This pie is also super good. It looked great the first time, so I made it again. You should use whatever end of season berries you have and make this. Decorate it any way you want. Maybe put a bird on it? I dunno.

Black and Blue Pie:

Makes one 9” pie


Filling-
3 c. blackberries
3 c. blueberries
2/3 c. – ¾ c. sugar (depending on how sweet your berries are)
1 tsp. lemon zest
1 tsp. fresh lemon juice
Dash nutmeg
Dash cinnamon

Topping-
2/3 c. all-purpose flour
3 Tb. brown sugar, packed
½ tsp. cinnamon
¼ tsp. salt
Dash allspice
Dash nutmeg
6 Tb. unsalted butter, melted and cooled slightly
Make the pie dough! Roll it out how you do and put it in a 9-inch pie dish. Refrigerate while prepping everything else. If you have extra dough like I did after trimming, use a cookie cutter to make fun shapes with the remainder. Refrigerate alongside pie crust.

Whisk sugar, lemon zest, nutmeg, and cinnamon together. Add berries and toss to coat. Add lemon juice and toss to coat again. Let sit at least 10 minutes.

While your berries are sitting, preheat oven to 375 and make the topping. Whisk together all dry topping ingredients. Add in melted and cooled butter and mix with fingers until blended evenly.
To assemble your pie, remove formed dough from fridge, scoop in berry mixture, and sprinkle topping as evenly as possible.

Bake pie for 1 hour and 15 minutes, until the filling is bubbling and your topping has become golden. If it is browning too quickly, cover top with foil. Place a baking sheet on the rack below your pie to catch any bubbly juices.
Let cool on wire rack until you can handle it enough to deliver to your tattoo artist. Or your friends out back. Or your mouth.
I really enjoyed this pie – but it was more like a cobbler because as you might see from the recipe above, I did not add corn starch to the berry mixture. Do that. Add about 2½ tablespoons corn starch to the berry mixture to help gel some of those juicy, juicy berries.

Overall, though, this was a great pie – easy to make, fun to decorate, and a great gift.

You've got a little summer left. Give this pie a try.


And now I'm done with summer pie recipes. On to the fall pies!   

Tuesday, September 09, 2014

Peach Pie


Summer isn't quite over yet. Sure, the leaves are falling off of the trees, kids are back in school, and the unofficial end of summer has passed, but it's going to be 90 on Saturday here in Portland, so no, summer isn't over yet.

And summer means pie. Today and tomorrow will be my last two summer pie recipes. For this summer. Probably.

Let's start with peach pie. Take my very favorite pie dough recipe, fill it with summer stone fruit (you can count on Smitten Kitchen for bad ass pie fillings. And pies, if you want to just do everything Deb did), and bake. Plus I made a lattice top for the first time ever.

Peach Pie modified from Smitten Kitchen:

Makes 1 9” pie

1 full recipe best pie dough ever (no arguments) 

Filling-
About 3½ lb. peaches (approximately 6 large, 7 medium or 8 small)
1 Tb. fresh lemon juice, from about half a regular lemon
¼ c. granulated sugar (use 1/3 c. for a sweeter pie)
¼ c. light brown sugar (ditto)
1/8 tsp. ground cinnamon
Few gratings of fresh nutmeg
1/8 teaspoon table salt
2 Tb. minute tapioca, ground to a powder, or 3 tablespoons cornstarch or potato starch

Finish-
1 Tb. milk, cream, or water
1 Tb. coarse or granulated sugar

Make the pie dough. Then prep filling. Bring a large saucepan of water to boil. Prepare an ice bath. Make a small x at the bottom of each peach. Once water is boiling, lower peaches, as many as you can fit at once, into saucepan and poach for two minutes. Using a slotted spoon, transfer to ice bath for one minute to cool. Transfer peaches to cutting board and peel the skins. In most cases, the boiling-then-cold water will loosen the skins and they’ll slip right off. In the case of some stubborn peaches, they will stay intact and you can peel them with a paring knife or vegetable peeler and curse the person who made you waste your time with poaching fruit. These were my favorite recipe directions ever.

Halve and pit the peaches, then cut into about 1/3-inch thick slices. You’ll want 6 cups; it’s okay if you go a little over. Add to a large bowl and toss with lemon juice. In a small dish, stir together sugars, cinnamon, nutmeg, salt and cornstarch until evenly mixed. Add to peaches and toss to evenly coat.

Preheat oven to 425 degrees.

Yell peach pie assemble! Then put it together yourself because this is a pie, not a giant cartoon robot fighting force. Flour counter, unwrap your first dough (if the two pieces look uneven, go for the smaller one) and put it in the middle and flour that too. Be generous. Start rolling your dough by pressing down lightly with the pin and moving it from the center out. You’re not going to get it all flat in one roll or even twenty; be patient and it will crack less. Roll it a few times in one direction, lift it up and rotate it a quarter-turn. And that’s what you’re going to continue to do, roll a couple times, lift the dough and rotate it. Re-flour the counter and the top of the dough as needed–don’t skimp! You should be leaving no bits of dough on the counter and none should be stuck to your pin. If at any point, the dough starts to get sticky or soft, it’s warming up and will only become more difficult to work with. Transfer it back to the fridge for a few minutes (or even the freezer, but for just a minute) to let it cool, then resume your rolling process. I have an amazing marble slab that I got for my birthday. If you do also, put this in the fridge while before working on your pie dough – it's amazing.

Once your dough is a 12- to 13-inch circle, transfer pie dough to a standard pie dish by folding it gently into quarters (making no creases), arranging the folded corner into one quadrant of the bottom of your tin and gently unfolding it to fit over the base. Trim the overhang to one inch.


Scoop filling into bottom pie dough, including any accumulated juices (they contain the thickener too, also: tastiness). Roll out your top pie dough using the same procedure, until it is 12 to 13 inches in diameter. If you’d like to make a regular lidded pie, use it as is, cutting some decorative vents in the pie lid before baking. To make a lattice-top pie, cut the pie dough into strips anywhere from 1/2 to 1-inch wide with a pastry wheel, pizza wheel or knife. Arrange every other strip across your pie filling in one direction, spacing the strips evenly. Fold back every other strip gently on itself and add the longest remaining strip in the other direction. Fold the strips back down, repeat with the other strips until a full lattice-top is formed. Trim the lattice’s overhang to the diameter of the pie dish’s rim (i.e. no overhang; only the bottom crust will have that and this is a case of do as I say, not as I do, because I totally forgot this detail when I was making the above pie). Gently fold the rim of the bottom crust over the lattice strips and crimp decoratively. Follow these directions carefully – I managed to make a pretty lattice top pie on my first go, so these have to be good directions.

Finish pie by brushing with milk, cream, or water and sprinkle with sugar.

Bake pie for about 20 minutes in the preheated oven, until the crust is set and beginning to brown. Reduce oven temperature to 375 and bake pie for another 30 to 40 minutes, until filling is bubbling all over and the crust is a nice golden brown. If the pie lid browns too quickly at any point in the baking process, you can cover it with foil for the remaining baking time to prevent further browning.

Cool pie for three hours at room temperature before serving. I know you won’t listen to Deb — there’s hot delicious pie to be eaten, after all — but if you’re concerned about the runniness of the pie filling, keep in mind that the pie filling does not fully thicken until it is fully cool. Deb is right. You should wait. Pie can be stored at room temperature or in the fridge; from the fridge, it will be even thicker.
From the fridge, you might find yourself standing in front of it, door open, eating pie directly from the pie plate. Maybe. I'm not saying that's what happened over here. Don't worry about it. Do worry that you're not eating this yet. Go finish off the season with this pie.

Or the one I post tomorrow. Or both. Up to you. Pie is great, so I won't judge.
Tuesday, August 26, 2014

Raspberry-Lemon Shrub

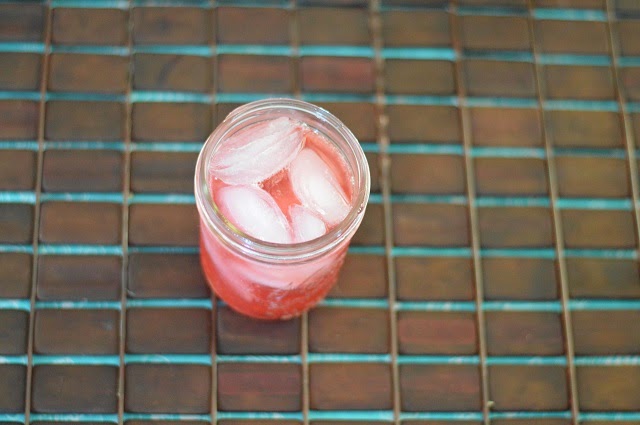
Summer is coming to an end. Well, supposedly. It was over 90 degrees today, so it doesn't really feel like it. Soon enough, though, all those tasty fruits of summer will be less abundant. Let's get at them while they're still everywhere and so so good.

Shrubs are awesome. They're fermented fruit, vinegar, and sugar. So easy to make and great with sparkling water – or in cocktails, if you're in the mood.
Go enjoy the last bits of summer! Sit on a porch and sip this.

Raspberry-Lemon Shrub via Reclaiming Provinical:

Yield: approx. 2 cups syrup

2 c. raspberries
Zest of 1 lemon
10 black peppercorns, slightly crushed
1½ c. sugar
1 c. white wine vinegar
1 c. apple cider vinegar

Combine raspberries, lemon zest, peppercorns, and sugar in a bowl or jar, stirring to evenly coat the fruit. Allow mixture to sit for around 1 hour, then crush until everything is nice and broken up. I used a potato masher. Cover and let sit for 24 hours. At room temperature is fine, but feel free to stick it in the fridge too.

After 24 hours, mash the mixture again, trying to crush the fruit as much as possible. Let it sit for another 24 hours.


Add the vinegars and stir well. Store at room temperature for 7–9 days, giving it a good stir each day. When finished, pour the mixture through a cheesecloth-lined sieve, then transfer to a clean jar or container. Store syrup in the fridge.
For drinks, add 1 part syrup to 2.5–3 parts sparkling water or mix it in with your favorite cocktail. I think this would make for a killer Moscow mule.


Sunday, August 10, 2014

Tomato Scallion Shortcakes with Whipped Goat Cheese


I don't really need to get into how many times I've referenced Smitten Kitchen on this blog (I'm too lazy to link them all. That's why.). It's a lot. This is the perfect summer recipe because a) your oven isn't on for very long and b) it involves summer's best fruit masquerading as a vegetable – the perfect summer tomato.

Just go make these.

Tomato Scallion Shortcakes with Whipped Goat Cheese from The Smitten Kitchen Cookbook:

Makes 6-8 short

For the scallion biscuits -
2 c. plus 2 Tb. all-purpose flour
2 Tb. baking powder
¾ tsp. salt
5 Tb. unsalted butter, chilled and cut into cubes
1 scallion, thinly sliced
1 c. buttermilk

For the tomato salad -
1 tablespoon olive oil
1½ Tb. red wine vinegar
⅛ tsp. salt
Pinch of sugar
Freshly ground black pepper
½ lb. (approximately 1⅓ c.) cherry or grape tomatoes

For the topping -
3 Tb. heavy or whipping cream
4 oz. goat cheese, softened
2 scallions, thinly sliced

To make the biscuits, preheat oven to 425 degrees. Line a baking sheet with parchment paper; set aside. In a large bowl, whisk the flour, baking powder, and salt together. Use a pastry blender to cut in the butter until the mixture resembles coarse meal. Stir in the scallion, then add the buttermilk and stir until the dough just comes together.
On a floured surface, pat or roll dough to ¾-to-1-inch thickness and cut into 3-inch rounds, reforming scraps as needed. You will get about six to eight biscuits. Arrange 2 inches apart on the prepared sheet. Bake about 15 minutes, until golden brown.

Meanwhile, make the tomato salad. In a bowl, whisk together everything except the tomatoes. Halve or quarter the tomatoes, then add them to the bowl with the dressing and toss to combine.

And now the best part – making the whipped goat cheese.

In a separate bowl, use an electric mixer to whip the cream until peaks form. Add the goat cheese and beat until the mixture is light and fluffy.

Split each warm biscuit in half. Generously spoon each half with the tomato salad and dressing. Dollop with whipped goat cheese and sprinkle with scallions. Serve immediately. Or keep them disassembled, transport them to a big mom and baby picnic, and then assemble them and eat far too many. But hey, it's summer and tomatoes will only be this delicious for a short while.


Tuesday, July 29, 2014

Peach Pie Ice Cream

You know what to do when life gives you lemons. Lots of things, obviously. Lemons are a very versatile and necessary piece of produce. To modify that common phrase, you take something not so great (still don't get it because lemons are awesome) and make it great. Well, what do you with pie dough that has failed?

I know I've said, out loud and online, that Thomas Keller's pie dough never fails. I still stand by that . This was user error. It came together beautiful. I just rolled it out too thin and when blind baking it, it slumped and started to crack on the bottom. Tragedy! Or vehicle for a great summer recipe.

I love Saveur (thanks Mom!) and with my fail crust and this recipe in mind, a lovely dessert was made. Plus it has lemon. Plus you don't have to peel anything. Plus...just go make it!

Peach Pie Ice Cream modified from Peach Ice Cream via Saveur

Makes 1 quart

1½ c. whole milk
2 eggs
2 egg yolks
1¼ c. sugar
1¼ c. heavy cream
1 pint ripe peaches, chopped, with peel on
Juice of ½ lemon
Dash each of ginger, cinnamon, nutmeg, and allspice.

Fully bake pie dough. You don't need to get it set in a pie pan – roll it out and bake it on a cookie sheet. Set aside and allow to cool fully.

Place milk in the top of a double boiler and bring just to a simmer over gently boiling water over medium heat.

Meanwhile, whisk together eggs, egg yolks, and ¾ cup of the sugar in a mixing bowl. Lightly whisk in ¼ cup of the hot milk into the egg mixture, then whisk egg mixture into remaining milk in top of double boiler. Cook, stirring constantly with a wooden spoon, until mixture is thick enough to coat back of a spoon, about 15 minutes.

Transfer mixture to a mixing bowl; stir in 1 ¼ cups heavy cream and spices; refrigerate until cold.

Combine peach, remaining sugar, and lemon juice in a mixing bowl; the peel will add a rosy color. Cover and refrigerate for 2 hours. Don't worry if it doesn't get all that rosy. Mine didn't.

Break up pie crust into small pieces. They don't have to be even.

Drain juice (return peaches to refrigerator) and stir into cream base. Pour into an ice cream maker and process according to manufacturer's directions. Just before mixture is set, add peaches. Turn off machine and mix in pie crust pieces with a wooden spoon.

Freeze for at least 2 hours for hard pack ice cream.
Have a barbecue. Eat a lot of ice cream – or as one taster called it “piescream”. It's good. Make it and share.  

Saturday, July 26, 2014

Red Raspberry Pie

There are so many wonderful things to do with raspberries (cake. ice cream. sauce.), but summer really is about pies. My mom group had a French picnic for Bastille Day and that meant lots of food. We could have said “let them eat cake” (historically inaccurate, BTW), but instead I said “let's eat pie.”

Red Raspberry Pie via Alice Bay Cookbook:

Makes 1 9” pie

1 9” baked pie shell (use one half of the best pie dough recipe ever and fully blind bake it.)

1 quart fresh raspberries
¾ c. sugar
2½ Tb. corn starch
¼ tsp. salt
½ c. water
½ c. fresh orange juice
Remove 1 cup of raspberries and puree in blender or press through sieve. (Or use a food processor). Set aside.

In a medium saucepan, combine sugar, cornstarch, salt, water, and orange juice. Cook over low heat, stirring constantly, until thickened, about 10 to 15 minutes. Add pureed raspberries.
Place whole raspberries in pie shell. Pour syrup over the berries. Chill in refrigerator for at least 4 hours.


Super easy. Super summery. This one you should do before summer is over.

Tuesday, July 22, 2014

Peach and Sour Cream Buckle

I'm a sucker for fruit desserts and I'm a sucker for desserts with silly names. Fool? Slump? Grunt? Buckle? Yeah, I'm all about that. Put it together and I'll make it. Tell me there's a Cascadia party and you should bring a local goodie? I guess this buckle will have to do.

It involves peaches I picked at Sauvie Island Farms. Raspberry picking was the primary goal (and I got a LOT of raspberries. Three different recipes worth plus all of the berries that ended up in my and my baby's belly), but peaches could not be ignored. What says summer like a peach? Plus I'd never picked a peach before. Other local things were the flour (Bob's Red Mill - Milwaukie, Oregon), the dairy (Tillamook - Tillamook, Oregon and Sunshine Dairy - Portland), and the eggs (New Seasons PacNW eggs). Oh, and it's delicious. And so so easy.

I followed the recommendation of using half regular granulated sugar and half brown sugar. I recommend you do too.

Peach and Sour Cream Buckle via Herbivoracious

Yield: 16 squares

For the streusel-
½ c. sugar
6 Tb. all-purpose flour
¼ tsp. cinnamon
½ tsp. kosher salt or sea salt
4 Tb. (½ stick) cold butter, cut into small pieces

For the cake -
1 ¾ c. whole wheat pastry flour (regular whole wheat worked for me)
2 tsp. baking powder
1 tsp. kosher salt
4 Tb. soft unsalted butter
½ c. granulated sugar
½ c. brown sugar
1 large egg
1 tsp. vanilla
½ c. sour cream
¼ c. whole milk
3 c. peeled and sliced peaches (about 12 slices per peach)

For the streusel, mix all ingredients except the butter in a small bowl. Add the butter and work it into the flour mixture with your fingertips until it looks like coarse cornmeal, just like when making a pie crust. It is fine if there are a few larger bits of butter. Refrigerate until ready to use.

Preheat oven to 350. Butter a 9×9 baking pan.

Whisk together the flour, baking powder and salt.

In a mixer, beat the butter, sugar, egg and vanilla until fluffy. Beat in the sour cream and milk. Gradually add the flour mixture and combine gently until just mixed, like you would for pancake batter.
Gently fold in the peaches. Your hands are probably the best tool for this. It will seem like way too many peaches. Pour the batter in the pan, and sprinkle on the streusel top evenly. Bake until browned and a toothpick comes out clean, about 40 minutes.
Let cool for 20 minutes. Serve to fanfare and eat plenty.

Where I've Been

I've been here! Well, here is relative. We moved a couple months ago to a new place in Portland, went to Alaska, and in the middle of all that we've been going to the mountains, the beach, a park, another park, another another park, BBQs, and many meet ups filled with moms, babies, and food.

I've been cooking and baking. Taking pictures of it too. 

So why are is it the end of July and there have only been 2 posts this year?

A toddler and a serious case of wanting to do anything but blog when he's asleep. Like binge watching TV shows (hi Netflix!). Playing board games. Playing dumb free games on my phone. Sleeping. Going to the gym.

Lazy!

I have 13 posts worth of pictures I just pulled off of the camera and I have two things in my kitchen right now that need photos. See, need. I love this little neglected blog. I love sharing food joys and sorrows.

So I'm back at it.

One thing I used to pride myself on was posting seasonal things within the season. As such, I'll be posting new things first instead of working my backlog in the order I made them. It's summer and it's time to read about fruit pies and ice cream (yup and yup), tomatoes (yup), peaches (you betcha!). I'll get to older things like soups, winter fruits, my birthday cake (April birthday - whoops!).

And I will get to them.

I'm back at it.

Promise.

Wednesday, March 26, 2014

Sweet Potato Blintzes with Farmer's Cheese


My son is officially in toddlerdom, especially when it comes to meal time. Things that were once beloved now are given to the dog or belong to the floor (which then goes to the dog). Sometimes within one meal a food goes from being bad to good to bad again (mac and cheese is not a floor food!). It’s hard, especially when you worked hard on something, but it’s all worth the effort in turning my child into a foodie.

These were a hit on dinner 1 and breakfast 1 and less so for dinner 2. The sauce, which is I changed to blueberry because it is a food he still very much enjoys, was always popular. So despite the potential of the dog getting a fabulous meal, I’d say these are worth the time and, as a bonus, freeze really nicely. Adults can have some too and they taste extra great when you save them from the floor.

I’m including the original cranberry syrup recipe as I made it for the first set and it really is quite good. If you decide to go the blueberry route, cut the sugar in half.

Sweet Potato Blintzes with Farmer’s Cheese via The Smitten Kitchen Cookbook:

Yield 16 blintzes

Wrappers-
1½ c. milk (whole is great, other fat levels are also fine)
6 large eggs
1½ c. all-purpose flour
¼ tsp. table salt
1 Tb. melted butter or neutral oil, for brushing the pan, plus additional for cooking blintzes  

Filling-
About 4 medium sweet potatoes
2 c. farmer’s cheese
2 large egg yolks
¼ c. sugar
½ tsp. ground cinnamon
Few fresh gratings of nutmeg
Pinch of salt

Cranberry syrup-
2 c. fresh or frozen cranberries
¼ c. orange juice
½ c. sugar

Make the wrapper batter by combining all wrapper ingredients except for butter or oil in a blender. Pour the batter into a bowl, cover with plastic wrap, and refrigerate for an hour or up to 2 days.

Preheat your oven to 400 degrees. Bake the sweet potatoes on a tray for about 40 minutes, until soft. Let them cool in their skins. Once they’re cool, peel the sweet potatoes and mash them or run them through a potato ricer.
Preheat a medium skillet or crepe pan over medium-high heat. I don’t have a crepe pan. You probably don’t either. Don’t sweat it, your skillet is fine. Once it’s heated, brush the pan lightly with melted butter or oil. Pour ¼ cup batter into the skillet, swirling it until it evenly coats the bottom, and cook, undisturbed, until the bottom is golden and the top is set, about 2 minutes. No need to flip them. The key here is even heat and just a little bit of grease in your pan. Sounds complicated and come out perfect. Transfer the wrapper to a paper-towel-covered plate, cooked side down. Continue with the remaining batter.

Once the sweet potato puree is cool, stir in the farmer’s cheese, egg yolks, sugar, cinnamon, nutmeg and salt.

If you plan to freeze these, do so before the browning step. They’ll taste great if you wait.

Preheat oven to 200 degrees. Put an ever-so-slightly heaped ¼ cup of filling in the center of each wrapper, and fold the opposite sides of wrapper over filling until they barely touch. If you had to read that 14 times like I did, it means take the two vertical sides of the wrapper. It’ll make sense in a second. Pull the end of the crepe nearest to you over the filling (away from you), and roll the rest of the way, to completely enclose filling, forming elongated, egg-roll-shaped packets. Reheat with the remaining blintzes and filling. Reheat your crepe skillet - or a larger one, if you want to cook more blintzes are a time - over medium heat and add more butter or oil to coat the pan. Place a few blintzes, seam side down, in a skillet, and cook them until they are golden brown and crisp, for about 5 minutes on each side. Transfer them to a baking sheet, and keep them warm in the over until they are ready to serve.
Now make the syrup. In a saucepan, over medium heat, simmer the cranberries, orange juice, and sugar together until the berries burst, about 7 to 10 minutes. Reduce the heat to medium-low, and simmer for 5 minutes more. Strain the syrup into a bowl.
Serve the blintzes warm with a drizzle of cranberry syrup and/or a dollop of sour cream.

If you’re lucky, your toddler will eat them and make you feel so proud. If not, they are also great in your own mouth.   

Thursday, January 09, 2014

Mini Pear Pies

The reason I hardly ever blog is I have this baby guy and he takes up a lot of my time and when he's sleeping or otherwise occupied with block stacking or chasing the dog around, I tend to zone out on silly phone games or cute pictures of animals on the Internet. So not blogging. I do think about it, though, and I continue to take pictures of the food I make (a thing I still do when not helping a baby stack blocks or be nice to the dog who puts up with a lot from a small thing that tries to climb on him all the time). Another thing I do is hang out with a great group of moms. So baking + hanging out with moms = trying to show off and bring tasty things to meet ups. I haven't done this in awhile, but this was an early hit.

I should probably try to show off again. And blog. But you know, block stacking.

Mini Pear Pies slightly modified from Mogwai Soup:

Makes 12 mini pies

5 pears, pealed and chopped
½ c. sugar
Peel of one lemon
1 Tb. lemon juice
Pinch of ground ginger
Pinch of cinnamon
Pinch of allspice
2 cardamom pods, crushed
Pinch of salt
1 Tb. of corn starch
A few Tb. of water
Butter or oil
1 egg beaten with a tablespoon of water

Make your amazing pie dough. Roll it out. Let it rest in the fridge. While you prep the filling, let the dough get to room temp and then roll it out. I used a not often used martini glass (a confluence of watching a lot of Sex and the City and turning 21) to cut out the bases and a drinking glass to do the tops.
Add all the filling ingredients except corn starch to a saute pan and cook on medium heat. After 10 minutes add the cornstarch and cook for 5 more minutes, if it is thickening too much you can add a few tablespoons of water. Cool off a bit before filling your pies.
Butter or oil the cups of a 12 cup muffin tin. Push in the bottoms of the pies, curling them up over the edge about ½ inch. Put about 1½-2 tablespoons of filling into each pie. Go for too little at first rather than too much. You still need to seal them. Cover with the tops and seal the edges with a fork. Brush with egg wash and sprinkle with some sugar.

Bake it at 400 degrees for about 30 minutes, checking after 20 or until nicely golden brown.
Cool in pan until you can push them out and cool on a rack. Transfer to some happy mommies or, you know, your mouth. Good times for everybody! Plus they look really fancy.
Related Posts Plugin for WordPress, Blogger...