I meant to post this on Tuesday, but the internet and my computer decided to not be friends. And then Wednesday I was just tired. Thursday I had coffee with an old friend in the morning and my friend Renai came into town that same afternoon. Today I had a job interview and now there's a lull and I'm posting! Hooray! My friend Amy will be in town tomorrow, so I will likely not be posting for another couple of days. I've got some good stuff coming though!
So here's the grand, final post of the appetizer extravaganza that was Aaron's birthday party:
When searching for ideas for birthday party appetizers, I of course checked out tastespotting. When I saw this popcorn recipe, I knew I had to do it. Aaron and I have a few plastic food baskets that we picked up years ago because they look exactly like the popcorn ones from Bullwinkle's, a pizza parlor in our home town. (I did not know they had a website until just now.) PS: How awesome is free popcorn with pizza? So awesome. More places should do this. Anyway, they spend most of their time sitting in the cabinet, unused. What a great opportunity this was to make something tasty and different for Aaron’s birthday and to use these lonely, unused baskets.
In addition to this, our friend Lindsay got us a great set of popcorns for Chrisannukah a couple of years ago. The Savannah Gold was my choice for this dish and it worked out perfectly. Mixing it all up was a bit of work, but the results were so worth it.
Spicy Rosemary-Cayenne Popcorn from montcarte.umbrela.com:
2 Tb. melted unsalted butter
1 Tb. dried rosemary
2 Tb. grated parmesan
1 tsp. brown sugar
1½- 2 tsp. cayenne pepper
¼ tsp. salt (I used kosher)
6 cups popped popcorn
In the bottom of a large bowl, mix the butter, rosemary, parmesan, brown sugar, cayenne and salt. Pour the popcorn into the large bowl. Stir the popcorn to evenly coat the kernels with the seasoning.
The top is a little more flavorful because some of the seasoning stuck to the bottom of the bowl and didn’t mix too well. It didn’t seem to matter though as this stuff was being munched up quite quickly. I most certainly will do this one again, even if it’s just for movie night.
And that’s part 4 and the end! I’ll finish off with a picture from the party and everyone starting to dig in (Carrina is the blur closest to the camera). All in all, I think it went rather well. Everything was tasty and though I got a bit frazzled at the end, it all turned out fine. And I even got to eat my own food, which is always a plus.
PS: Yes, those are THE cookies in the background.
Friday, February 27, 2009
Spicy Rosemary-Cayenne Popcorn
Labels:
appetizers,
cheese,
party,
popcorn,
rosemary,
vegetarian
Monday, February 23, 2009
Mini Turkey Meatballs
There are so many things wrong with the Food Network (Sandra Lee, Rachel Ray, Emeril, Bobby Flay…I need to stop before my head hurts), but some things are good. While I find Giada’s show annoying (soft focus lighting? Really? Oh she’s washing her hands again, let’s watch that!), her recipes are so delicious and easy to do. I’ve tried a few and have just loved the results.
For Aaron’s birthday (hooray for part 3!), I wanted to do something meat-y, but since I don’t eat a lot of meat, I wasn’t sure I could do a good meatball recipe and get it right. Then this recipe came to mind. I skipped the tomato sauce part at the end and kept them warm in my slowcooker while I worked on everything else. I think it helped compensate for the lack of tomato sauce simmering.
Mini Turkey Meatballs from Everyday Italian:
Makes 42 mini meatballs (I got fewer, but I made random sizes)
1 small onion, grated (I used half of a larger Vidalia onion)
7 garlic cloves, minced
1 large egg
¼ c. dried bread crumbs
3 Tb. ketchup
¼ c. chopped fresh Italian parsley leaves
¼ c. grated Parmesan
¼ c. grated Pecorino Romano
1 tsp. kosher salt
¼ tsp. ground black pepper
1 lb. ground turkey meat
Add the onion, garlic, egg, bread crumbs, ketchup, parsley, Parmesan, Pecorino, salt and pepper to a large bowl and blend. Mix in the turkey. Shape the turkey mixture into 1 1/4-inch-diameter meatballs (if you feel like being exact. I rarely do). Place on a large plate or baking sheet.
Heat the oil in a heavy large frying pan over medium-high heat. Add the meatballs and sauté until browned on all sides, about 5 minutes. Cook through, about another 10 minutes on lower heat. It was at about this point that I put them all into the slowcooker. They were still very moist and tasty when I removed them 30-40 minutes later.
I think these are an incredible appetizer and I may try them with the tomato sauce one of these days or with the fried mozzarella balls in pasta, as I mentioned earlier. Right now, though, I think they are great just as is with toothpicks. My friend Bryan was a pro, though, and managed to get both a meatball and a mozzarella ball on a single toothpick, so maybe as is can include much more than I think! Italian kebabs maybe? I’ll have to work on some of these ideas.
Fried Mozzarella Balls
I love fried cheese. Aaron loves fried cheese. I’m fairly sure even vegans love fried cheese, they just don’t eat it. I found this recipe on epicurious in one of their Oscar menu sections, but instead of an Oscar party, it was for Aaron’s birthday party! Yes, welcome to part 2. Besides, Aaron’s birthday was much more interesting than last night’s *yawn* Oscars. But enough of that.
These are actually much easier to do than I thought they would be. My hands did get messy and my friend Bryan helped me out as the party had already started when I was frying these up. Another result of party in motion was that I only got one picture of these and while they were frying. There’s a picture on the original recipe page, so check that out. Mine were approximately like those.
Fried Mozzarella Balls from Gourmet via epicurious.com:
Makes about 3 dozen. I think I had closer to 30, but I did eat some while frying, so who knows?
About 5 cups vegetable oil (I used regular olive oil, not extra virgin, as it has a decent smoke point)
1 pound drained marinated bocconcini (small mozzarella balls), patted dry (for me this was 2 8 oz. containers and there were about 9 left when I stopped)
3 large eggs, beaten
1 cup plain fine dry bread crumbs
The recipe also talks about using a deep-fat thermometer. I only have a meat one and these were fine. The average cook can tell when the oil is very hot and ready to go. Plus, it’s not like the cheese will be underdone. So don’t worry about that.
Heat oil in a large saucepan. Mine’s a 4 quart.
Meanwhile, double-coat bocconcini by dipping in eggs, then in bread crumbs, and repeating. Your hands will get messy. Toss them into the oil, wash hands, and repeat.
Working in batches of 10, lower balls into oil with a slotted spoon and fry, turning occasionally, until golden brown, about 30 seconds per batch. Transfer to paper towels to drain. A few of mine burst and tried to stick to the paper towels. They were still tasty once removed. The original recipe also says to season with salt here, but I think that’s unnecessary. If you get a decent quality mozzarella, a decent quality bread crumb, and good eggs, why add salt? The mozzarella is key. Don’t use a cheap one as they don’t melt as well and they don’t taste as good.
Serve immediately as they are best warm, although some of my friends, like Carrina, did enjoy them a little colder. These are a wonderful, wonderful appetizer. They look pretty, they taste great, and it’s fried cheese! One of the reviewers on epicurious said they used them in place of meatballs for spaghetti and meatballs. How perfect! I may do that sometime, possible combined with the mini turkey meatballs I’ll be posting about later.
Labels:
appetizers,
cheese,
italian,
party,
vegetarian
Sunday, February 22, 2009
Mashed Potato Puffs
Part 1 of all the lovely snacks I made for Aaron’s birthday party yesterday comes from my own imagination. I bought puff pastry sheets from Trader Joe’s a couple of weeks ago because I couldn’t find phyllo dough and really wanted to do some kind of puff. These came up when planning all the appetizers I wanted to do for the party. I love the idea of potatoes, cheese and garlic together on a puff pastry (hey! Those are all the things I love together just like I said in my bio!).
Anyway, the recipe is based on Aaron’s and really, any recipe would do. If you have a fave, go with that. This one was really good though.
This is what I did:
8 medium potatoes (4 blue, 4 white)
3 Tb. unsalted butter
6 cloves garlic, minced
Large splash of milk
Salt and ground pepper to taste
½ c. Monterey jack cheese, grated
Wash and peel potatoes. Cut in half or quarters.
Bring water to a boil in a medium saucepan. Toss in the potatoes and cook until a fork goes in easily, about 10 minutes or so. While the potatoes are boiling, take the puff pastry sheets out of the freezer and thaw. Drain the potatoes and place in a bowl (I used my mixer) with the butter. Blend and add milk until a consistency you enjoy has been achieved. I have absolutely no idea how much I added, but it was great. Mix in salt and pepper to taste, garlic, and cheese.
Heat oven to 400 degrees.
With a sharp knife, cut pastry into squares and place on a greased baking sheet. Spoon mashed potatoes onto the middle of each piece. Bake in hot oven for about 20-25 minutes. The package said 15, but the pastry really wasn’t puffy or crispy enough at that point. Just check and watch until the pastry looks good.
Serve immediately and snag some before everyone else eats them.
Labels:
appetizers,
baking,
cheese,
garlic,
original,
party,
potato,
vegetarian
Saturday, February 21, 2009
Aaron's Birthday!
Today is my husband's birthday and I have spent all afternoon getting ready. I'm making a variety of snacks and now have pretty much everything prepped. All I have to do now is wait until it gets a little closer to party time and then off I go. I'll be posting about these over the next couple of days. They are from all over the place: via Tastespotting, Epicurious, Food Network (gasp!), and my own brain.
Things are looking tasty. Now to celebrate!
Labels:
party
Wednesday, February 18, 2009
Mexican Brownies
Tastespotting is an obsession. Well, sorta. It’s just really great food porn, which should be obvious since this will be the 4th mention of it in this blog. Anyway, I came across this recipe the other day and thought “bingo! Now I know what to do with all that Ibarra I have sitting around.” It’s just been sitting in the pantry since I worked on this project back in December. I love making brownies, especially since I now own a double boiler, and it seems like everyone likes them. Doing a twist on the same old thing is always fun.
One thing that did bug me is that the original recipe did not include cinnamon or chili powder. How can you call it Mexican brownies without those? Both ingredients enhance the special flavor that is Mexican chocolate. I first learned about chili powder in chocolate in my first Spanish class back in high school. My teacher was amazing and told us great stories about Spain and Mexico and food. I think it is a fabulous pairing and it goes really well with these brownies.
Mexican Brownies from foodlibrarian.blogspot.com:
Makes one delicious pan of brownies
3 circles Ibarra chocolate
2 oz. (2 squares) unsweetened chocolate
12 Tb. (1½ sticks) butter
1 c. plus 2 Tb. brown sugar
3 eggs
2 tsp. vanilla
1¾ c. flour
½ tsp. baking powder
½ tsp. salt
4 tsp.-ish cinnamon plus more for the top (I only sort of measured)
A bit of chili powder (about ½ tsp.)
Raw sugar
Heat oven to 350 degrees.
Melt chocolate with butter in the top part of a double boiler, stirring occasionally with a wooden spoon. You can totally fake a double boiler with a bowl resting on top of a pot with simmering water. In the meantime, mix the dry ingredients together in another bowl. After the chocolate cools, beat in the sugar and the eggs, one at a time. Mix in vanilla then fold in dry ingredients. It was at this time I decided that there wasn’t enough cinnamon or chili powder in the mix, so I added more. Adjust flavor to taste.
Lightly grease a pan and sprinkle the bottom with raw sugar. Pour in the batter. Bang the pan if you need to in order to even out the batter in the pan. Sprinkle the top with more raw sugar and cinnamon.
Bake for about 25 minutes or until a toothpick inserted in the center comes out clean.
Let cool on a rack before eating.
These are extremely rich, dense, fudgy, and delicious. I really, really like them. Aaron says a glass of milk is necessary. Next time I do them (because I WILL do these again), I’ll add a smidge more chili powder. Other than that, awesome! I’m really impressed with how well these turned out.
Saturday, February 14, 2009
Savory Crepes and Dessert Crepes with Lemon Curd and Strawberry Compote
Yesterday afternoon involved me being hungry and grumpy and reading Tastespotting, which is a terrible combination. Because I’ve been using my Moosewood cookbook so much, it was up here next to the bed when I usually blog. Yes, I blog from bed. That’s what my laptop is for! Anyway, I started flipping through that and came across her recipe for crepes, which I have on my ambitious list of recipes to make. Of course, while looking through it, I realized a) there was no milk in the house and b) hardly any eggs.
Luckily, Aaron came to my rescue and helped me out of my grumptastic mood and went grocery shopping. He returned with all the things I needed and I was off on my mission to make crepes! The recipe itself is quite easy. The hard part of finding the correct pan temperature and spinning the pan around to get a good sized crepe. My first one was perfect…so we ate it. The next few were weird shaped or split it half. So I ate those ones too. Finally, I was able to get into a groove and made 5 decent size ones and 2 small ones. My goal is to be able to make good size crepes consistently. It is difficult! The thing starts cooking and you have to spin it around before all the batter runs out and you get spindly bits that stick out. Man, Alton Brown made this look far too easy. (PS: I totally have a nerd girl crush on Alton. His show is almost the only watchable thing on the Food Network.)
Anyway, despite the mishaps, these are very, very tasty. The thing I love about crepes is that you can have them for dinner, for dessert, just because, and you can fill them with whatever you want. Or just eat them. Last night we had them for dinner and after our friend came over, a couple for dessert.
Crepes from The New Moosewood Cookbook:
Yield: 8-10 7” crepes (if you’re good!)
1 large egg
1¼ c. milk (I use 1% because that’s what Aaron drinks. I have milk issues.)
1 c. flour
¼ tsp. salt
A few drops of oil for the pan
She has a note here that you need a 6 or 7” crepe or omelette pan. As I recall from Alton’s show about crepes, this is crap (if you pronounce that with Maurice Chevalier-esque French accent, it’s a bad pun). A heavy, nonstick skillet will work. Even if mine weren’t all even and perfect, the pan performed like a champ. I’m just a n00b.
Place egg, milk, flour, and salt in a blender or food processor, and whip until smooth.
Heat pan. After a few minutes, lightly brush its entire surface with oil. When the pan is hot enough to sizzle a drop of water instantly on contact, pour in approximately ¼ cup batter/ Slowly tilt the pan in all directions until the batter thoroughly coast the bottom. Pour off any excess batter. The pancake should be thin. This is the hard part. Mine weren’t perfectly thin or perfectly shaped, but it got easier as I went on. This is definitely something that needs practice. Cook on one side over medium heat until set, about 20 seconds, then turn over (use a plastic spatula) and cook for just another second or two on the other side.
Turn crepe out onto a clean, dry dinner plate, and repeat the procedure until you have used up all the batter. (If you keep the pan hot, you won’t have to add any additional oil. I did not find this to be true for me as I had to keep adjusting the heat. Maybe when I get it right…) You can pile the finished crepes on the plate – they won’t stick together.
Cover the plate tightly with plastic wrap and refrigerate until use. The crepes will keep well for at least a week.
To fill, simply place a small amount of whatever filling at one end of the crepe and fold over sides and end to make a need little packet. Filled crepes can be heated gently, covered, in a 325 degree oven or sautéed in a little butter just before serving. My husband and I did ours a little differently. We tried to fold them in packets with an open middle to resemble some we had while in Tours, France. This worked out, but involved the use of many toothpicks.
Anyway, for our dinner crepes, we had:
Sharp cheddar cheese
Sweet onion, chopped
4 eggs, fried (like an omelette that hasn’t been folded over)
Hot sausage (for Aaron)
Fill these and place covered in a 325 degree oven for about 10 minutes or until the cheese has melted. Very, very tasty.
The dessert ones were a little more complicated. I was so in love with the Citron Strawberry ones we had at Le Happy a couple weeks ago, I had to try it at home. The original lemon curd and strawberry compote recipes can be found here and here.
Lemon Curd from Gourmet Magazine via epicurious.com:
¾ c. fresh lemon juice (this was about 2 medium size lemons)
1 Tb. finely grated fresh lemon zest (1 medium size lemon)
¾ c. granulated sugar
1 stick (½ c.) unsalted butter, cut into bits
2 Tb. cornstarch
½ tsp salt
4 large egg yolks
Simmer lemon juice, zest, sugar, butter, cornstarch, and salt in a 2-quart heavy saucepan over moderately high heat, whisking constantly, 1 minute. Lightly beat yolks in a small bowl, then add 1/4 cup lemon mixture, whisking. Add yolk mixture to remaining lemon mixture, then reduce heat to low and cook, whisking constantly, until curd is thick enough to hold marks of whisk, about 2 minutes. Transfer to a bowl, then cover surface with plastic wrap and chill.
Strawberry Compote from Gourmet Magazine via epicurious.com:
2 ½ c. strawberries (I used whole frozen unsweetened and it worked out fine), trimmed
¼ c. fresh orange juice (I used Trader Joe’s concentrate and again, fine)
2 tsp. granulated sugar
Halve strawberries lengthwise if small or quarter if larger. Whisk together orange juice and superfine sugar in a bowl until sugar is dissolved and add strawberries, tossing to coat.
Fill the crepes with lemon curd and compote and serve with extra because they are both just so delicious. Heat gently for about 5 minutes. As you can see from the pictures, I gave up on the whole packet thing and just folded them in half. Still tasty though! I think this was a good home attempt at a restaurant recipe. I have a bunch of lemon curd leftover, so I need to figure out something to do with that. Maybe just make more crepes? We’ll see.
Labels:
cheese,
dessert,
fruit,
sausage,
vegetarian
Thursday, February 12, 2009
Spinach-Ricotta Pie
Yes, yes, it’s another Moosewood recipe. I had actually wanted to do this one last week, but surprisingly didn’t have enough onion. So now I have two and a half just in case that same problem tries to come up again.
For tips on doing the pie crust, check out my post when I made pumpkin and apple pies for Thanksgiving here. The crust used for this recipe is pretty good, but if I do this again, I’ll use the other one. It’s a little flakier and easier to work with. I did enjoy this pie quite a bit and the filling was really easy to put together. I cheated a bit and used frozen spinach instead of fresh, but I think that made the cooking part just a little easier. If you also chose the cheater route, make sure the spinach is fully drained before you use it.
Spinach-Ricotta Pie from The New Moosewood Cookbook:
Serves 4-6
For the crust-
6 Tb. butter, cut into small pieces
1½ c. flour
About 4 Tb. cold water (or milk or buttermilk)
For the filling-
1 tsp. butter
1 c. minced onion
1 lb. spinach, stemmed and finely chopped
½ tsp. salt
Freshly ground pepper, to taste
1 tsp. basil
1 lb. ricotta cheese
2 or 3 beaten eggs (I used two)
3 Tb. flour
½ c. packed grated sharp cheese of your choice (I used cheddar)
A dash of nutmeg (optional. I love how nutmeg mixes with cheeses, so I chose to do this)
Optional toppings (1 c. sour cream, lightly beaten and paprika. I just used the paprika.)
Use a pastry cutter, two forks, or a food processor to cut together the butter and flour until the mixture is uniformly blended and resemble coarse cornmeal. Add just enough liquid to hold the dough together. Roll out the dough and form a crust in a 9-or-10-inch pie pan. Mine’s 9.5”. I find this very funny for some reason. Set aside.
Heat oven to 375 degrees. Melt the butter in a medium-sized skillet, add the onion, and sauté for 5 minutes over medium heat. Add the spinach, salt, pepper, and basil, and cook, stirring, over medium-high heat until the spinach is wilted. Since my spinach was frozen and fairly wilted to begin with, I let this cook for about 5-7 minutes. Remove from heat.
Combine all the filling ingredients in a large bowl and mix well. Spread into the unbaked pie shell. For an extra rich pie, top with sour cream and spread to the edges of the crust. Dust generously with paprika. I love paprika, so I just dusted it with paprika.
Bake 40 to 45 minutes, or until firm to the touch at the center. Mine was done at 40 minutes even. Serve, hot, warm, or at room temperature.
This is very tasty and filling. I meant to serve it with salad, but was so hungry I just dug in and now I’m stuffed. Good thing there’s a lot of spinach in there! My husband suggested adding chicken next time, which I think would go very well with the spinach and ricotta. I think this would also make a great filling for calzones.
Labels:
baking,
cheese,
pie,
spinach,
vegetarian
Wednesday, February 11, 2009
Jack Cheese and Jalapeño Corn Bread
I love corn bread. It is earthy, delicious, and goes with so many different kinds of cuisine. It is especially tasty with chiles and spicy foods. When I decided to make the Brazilian Black Bean Soup, I knew it would be awesome with corn bread. This is a super simple bread to make and it is perfect. I only made one loaf, so cut the recipe in half if you want to do that.
Also, it goes great with the red chile honey I made last week.
Jack Cheese and Jalapeño Corn Bread from Flavored Breads:
Makes two 1-pound loaves
1½ c. lukewarm milk
½ c. lukewarm water
2 Tb. canola or vegetable oil
1 Tb. active dry yeast
4 c. all-purpose flour
1 c. cornmeal
¾ c. whole-wheat flour
4 tsp. salt (I used kosher)
2 tsp. cumin
1 tsp. freshly ground black pepper
½ c. chopped fresh cilantro
1 c. grated Monterey jack cheese
7 jalapeño chiles, stemmed, seeded, and minced
Preheat oven to 400 degrees.
Gently whisk the milk, water, and oil in a large mixing bowl. Sprinkle yeast over the milk mixture and let sit for 3 or 4 minutes. Combine the dry ingredients (all-purpose flour, cornmeal, whole-wheat flour, salt, cumin, and black pepper) and sift into a separate mixing bowl.
Add the dry ingredients to the yeast mixture and mix or knead for 6 minutes, or until the dough is smooth and elastic. Add the cilantro, cheese, and jalapeños, and mix or knead until thoroughly and evenly distributed. Transfer the dough to a lightly oiled bowl and cover with plastic wrap. Let rise in a warm place for 20 minutes.
Dust a baking sheet with cornmeal or flour. I used a bread pan because I like the shape and it works really well with corn breads. Divide the dough into 2 equal portions and shape into round loaves. Or, do what I did, and put it in a bread pan. Place the loaves on the prepared baking sheet and cover with plastic wrap. Let rise for 25 minutes.
Bake for 18 to 20 minutes, or until golden brown and a paring knife or toothpick comes out clean when inserted in the center. Place the loaves on a rack to cool. Cut when cool or slightly warm and serve.
Even Aaron, who’s not a big fan of corn bread, really like this one. Especially with the soup. It’s also great crumbled up in the black bean soup the next day. Yum!
Tuesday, February 10, 2009
Brazilian Black Bean Soup
The other day I went through a few of my cookbooks and chose a bunch of recipes I wanted to try. One of the books that I ended up choosing a number from is my Moosewood Cookbook. Although I do eat a little bit of red meat now, I’m still a huge fan of vegetarian recipes and still eat pretty much the same way I did before I started eating red meat again.
I have never made black bean soup before and this one looked fairly simple. It was fun soaking the beans, which is something I remember seeing on my counters as a child. I was also extra careful this time when blending up part of the soup based on my splatter incident with this soup. It smells amazing, it looks amazing, it is amazing. Do all of the prep work, etc., while the beans are cooking.
Brazilian Black Bean Soup from The New Moosewood Cookbook:
Serves 6-8
2 c. dry black beans, soaked
4 c. water
1 Tb. olive oil
3 c. chopped onion
10 medium cloves garlic, crushed (do I even need to say it?)
2 tsp. cumin
2-2½ tsp. salt (I used 2. The soup has plenty of flavor.)
1 medium carrot, diced
1 medium bell pepper, diced
1½ c. orange juice
Black pepper, to taste
Cayenne, to taste
2 medium tomatoes, diced (optional. I did.)
Optional toppings (sour cream, cilantro, salsa. I used yogurt, cilantro, and avocado.)
Soak 2 cups dry black beans in plenty of water (about 8 cups) for at least 4 hours (and preferably overnight).
Place the soaked beans in a kettle or Dutch oven with 4 cups of water. I don’t have either of those, so I used my big stock pot that I use for all of my soups. It was totally fine. Bring to a boil, cover, and simmer until tender (about 1¼ hours).
Heat olive oil in a medium-sized skillet. Add onion, half the garlic, cumin, salt, and carrot. Sauté over medium heat until the carrot is just tender. Add remaining garlic and the bell pepper. Saute until everything is very tender (about 10 to 15 minutes). Add the sautéed mixture to the beans, scraping in every last morsel.
Stir in the orange juice, black pepper, cayenne, and optional tomatoes. Puree all or some of the soup in a blender or food processor. Be careful! It is hot and can explode everywhere! I know this. Return to kettle. Simmer over very low heat for 10 to 15 minutes more. Serve topped with an artful arrangement of your choice of toppings.
I also served mine with a special corn bread which I will post about later. It was super tasty and filling. I cannot wait to have more!
Labels:
beans,
chile,
garlic,
soup,
vegetarian
Monday, February 09, 2009
Fried Lemon Slices with Aioli
I have been obsessed with Tastespotting lately. The pictures are so pretty and really, the whole website is just food porn. I spent a nice chunk of yesterday looking at it and then another bit getting Aaron to look at it with me. It’s even sadder when you’re reading it while eating pad thai from a box (note: do not do this. It is terrible).
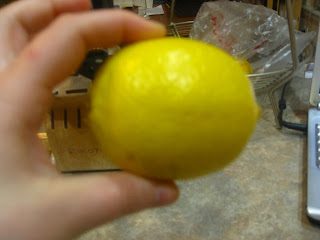
In any case, I was perusing the yummies when I came across this recipe and I just stopped. It’s so different, so yummy looking, so fun! So yesterday afternoon, when my energy was starting to flag and green ginger tea wasn’t helping, I decided to just go for it. I always have a ton of garlic in my house (duh), so I knew the aioli would be a cinch. Plus I was given an extra lemon on Super Bowl and I just bought more panko, so I decided to do it.
And dang! They were so good and so much fun to make. The aioli is a snap with a food processor and it was nice doing it with fresh lemon juice. I also managed to make the garlic paste like they do in all those cooking shows. I have never before been able to do this and I’m not sure why. I think it doesn’t work quickly enough and I just give up or something like that. Unlike the original poster of the recipe, I don’t mind bits of garlic in my food, but it was nice to do it differently for a change.
Fried Lemon Slices with Aioli from userealbutter.com:
1 lemon, organic and thin-skinned
1 egg, beaten
½ c. panko
For the aioli-
3 cloves garlic (hmm… I used more. Big surprise)
½ tsp. salt
2 egg yolks
3/4 cup olive oil
juice of 1 lemon
Peel the garlic cloves and mince. Gather the garlic into a little pile and pour the salt over it. With the flat of a sturdy knife blade, crush the salt into the garlic until you get a nice paste. Combine the paste in a bowl with the egg yolks. Whisk or beat the egg yolks together (you can also use a food processor), adding a few drops of olive oil at the start. Keep whisking and adding a little oil until it begins to thicken. While whisking/beating, pour half of the oil into the mixture in a slow and thin stream. Add a tablespoon of lemon juice and continue whisking in the remaining oil until it reaches the desired consistency. Add more lemon juice and or salt to taste. I used all of the lemon juice because I love a tangy aioli.
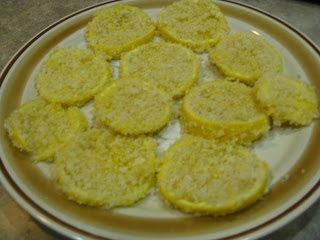
Slice the lemon into 1/8-inch thickness. Dip each slice into the egg, then coat in breadcrumbs. Place in hot oil and fry for about a minute or until golden. Take care that there will be some splattering. Remove from oil and set on a rack to cool. Serve with aioli.
Aaron wasn’t really a fan of these, but I am. They are a fun, different appetizer and I am so, so glad I tried them. Thanks Tastespotting! As the OP said, these are also incredible in tacos. They add a bit of zip.
Labels:
appetizers,
fruit,
garlic,
lemon,
sauce,
vegetarian
Sunday, February 08, 2009
Baked Macaroni with Smoked Turkey Sausage
Yesterday was a very exciting day for me. The GRE is over and my scores made me very, very happy. Even better, my husband decided to make dinner and what a delicious dinner it was. As always, I helped with the prep a little, but this is almost all his work. As you can probably guess from recipes like this, we’re into cheese and sausage dishes. I love turkey sausage. It’s tasty and it works well in so many things. Aaron doubled the recipe and added the sausage because a) we like leftovers and b) turkey sausage is wonderful!
Baked Macaroni with Smoked Turkey Sausage modified from Joy of Cooking:
Serves 4 or two very hungry people with plenty of leftovers
2 c. macaroni
2 c. shredded cheddar cheese
2 eggs
1 1/3 c. half-and-half
½ tsp. salt
¼ tsp. paprika
2 Tb. grated onion
About two smoked turkey sausages (use however much you like or omit altogether)
Au gratin: dry bread crumbs, dots of butter, grated cheese, and paprika
Boil macaroni in salted water and drain. Heat oven to 350 degrees.
Beat eggs, milk, salt, paprika, and grated onion until blended.
Place layers of macaroni and sausage in a greased baking dish. Sprinkle the layers with the cheese (reserve some for the au gratin). Aaron says he had about three layers. Pour egg mixture over the top of the macaroni. Sprinkle the top with the au gratin.
Bake the macaroni for about 40 minutes. Place under the broiler for a couple of minutes for a delicious, golden crust.
Serve immediately. We had ours with a simple salad. This would also make a great side dish. It’s super tasty and I hope he makes it again soon (*wink* *wink*).
The day ended very well. Carrina honored me with a super delicious cake wreck (which you can see here). If you haven’t been to Cake Wrecks, go now. You’ll laugh so hard. Thanks Carrina!
Labels:
aaron made,
cheese,
pasta,
sausage,
turkey
Saturday, February 07, 2009
Notes from All Over
The GRE is done and I am happy. I'll try to get back into posting new stuff more regularly now that I am not studying all the time. Tastespotting has been giving me lots of good ideas and I have a ton of stuff bookmarked that I want to try. Plus, Aaron made a great dinner tonight that I will have to post.
Here's a bit of what's been going on:
-The pumpernickel bread makes great french toast. The cocoa flavor is still very pronounced, but it works well this way.
-The scones are great with herbs. I used a bunch of fresh parsley chopped, dried oregano, basil, and rosemary. If I do it again with dried, I'll cut back a bit on each. I'd rather do it with fresh herbs though. So much better. These are great with cream cheese!
-Keeping working that bread, even if it's being annoying. I had bread just not rise the other day, so now it's cracker bread. Still tasty, just flat.
I'll be back soon with more tasties. Now it's time to celebrate being done with that test with some delicious Portland beer.
Labels:
excuses
Friday, February 06, 2009
Red Chile and Cinnamon-Clove Honeys
These two recipes have been floating around in my head for a couple of weeks. They were simple enough for me to do in the midst of all my studying and since today is my “do not study” day (the test is tomorrow), I can post them.
I have only tasted the red chile honey on its own, but it is very good and I cannot wait to try it with cornbread or as a glaze. It’s supposed to be good with salmon. The cinnamon-clove honey is amazing! I had it in tea last night and it was so good! I’m excited to try it with some other things as well.
Red Chile Honey and Cinnamon-Clove Honey from Flavored Breads:
Makes about 1 cup of each
For the red chile-
2 tsp. chile molido (freshly ground pure chile powder)
1 tsp. chile caribe (red pepper flakes)
1 c. honey
Pinch of salt (I used kosher, as always)
For the cinnamon-clove-
1 c. honey
2 tsp. ground cinnamon
½ tsp. ground cloves
For the red chile honey, place the chile molido and chile caribe in a dry pan or skillet. Toast over medium heat, shaking the pan occasionally, until the powder and flakes are fragrant, about 4 or 5 minutes. Do not let the chile burn, and beware of strong fumes, which may make your eyes water. (This didn’t happen to me, but it seems like it very easily could.)
Transfer to a saucepan and add the honey and salt. Bring to a simmer over medium heat, stirring with a wooden spoon. Turn off the heat and let cool for 10 minutes. Pour into a clean glass jar and refrigerate.
For the cinnamon-clove honey, place the honey, cinnamon, and cloves in a saucepan. Bring to a simmer over medium heat, stirring with a wooden spoon. Turn off heat and let cool 10 minutes. Pour into a clean glass jar and refrigerate.
Tuesday, February 03, 2009
Le Happy
Another cheater post. Sorry!
Yesterday was my 8th anniversary with Aaron (our wedding anniversary is in August) and while we kept the whole thing rather low key, we did want to eat something nice for dinner. But we waited...and waited. And then it was close to 10 pm. After our trip to Europe, I had been wanting to take my husband to Le Happy. We ate quite a few crepes in France and they do make for a fancy meal. Anyway, Le Happy is open late, even on Mondays, so it made for the perfect choice.
This was only my second trip there, but it was as good as I had remembered. It's small, but cozy. The red walls make the whole place seem just that much more romantic. There are a ton of crepe choices, both savory and sweet, or you can add to any of them, or make your own. There are also cocktails and beer galore.
Everything is so tasty. Aaron had Le Trash Blanc with the half steak and salad and I have Le Cinq with caramelized onions added in. I had a Pilsner Urquell to wash everything down. When our plates arrived, there was a brief moment of reverence and then we dove in. The crepes were the perfect thickness, the perfect amount of salt, and the perfect amount of filling. The fillings themselves were evenly spread throughout, so each bite was delicious.
For dessert we split the Citron Strawberry and I must say it was difficult to not just lick the plate when we were done. It was so good!
The whole experience was wonderful and I cannot wait to go back. It has also inspired be to try to make crepes on my own, so hopefully there will be a post about that in the near future.
Labels:
features,
portland,
restaurant review
Sunday, February 01, 2009
Super Bowl
I had this plan to make a bunch of fun food for the Super Bowl, but instead made cookies and just enjoyed all the snack foods that usually attend super bowl parties.
As you can see, my cookies are in the back right corner. Right next to the camera are three boxes of pizza. There's garlic sticks from Sparky's Pizza (around the corner from our house...that's where the pizza is from too), hot and barbecue wings, potato and tortilla chips, salsa, cheese sauce, blue cheese, and ranch, other chips, enchilada sauce (for the tortilla chips. Chez Jose East offers this with their basket of tortilla chips and it is AWESOME), gingerbread cookies and of course a giant bowl of party punch.
Party punch consists of:
1 part Malibu coconut rum
1 part Hawaiian punch
Lemon-lime soda to finish off the bowl
It is delicious and we do it for every party.
I hope to be making a real post here soon. My test is Saturday, so at least after that I'll have my mind free to explore all those cookbooks you can see in the left hand corner of the photo.
Labels:
party
Subscribe to:
Posts (Atom)