Tuesday, April 30, 2013

30 Before 30: Grissini (#32)


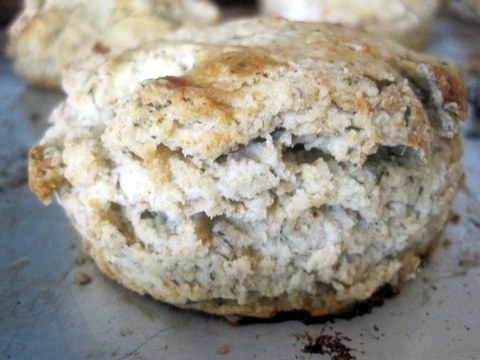
Just one more. I made these the day of my birthday and they are so easy. I may have oversalted mine a tad, so be careful when Keller says to put the salt in a small part of the work area. Despite a little too much salt, they are amazing. So so amazing. I preferred the short ones to the long ones, but deciding which is best is part of the tasty fun.

Grissini via Ad Hoc at Home:

Makes 24 small or 12 large grissini

½ c. warm water (110 to 115 degrees)
1 Tb. active dry yeast
1½ c. all-purpose flour, plus additional as needed
1/3 c. fine semolina flour
¼ c. freshly grated Parmigiano-Reggiano
1 tsp. ground fleur de sel or fine sea salt
2 Tb. olive oil, plus additional for brushing
Coarsely ground black pepper
Combine the water and yeast in a small bowl. Let stand for 10 minutes, then stir until the yeast is completely dissolved.

Combine the flours, cheese, and salt in a large bowl. Make a well in the center of the dry ingredients. Stir the oil into the yeast mixture, then pour into the well and mix together with a fork. Once the dough comes together, transfer to a lightly floured board and knead, adding a dusting of all-purpose flour as necessary. You may end up using up to an additional ¼ cup, until a smooth dough forms. Shape the dough into a ball and roll on the board to coat very lightly with flour.

Transfer the dough to a medium bowl, cover with a damp towel, and let rest in a warm place for about 15 minutes, or until it has risen slightly. Position the oven racks in the lower and upper thirds of the oven and preheat the oven to 400 degrees. Line two baking sheets with parchment paper.
Turn the dough out onto the floured work surface and, using a dough scraper or sharp knife, cut the dough in half. Cut one half into 12 pieces for short grissini or 6 pieces for long grissini. Roll each piece into a rope 9 inches long for short grissini or about 15 inches long for long grissini. You can leave them round or twist or flatten them, or a combination of the two. The thinner or flatter they are, the crispier the result; thicker grissini may be doughier, if that is your preference. Transfer to one of the parchment-lined baking sheets as you form them.
Coarsely grind a light dusting of pepper onto a section of the work surface; it is easier to control the amount of pepper that will be rolled onto the grissini by keeping the are small. Alternately, omit the pepper and sprinkle the grissini with fleur de sel or seeds. I did both pepper and salt. Lightly brush the grissini with olive oil. I used the garlic oil I had made the day before. One at a time, roll in the pepper and return to the parchment; grind additional pepper as needed. Repeat with the remaining dough. The grissini can be held for up to an hour on the baking sheets in a cool spot. Or, to hold them longer, cover the parchment paper, wrap the baking sheets in plastic wrap, and refrigerate for up to 6 hours.
Bake the grissini, switching the position of the pans and rotating them halfway through baking, until golden and crisp, 16 to 18 minutes. Cool on the pans on a rack. Store in an airtight container for up to 1 week.

30 Before 30 was hard work and so much fun. It was difficult digging through my fridge and cookbooks and matching things up and I loved the challenge.

Now back to our regularly scheduled irregular blogging.

Recipes Complete: 32
Recipes to Go: -2

Monday, April 29, 2013

30 Before 30: Fig and Balsamic Jam (#31)


So yeah, figs aren't in season. I used half the amount required with dried figs and rehydrated them with some simmered merlot for a few hours. Because of this, they are a bit harder to chop and the jam ended up being a little more chunky and less jam like, but it's still wonderful.This is amazing with wine and chevre and friends.

Fig and Balsamic Jam via Ad Hoc at Home:

Makes 2½ cups

2 lb. Figs, preferably Black Mission or Kadota, stems removed and coarsely chopped
1½ c. granulated sugar
½ c. balsamic vinegar
1 tsp. black peppercorns, tied into a sachet
Fresh lemon juice
Combine the figs, sugar, balsamic vinegar, and sachet in a large saucepan and attach a candy thermometer to the pan. Bring to a simmer over medium-high heat, then lower the heat to maintain a gentle simmer and cook, stirring to break up the larger pieces of fig, keeping a chunky consistency, until the jam reaches 215 to 220 degrees. Remove from the heat.
Remove the sachet and stir in the lemon juice to taste. Spoon the jam into a canning jar or other storage container, cover, and let cool to room temperature, then refrigerate for up to 1 month.

Recipes Complete: 31
Recipes to Go: -1

30 Before 30: Sweet Onion Tapenade (#30)


What's faster than tapenade? This is just a little slower because of the onions, but it is very bold and perfect with cheese and wine and pickles.

I also used a tablespoon and a half of Thai fish sauce instead of the anchovy. Why? It's made from the first pressing of anchovies. Easier and always on hand.

Sweet Onion Tapenade via Ad Hoc at Home:

Makes about 1½ cups

3 Tb. canola oil
2 c. chopped red onions
1 salt-packed or oil-packed anchovy
¼ c. whole milk
1 c. pitted Kalamata olive, rinsed and drained
1 tsp. capers, rinsed and drained
1 medium garlic clove
¼ c. plus 2 Tb. extra virgin olive oil
Heat the canola oil in a large frying pan over medium heat. Add the onions, reduce the heat to medium-low, and cook slowly, adjusting the heat as necessary to keep the onions from coloring, for about 30 minutes, until very soft. Transfer to a food processor.

Meanwhile, soak the anchovy in the milk for 30 minutes. Drain and rinse under cold water.

Add the anchovy, olives, capers, garlic, and olive oil to the food processor and blend, scraping down the sides as necessary and blend, scraping down the sides as necessary, to a coarse puree.
Refrigerate in a covered container for up to 1 week.

Recipes Complete: 30
Recipes to Go: 0

You'd think that's it, but it was my 30th birthday. So there are actually 2 more. I love to overdo it.

30 Before 30: Pickled Radishes (#29)


When I get radishes in my CSA, I usually just have them raw in salad. This was a fun way to do them differently.

Pickled Radishes via Ad Hoc at Home:

Makes ¾ cup

½ recipe pickling liquid
1 c. radishes, trimmed and thinly sliced on a diagonal

Bring the pickling liquid to a boil, stirring to dissolve the sugar. Remove from the heat and let cool to room temperature, then chill in the refrigerator.
Put the radishes in a canning jar or other storage container and pour the pickling liquid over them. Let stand for 20 to 30 minutes, then cover and refrigerate for up to 1 month.

Recipes Complete: 29
Recipes to Go: 1

30 Before 30: Pickled Green Beans (#28)


Green beans are an amazing vegetable. My son loves them pureed. They are great as a pickle as well.

Pickled Green Beans via Ad Hoc at Home:

Makes about 4 cups

1 tsp. black peppercorns
1 shallot, peeled and cut lengthwise into quarters
4 c. trimmed thin green beans (haricots verts)

Combine all of the pickling liquid ingredients in a saucepan. Add the peppercorns and shallot to the pickling liquid and bring to a boil, stirring to dissolve the sugar. Pour into a bowl and let cool to room temperature, then chill in the refrigerator.

Bring to large pot of salted water to a boil. Blanch the beans until crisp-tender. Drain and dry on paper towels.

Stand the beans in a canning jar or other storage container that holds them in a very right fit and pour the cold pickling liquid over the top. Cover and refrigerate for up to 1 month.

Recipes Complete: 28
Recipes to Go: 2

30 Before 30: Pickled Carrots (#27)


I love all things pickled. The next three posts are the three pickles I chose. They all start the same and are easy to adjust for more or less vegetables.

Pickled Carrots via Ad Hoc at Home:

Makes about 2 cups

Basic Pickling Liquid-
1 c. champagne vinegar
½ c. granulated sugar
½ c. water

10 medium carrots or 20 baby carrots, peeled
½ tsp. yellow curry powder
¼ jalapeno, seeded

The basic pickling liquid is 2 parts vinegar to 1 part sugar to 1 part water.

Cut medium carrots on the diagonal into 2-inch sections and then cut the sections lengthwise in half (or into quarters at the thicket end). Trim the green tops of baby carrots to about ¼ inch and cut the carrots lengthwise in half.

Put the curry powder in a medium saucepan and heat over medium heat, stirring constantly, for 1 to 1½ minutes or until fragrant. Be careful – the curry can burn easily.

Add the carrots, jalapeno, and pickling liquid to the curry, bring to a simmer, stirring from time to time to dissolve the sugar, and simmer for 2 minutes. Pour into a container and let the carrots cool in the liquid, then cover and refrigerate for up to 1 month.

These are fantastic day of and even better later.

Recipes Complete: 27
Recipes to Go: 3

30 Before 30: Garlic Confit and Oil (#26)


For my 30th birthday, I decided to have a wine and cheese party. Wine and cheese needs friends – like dips, pickles, fun sides. Everything ended up coming from Ad Hoc at Home. I've been drooling over the lifesavers section ever since I got it and these were quite the party additions. It was a great birthday and this is a great start to the end.

Garlic Confit and Oil via Ad Hoc at Home:

1 c. peeled garlic cloves
About 2 c. canola oil
Cut off and discard the root ends of the garlic cloves. Put the cloves in a small saucepan and add enough oil to cover them by about 1 inch. None of the garlic cloves should be poking through the oil.

Set the saucepan over medium-low heat. The garlic should cook gently: very small bubbles will come up through the oil, but the bubbles should not break the surface; adjust the heat as necessary and/or move the pan to one side of the burner if it is cooking too quickly. Cook the garlic for about 40 minutes, stirring every 5 minutes or so, until the cloves are completely tender when pierced with the tip of a knife. Remove the saucepan from the heat and allow the garlic to cool in the oil.

Refrigerate the garlic in a covered container, submerged in the oil, for up to 1 week.

The gloves are amazing mushed on baguette and the oil is great to cook with and use for brushing on breads.

Recipes Complete: 26
Recipes to Go: 4

Thursday, April 25, 2013

30 Before 30: Baked Asparagus and Prawns (Gamberi al Forno con gli Asparagi) (#25)


Well, I had a lot of shrimp. It was Alaskan and from one of my favorite families and it was delicious and now it's all gone.

I'm really liking the necessity of digging through my cookbooks and looking at new ways of cooking cuisines that I normally stay within my comfort zone when I cook them. This recipe is a great example. It's simple, but I'd normally just plop a lot of this stuff over pasta. The inspiration comes from a risotto Marcella Hazen had in Venice. I think if you took out the potatoes and went for a risotto, it would also be quite fantastic.

Also, Aaron cooked bacon and had me add it. It's always a good idea.

Baked Shrimp with Asparagus (Gamberi al Forno con gli Asparagi) via Marcella's Italian Kitchen:

Serves 6

2 lb. asparagus
Salt
2 lb. medium shrimp, in their shells
½ lb. potatoes
2/3 c. onion
5 Tb. butter
1 Tb. vegetable oil
¼ c. heavy cream
½ c. freshly grated Parmesan, plus 2 Tb. for topping
Black pepper in a grinder

Trim the asparagus, cutting off 1 inch or more of the hard root end and peeling away the tough green skin from the lower half of the stalk. I personally ascribe to the snapping asparagus school, so do what you normally do to prep it. Wash asparagus thoroughly in 1 or 2 changes of cold water.

Choose a shallow pan that can accommodate all the asparagus lying flat. Pour in about 2 inches of water and bring it to a boil over medium-high heat. Add 1 tablespoon of salt and, when the water resumes boiling, slip in the asparagus and cover the pan. Cook for just a few minutes – depending on the freshness and thickness of the vegetable – until the asparagus is barely tender, but still firm to the bite. Drain and set aside to cool. When the asparagus has cooled, cut it into pieces 1½ inches long.

Shell the shrimp, remove the dark vein just below the surface of their backs, and wash them in cold water. Pat thoroughly dry with kitchen towels.

Wash the potatoes and boil them, unpeeled, in abundant water. When they are done, drain them, peel them, and pass them through a food mill or potato ricer. Though I'm sure it would drive Hazen crazy, I don't have either of those, so I mashed them with a potato masher. Not a big deal when you see how they are used. Put your potatoes in a bowl large enough to accommodate all the other ingredients later.

Turn the oven to 450 degrees.

In a medium saucepan put the chopped onions, 3 tablespoons of the butter, and the vegetable oil and turn on the heat to medium. Saute the onion until it becomes colored a deep gold of even very lightly brown. Add the asparagus, turn up the heat to high, and saute the asparagus, turning them constantly, for 3 to 4 minutes.

Transfer the asparagus with all the pan juices to the bowl containing the potatoes. Add the cream, ½ cup of grated cheese, salt, liberal grinding of pepper, and the shrimp. Toss thoroughly. Choose a 12-by-9-inch oven-to-table baking dish. Smear the bottom with a little butter. Pour into it all the contents of the bowl, leveling with a spatula. Sprinkle the top with 2 tablespoons of grated cheese, and dot with the remaining 2 tablespoons of butter.

Bake in the uppermost level of the preheated oven for 15 to 20 minutes, depending on the thickness of the shrimp. After removing the dish from the oven, allow it to settle for 5 minutes before serving.

This is an easy recipe to break into smaller steps and comes together relatively quickly. Make sure you have some crusty bread to go with this.

Recipes Complete: 25
Recipes to Go: 5 

30 Before 30: Sauteed Shredded Zucchini (Calabacitas Rallados) (#24)


Zucchini is something I adore (at least this early in the year) and Aaron isn't really into. Childhood experiences with it, I guess. This is a fun new way to play with zucchini before the farmers market is flooded with it and farmers are basically throwing them at you.

Sauteed Shredded Zucchini (Calabacitas Rallados) via 1,000 Mexican Recipes:

Makes 4 servings

2 Tb. olive oil
2 Tb. finely chopped white onion
4 medium zucchini, coarsely shredded
1 tsp. finely chopped fresh oregano or ½ tsp dried, crumbled (Mexican variety preferred)
1/8 tsp. freshly ground pepper, or to taste
½ tsp. salt
1 Tb. crumbled cotija cheese

Heat the oil in a large nonstick skillet and cook the onion until slightly softened, but not browned, about 2 minutes. Add the zucchini and oregano. Cook, stirring, until zucchini is limp and hot, with bright green edges, about 4 minutes. Season with black pepper and salt. Sprinkle with cheese.

I loved this! Aaron even ate some and didn't hate it. It tasted amazing the next day too, mixed with the beet and carrots mixture from earlier in the week.

Recipes Complete: 24
Recipes to Go: 6

30 Before 30: Flautas con Chorizo (#23)


I've said it before and I'll say it again, I love the meat counter at New Seasons. They make some of the best chorizo I have ever had. I love that it varies in spiciness, but is always very, very good. This is a simple recipe, made simpler by using amazing, flexible tortillas. It cuts down on the amount of oil you need to use and makes everything go faster. I simply pop the tortillas in a warm oven while I get everything else ready for whatever dish. For this one in particular, it was easy to time.

Flautas con Chorizo via 1,000 Mexican Recipes:

Makes 6 flautas

2 tsp. vegetable oil, plus more for frying tortillas
2 Tb. finely chopped onion
¼ lb. fresh bulk chorizo (chicken is a good substitute if you're not into pork)
1 medium tomato, finely chopped
6 (6-7-inch) corn tortillas
1 c. very finely shredded cabbage (or lettuce)
1 avocado, thinly sliced
2 tsp. fresh lime juice
½ c. sour cream

In a medium skillet, heat 2 teaspoons of oil and cook the onion, stirring, until softened, 3 to 4 minutes. Add the chorizo, breaking it into small pieces, until completely cooked, about 4 minutes. Stir in the tomato and set the pan aside off heat.

In a large skillet, heat about ¼-inch of oil until it shimmers. Dip the tortillas in the hot oil, 1 at a time, until soft and limp, about 3 seconds. Drain on paper towels. If you have nice, thick, flexible tortillas, you can skip this step.

Lay 1 tortillas on a working surface and put about 2 tablespoons of the chorizo filling across the lower third of the tortillas. Roll tightly and secure with a toothpick. Lay seam side down on a plate and repeat with all of the tortillas. Add extra oil to the skillet and heat until hot. Fry the flautas 2 or 3 at a time until crisp and golden brown. Drain on paper towels and remove toothpicks.

Make a bed of shredded cabbage (or lettuce) on a plate. Lay the warm flautas on top. Arrange the sliced avocado around the flautas and sprinkle them with lime juice. Drizzle sour cream over the flautas. Serve at once.

These are fast, easy, and make for a super tasty dinner, especially when paired with rice and a vegetable, like the next post.

Recipes Complete: 23
Recipes to Go: 7 

30 Before 30: Coconut Shrimp (#22)


This dish worked out in the end, but man, did it make a mess. First off, I didn't get a fresh coconut, even though the lord of the cookbooks (Alton Brown) says to do so. Also, I didn't have a lot of oil to begin with and I overheated it, it smoked, a little bit of stuff burned, the house got smoky, we opened the garage to air out the house, never closed it, and Aaron's bike was stolen (boo!). But we did have dinner and it was a healthier version in the end. I went into this one not intending to modify it, but there you go.

Coconut Shrimp (slightly modified) via Good Eats – The Early Years:

Serves 4 to 6

25 shrimp, peeled and deveined
½ c. cornstarch
¼ tsp. kosher salt
¼ tsp. white pepper
¼ tsp. cayenne pepper
4 large egg whites
2½ c. shredded coconut

Preheat oven to 400 degrees.
Pat the shrimp dry with a paper towel. In a small bowl, combine the cornstarch, salt, pepper, and cayenne. In another small bowl, whisk the egg whites until foamy. Place the coconut in a pie plate. Coat the shrimp with the cornstarch and shake off the excess. Dip them into the egg whites and then press them into the coconut to get full coverage.
Place the coated shrimp on a greased baking sheet and bake until the coating is golden brown, 15-20 minutes.

I love coconut shrimp and though these didn't end up with the same crunch you normally get, I also didn't need more oil. I will try Alton's real version someday, but this worked really well in the meantime.

Recipes Complete: 22
Recipes to Go: 8

30 Before 30: Pretty Beets and Carrots (#21)


Beets are wearing me out. I love them, but I've gotten so many through my CSA, I'm not sure how many more I can eat. Fortunately I found another recipe to deal with them and it is pretty darn delicious. It works in the place of slaw as well as salad, so feel free to throw it on a sandwich. Just drain it a bit first or you may end up with purple hands. I skipped the lettuce and the arrangement and just mixed it all together.

Pretty Beets and Carrots via Moosewood Restaurant New Classics:

Serves 4

1 large red beet, peeled
1 large carrot, peeled
1 walnut-sized piece of fresh ginger root
2 Tb. vegetable oil
3 Tb. cider vinegar
1 garlic clove, minced
Salt and ground black pepper to taste
¼ c. minced scallions
6 green or red lettuce leaves (optional)

Coarsely grate the beet and then the carrot to yield about 1½ cups of each. Place in separate bowls and set aside.

Grate the ginger finely and combine it with the oil, vinegar, and garlic. Toss the beets in half the dressing and add salt and pepper to taste. Mix together the scallions, carrots, and the remaining dressing. Add salt and pepper, if you like.

Arrange the lettuce on a platter, mound the carrot mixture in the center, and spoon the beets around it. Or just mix it all up. Depends on how you want to present it, really.
Serve chilled or at room temperature.

I love the faux pickled flavor of this dish and how quickly you can create it, especially if you have a grater attachment for a food processor.

Recipes Complete: 21
Recipes to Go: 9

Wednesday, April 24, 2013

30 Before 30: White Cheddar, Sage, and Bacon Biscuits (#20)


More biscuits this month? Yes, more biscuits. I love quick breads because if you don't know what you're doing for dinner until later in the day, you can still have a tasty, homemade bread with it. These are meant for breakfast, but I think biscuits belong at every meal. I halved this one, but accidentally forgot to halve the buttermilk, making for a very wet and sticky dough. I worked in some more flour and they ended up more like a drop biscuit than a rolled one. It was an amazing mistake because they were fantastic. I'm sure they're great in normal proportions as well.

White Cheddar, Sage, and Bacon Biscuits via The Tillamook Cheese Cookbook:

Makes approximately 9 biscuits

2 c. all-purpose flour
2 tsp. baking powder
2 tsp. sugar
¾ tsp. baking soda
½ tsp. salt
2 Tb. finely chopped fresh sage leaves
5 Tb. cold unsalted butter, cut into ½-inch pieces
5 bacon slices, cooked crisp, chopped
¾ c. grated white sharp cheddar cheese
¾ c. buttermilk

Place the rack in the middle of the oven and preheat to 425 degrees.

Sift together flour, baking powder, sugar, baking soda, and salt and place in a large bowl. Stir in the sage and, using your fingertips, blend in the butter until the mixture is crumbly and resembles coarse meal.

Stir in the bacon and the cheese. You probably should have made more bacon because let's be serious, you snacked on some of it. Add the buttermilk, and stir just until the mixture begins to form a dough. Gather the dough into a ball, and on a lightly floured surface, knead gently 8 times.
Pat out the dough into a round, ¾-inch thick. Cut the dough with a biscuit cutter (or small drinking glass), and place 1-inch apart on a baking sheet. Bake the biscuits for 15 minutes, or until golden brown.

Cheddar and bacon are natural partners. The addition of sage was not something I would have thought of on my own, but a very welcome one indeed. Seriously, biscuits are far too amazing.

Recipes Complete: 20
Recipes to Go: 10 

30 Before 30: Celery Root with Melted Onions (#19)


One thing that has been great about this challenge is using my cookbooks to help me out with some of the seemingly random contents of my CSA. Celery root, or celeriac, is something I know about (thanks Chopped), but have never used. Now that I've made this, I'm totally down with it. This would be a perfect addition to any fall or winter meal, especially around the holidays.

Celery Root with Melted Onions via Ad Hoc at Home:

Serves 6

4 large celery root (about 4 lb. Total)
8 Tb. unsalted butter, cut into 8 pieces
1 Tb. thyme leaves\
4 cloves garlic crushed, skin left on
½ c. chicken or veggie stock, plus more if needed

Cut off the top and bottom of each celery root. Stand each one up on a cut side and cut off the skin in strips, from top to bottom, working around the celery root. Quarter each one lengthwise and then, with a Japanese mandoline or knife (or food processor with a slicing attachment, like I did), cut crosswise into thin slices.
Heat two large saute pans over high heat until hot. Add 2 tablespoons of the butter to each pan, the pull the pans off the heat and let butter brown. Add one-quarter of the celery root to each and cook over medium heat for 1 minute, without stirring. Add one-quarter of the thyme and 1 garlic clove to each pan and cook, stirring from time to time, until the celery root is tender throughout, 9 to 10 minutes total cooking time. Season to taste with salt and pepper. Drain the celery root on paper towels. Pour off any excess fat from the pans (and remove any thyme); discard the garlic cloves. Repeat with the remaining celery root.
Add the melted onions to one of the pans and cook to give them a little color, about 3 minutes. Drain the onions to remove the excess fat, and return them to the pan. Add the celery root, stir to combine, and season with salt and pepper as needed. Increase the heat to high and swirl in ½ cup stock. Bring to a simmer, adding additional stock or water if needed to create a creamy dish. Transfer to a serving bowl.

Celery root tastes like a cross between super intense celery and a potato. I really enjoyed this dish, especially paired with Aaron's pork chops.

Recipes Complete: 19
Recipes to Go: 11

30 Before 30: Melted Onions (#18)


Thomas Keller really emphasizes the importance of basics and this importance really can't be overstated. These melted onions were an essential component of the next post and because of that I decided to give them their own post. These work well for sandwiches, added into sauces or salads, or as something to snack on while you're working on the rest of the meal (hmm, what?, who does that?).

Melted Onions via Ad Hoc at Home:

Makes 2 cups

8 c. sliced onions (about 3 large onions)
Kosher salt
8 Tb. unsalted butter, cut into 8 pieces
1 sachet (1 bay leaf, 3 thyme leaves, 10 black peppercorns, 1 garlic clove, smashed and peeled)

Lay out a 7-inch square of cheesecloth. Put the bay leaf, thyme, peppercorns, and garlic near the bottom of the square and fold the bottom edge up and over them. Roll once, tuck in the two ends of the cheesecloth, and continue to roll. Tie the cheesecloth at both ends with kitchen twine.

Put the onions in a large saute pan, set over medium-low heat, sprinkle with 2 generous pinches of salt, and cook, stirring from time to time, for about 20 minutes, until the onions have released much of their liquid.
Stir in the butter, add the sachet, cover, and cook slowly over low to medium-low heat for another 30 to 35 minutes. The onions should look creamy at all times; if the butter separates, or the pan looks dry before the onions are done, add a bit of cold water and stir well to re-emulsify the butter. The onions should be meltingly tender but not falling apart or mushy. Season to taste with salt.

Once cooled, the onions can be refrigerated for up to 3 days.

These would be perfect with day after Thanksgiving sandwiches and they are so wonderful with an interesting side dish as you'll see in the next post.

Recipes Complete: 18
Recipes to Go: 12

30 Before 30: Roasted Salmon with Cheddar Dijon Bechamel (#17)


I know I said I needed to stop using roasted as a title so much, but guys, roasted things are so good! Sockeye has been on sale a lot lately, so we got more. I can't help myself, I just love salmon so much. Wanting to branch out even more than the meuniere and maybe find a good alfredo, I poked around my cookbooks and found something even more different. I was excited because I had almost everything on the ingredient list at home already, something that has been a major challenge within the challenge this month. I had to sub out the Dijon for sweet hot mustard because I was out for some reason (we are a multi-mustard home). I also subbed in some amazing herb tagliatelle from Pastaworks for the rice since we'd already been out shopping that day and it's fresh pasta. You can't say no to that. I also cut this recipe in half, which leads to two very large servings of salmon – but it's salmon. Don't say no.

Roasted Salmon with Cheddar Dijon Bechamel via The Tillamook Cheese Cookbook:

Serves 6

6 6 oz. Center-cut salmon fillets, skin-on
3 Tb. extra virgin olive oil
1 Tb. Dijon mustard
Freshly ground black pepper
1½ c. whole milk or half-and-half
¼ c. Dijon mustard
1 Tb. all-purpose flour
1 large egg yolk
2¼ c. shredded white extra sharp cheddar cheese
Salt
3 c. hot, cooked wild or brown rice
Position the oven rack in the upper third of the oven and preheat to 425 degrees. Line a baking sheet with aluminum foil.

Place the fillets, skin side down, on a baking sheet. Mix the olive oil and mustard, and brush on the tops and sides of the salmon and sprinkle with pepper. Roast until the fish is just opaque, about 10 to 12 minutes.
Meanwhile, prepare the sauce by combining the milk, mustard, flour, and egg yolk in a small saucepan. Whisk to blend, and cook over medium heat, whisking gently and constantly, until the mixture just begins to bubble, about 10 to 15 minutes. Remove from the heat and add ¾ cup of the cheese. Stir, until the cheese melts. Season with salt and pepper.
To serve, place a spoonful of rice on serving plates. Lift the fillets from the skin with a metal spatula, and place the salmon on the rice. Spoon the sauce over the fish and rice. Sprinkle each serving with ¼ cup of the remaining cheese.

We had ours with some steamed broccoli. This was one of my favorite meals this month because it was new, it was easy, it was fast, and I managed to get all of the components of dinner done at about the same time.

Recipes Complete: 17
Recipes to Go: 13

Tuesday, April 23, 2013

30 Before 30: Banana Cream Pie (#16)


I wanted to try something very new for an ending to our corned beef lunch. I've never made a custard pie before and what better than banana cream pie? The crust was disappointing. I should have stuck with my gut and gone for Thomas Keller's amazing pie crust and rolled it in graham cracker crumbs. The filling though? Magnificent.

Banana Cream Pie via Baking Illustrated:

Makes 1 9-inch pie

For the crust-
1¼ c. unbleached all-purpose flour
½ tsp. salt
1 Tb. sugar
3 Tb. vegetable shortening, chilled
4 Tb. cold unsalted butter, cut into ¼-inch pieces
4-5 Tb. ice water
½ c. graham cracker crumbs (about 8 crackers)

For the filling-
½ c. plus 2 Tb. sugar
¼ c. cornstarch
1/8 tsp. salt
5 large egg yolks, lightly beaten
2 c. 2 percent or whole milk
½ c. evaporated milk
1 tsp. vanilla extract
2 Tb. unsalted butter
1-2 tsp. brandy
2 medium bananas

For the topping-
1 c. heavy cream, chilled
1 Tb. sugar
1 tsp. vanilla extract

Make the crust first. It needs to be completely baked and cooled before filling it with the custard.

Process the flour, salt, and sugar in a food processor until combined. Add the shortening and process until the mixture has the texture of coarse sand, about 10 seconds. Scatter the butter pieces over the flour mixture; cut the butter into the flour until the mixture is pale yellow and resembles coarse crumbs, with butter bits no larger than small peas, about ten 1-second pulses. Turn the mixture into a medium bowl.

Sprinkle 4 tablespoons of ice water over the mixture. With a rubber spatula, use a folding motion to mix. Press down on the dough with the broad side of the spatula until the dough sticks together, adding up to 1 tablespoon more ice water if the dough does not come together. Flatten the dough into a 4-inch disk. Wrap in plastic and refrigerate at least 1 hour, or up to 2 days, before rolling.

Remove the dough from the refrigerator (if refrigerated longer than 1 hour, let stand at room temperature until malleable). Roll the dough on a work surface sprinkled with 2 tablespoons of graham cracker crumbs. Continue sprinkling additional crumbs underneath and on top of the dough as it is rolled, coating the dough heavily with crumbs. Roll the dough out to a 12-inch circle. Transfer the dough to a 9-inch pie plate by rolling the dough around the rolling pin and unrolling it over the pan. Working around the circumference of the pie plate, ease the dough into the pan corners by gently lifting the edge of the dough with one hand while gently pressing into the pan bottom with the other hand. Trim the dough edges to extend about ½-inch beyond the rim of the pan. Fold the overhang under itself; flute the dough or press the tines of the fork against the dough to flatten it against the rim of the pie plate. Refrigerate the dough-lined pie plate until firm, about 40 minutes, then freeze until very cold, about 20 minutes.

Adjust the oven rack to the lower-middle position and heat the oven to 375 degrees. Remove the dough-lined pie plate from the freezer, press a doubled 12-inch piece of heavy duty foil inside the pie shell, and fold the edges of the foil to shield the fluted edge; distribute 2 cups ceramic or metal pie weights over the foil (or dried beans, like me). Bake, leaving the foil and weight in place until the dough looks dry and is light in color, 25 to 30 minutes. Carefully remove the foil and weights by gathering the corners of the foil and pulling up and out. Continue baking until deep golden brown, about 12 minutes more. Transfer to a wire rack and cool completely.

To make the filling, whisk the sugar, cornstarch, and salt together in a medium saucepan. Add the yolks, then immediately but gradually whisk in the milk and evaporated milk. Cook over medium heat, stirring frequently at first, then constantly, as the mixture starts to thicken and begins to simmer, 8 to 10 minutes. It seems like it will never happen, but then suddenly it does and it is fantastic change. Once the mixture simmers, continue to cook, stirring constantly, for 1 minute longer. Remove the pan from the heat, whisk in the butter, vanilla extract, and brandy.


Pour the filling into a shallow pan. Put plastic wrap directly on the filling surface to prevent a skin from forming; cool until warm, 20 to 30 minutes. Pour half of the warm filling into the baked and cooled pie shell. Peel the bananas and slice them over the filling. Top with the remaining filling. Once again place a sheet of plastic wrap directly on the filling surface. Refrigerate the pie until completely chilled, at least 3 hours.

When ready to serve, make the topping. Beat the cream and sugar in a chilled bowl over an electric mixer at medium speed to soft peaks; add the vanilla. Continue to beat to barely stiff peaks. Spread over the filling and serve immediately.

Overall, I really enjoyed this pie. Again, the crust was the weakest part, but the filling was so good, in the end it was just delicious.

Recipes Complete: 16
Recipes to Go: 14

30 Before 30: Garlic-Rye Biscuits (#15)


What goes best with corned beef? Rye bread. Here's another instance of changing a bunch of stuff. I have rye flour on hand, not dark rye. I didn't have dried onion flakes, but dried garlic stepped in. Because of that, I used garlic powder instead of onion powder. So onion-rye biscuits became garlic-rye biscuits and were delicious. Plus more biscuits this month!

Garlic-Rye Biscuits modified from Onion-Rye Biscuits via King Arthur Whole Grain Baking:

Makes 12-14 biscuits

2 c. rye flour
1 c. unbleached bread flour
1 Tb. dried garlic flakes
2 tsp. garlic powder
2½ tsp. baking powder
½ tsp. baking soda
¾ tsp. salt
½ c. cold unsalted butter
1 large egg
¾ c. buttermilk, plus more for brushing
2 Tb. dill pickle juice
1 Tb. dried dill

Preheat the oven to 400 degrees. Lightly grease a baking sheet or line it with parchment paper.
Whisk together the flours, baking powder, baking soda, and salt in a large mixing bowl. With a fork, two knives, a pastry cutter, or a food processor, cut in the butter until the mixture resembles coarse crumbs.

Whisk together the egg, buttermilk, and pickle juice in a small bowl or a large measuring cup. Add, all at once, to the flour mixture, and blend lightly and quickly with a fork until the mixture is evenly moistened. Add dill.

Turn the dough out onto a floured work surface, and using a bench knife or a dough scraper, fold the dough over on itself three or four times until it comes together.
Pat the dough out or roll very lightly with a rolling pin (just pat it out) until it's ¾-inch thick. Cut the dough into squares or rounds with a biscuit cutter and transfer the biscuits to the prepared baking sheet. Stack the scraps on top of each other, fold them as you did for the original dough, and pat out and cut again. Brush the tops with more buttermilk.
Bake until the tops are golden brown, 20 to 22 minutes. Remove from the oven and serve warm, or cool on a rack.

These are a perfect match for corned beef and were great with the pasta salad as well.

Recipes Complete: 15
Recipes to Go: 15
Related Posts Plugin for WordPress, Blogger...