Wednesday, December 23, 2009

Onion Soup

I’m so glad I’m getting back to using The Moosewood Cookbook again. This recipe has been modified and thus is no longer strictly vegetarian. I had to do something with the Thanksgiving turkey carcass. So I made turkey broth and it is delicious. Anyway, what I love about turkey is that it subs well for beef in many things. French onion soup is traditionally made with beef broth, so what better way soup to make with turkey broth than onion soup? I would posit none!


Even though this isn’t vegetarian anymore, it is still delicious. You can use water instead of turkey broth, like in the original recipe, or veggie broth, which is what I usually have on hand. A small warning though: this will make your house very, very oniony and your eyes may sting for some time afterward. Fan your place out. Seriously.

Onion Soup from The New Moosewood Cookbook:

Makes 6 servings

2 Tb. butter
4 large yellow onions (I used 5 since mine were on the small side), thinly sliced
1 tsp. salt
½ tsp. dry mustard
A dash or two of thyme
4 c. turkey broth
2 Tb. soy sauce
2-3 Tb. dry white wine (optional. I went for it)
A few dashes of white pepper
Thin slices of Swiss cheese
Olive oil
A few small slices of baguette
A few garlic cloves


Melt the butter in a kettle or Dutch Oven. Add onions and salt, and cook over medium heat about 10 minutes, stirring occasionally. Add mustard and thyme; stir and cover. Continue to cook very slowly, about 35 more minutes. The onions will be exquisitely soft and simmering in their own liquid. Also, the bottom of my pot was covered in burnt on onion. A bit more butter or stirring or something may have prevented this. The rest of the onion, though, was as advertised.

While the soup is simmering, make the croutons. Brush thin slices of baguette on both sides with olive oil. I crushed a few cloves of garlic into the oil first. Bake on a tray in a 350 degree oven until crisp, 8-12 minutes. Check on them frequently. They can look underdone one minute and burn the next. Mine cooked for a bit over 12 and were perfect.


Add water, soy sauce, optional wine, and white pepper. I didn’t realize this while cooking, but we were out of soy sauce. We have teriyaki sauce, fish sauce, oyster sauce, and sweet and sour sauce, but no soy sauce. A quick look online suggested Worcestershire as an acceptable substitute. I think it worked out. Simmer at least 10 minutes more. Taste to adjust seasonings. Serve topped with croutons and Swiss cheese. If you’re serving the soup in ovenproof bowls (like I did), you can put them under the broiler briefly to brown the cheese. Be careful handling the bowls!

This was so delicious and wonderful. I loved this soup! It was salty, but not too, and so well flavored. The onion is soft and perfect with bread. Hopefully I’ll have soy sauce on hand next time. And I’ll try veggie broth too. Still, fantastic soup. Go make it. But maybe crack a window.
Monday, December 21, 2009

Hot Toddy

Something magical happened to me recently. I started liking whisk(e)y. Mostly bourbon, actually, but also other whisk(e)ys. Anyway, this means that some drinks are even more wonderful. It used to be that hot toddies were the only way I could stomach whiskey. Now I love them just that much more and even though it stopped being ridiculously cold out here in Portland, I had to have one this past weekend. I am fortunate enough to have fantastic friends and one of them came up for Thanksgiving and left a bottle of Maker’s Mark. And that’s how I got my hot toddy, which is doubled from the original recipe I found here.

Hot Toddy from drinkstreet.com:

Makes one fantastic beverage

3 oz. whiskey
2 oz. honey
2/3 oz. lemon juice
6 oz. hot water (or tea, if you feel like it)


Stir honey and lemon juice into hot water, allow it to cool slightly, and add the whiskey. Garnish with a cinnamon stick. Enjoy and be warm.

Potato Onion Broccoli Pie

For starters I will say that this is definitely a work in progress, but it will be something great in the future.

I got the idea to make a pie because I really wanted to make pastry dough now that I have a food processor. The recipe I have, first seen here, is designed for a food processor and having now done it, I can see why you’d want to use one. It’s so much faster. I’ll be posting the food processor directions for it because they are different than the by hand ones from last year. Still very tasty though.

I wanted to do a savory pie, for whatever reason, and was inspired by some of the pies in The New Moosewood Cookbook, like this one and this one. And because I have a food processor now (let me know if I’m getting too annoying with all my talk about it. I am in love though, what can I say?), slicing potatoes is a cinch. I love it.

Also, remember how just after I got my fancy new machine, Aaron and I pureed an onion? That inspired this too. Again, work in progress. There is too much onion in this pie by far. Anyway, this is what I did.

Potato Onion Broccoli Pie:

Serves 4-6, depending on if served as entrée or appetizer

1½ c, flour
¼ tsp. salt
1/8 tsp. baking powder
8 Tb. unsalted butter, cut in ½" pieces and kept well chilled
2 Tb. vegetable shortening , well chilled
2- 4 Tb. ice water
One large potato
Three heads of broccoli
Puree of one onion
1-2 c. grated white cheddar cheese
½ c. grated Parmesan
2-3 cloves garlic, chopped

Make the pastry dough first. Insert the metal blade. Process the flour, salt, and baking powder to sift, 10 seconds. Add the well chilled butter and vegetable shortening. Use short rapid pulses (15-20) until the mixture resembles coarse corn meal and no pieces of butter are larger than a pea remain visible. Sprinkle half the maximum ice water on the flour and butter mixture, then pulse 5-6 times. The dough will be crumbly, but should begin to hold together when a small amount is picked up and pressed together. Sprinkle on more water, a teaspoon at a time, with 2-3 quick pulses after each addition, adding enough water for the dough to hold together easily when pressed into a ball. Add the liquid sparingly so the dough is not sticky. Do not overprocess or the pastry will be tough, not tender and flaky.

Turn the dough out onto a lightly floured surface. Press together into a ball, then flatten into a disc about 6 inches in diameter. Wrap in plastic wrap and refrigerate for 1 hour before continuing to allow the gluten in the flour to rest. Thaw at room temperature for an hour before using.


While waiting for your dough to thaw, slice a potato super thin (go food processor!) and dice up three heads of broccoli. Make them into as small of pieces as possible. Guess what I used.


Heat oven to 350. This is what I did, not what I should have done. Roll out your dough and press into a pie pan. Spread half of the onion puree on the bottom. Place the potato slices into a pretty pattern or just layer them until they cover the bottom of the crust. Add about half of the broccoli and then sprinkle with a bunch of cheese. I mixed my cheeses together, but it got a little clumpy, so I wouldn’t do that in the future. Repeat pattern. Top pie with remaining potato slices, chopped garlic, and a bit more cheese.

Bake for 40 minutes at 350. I then took it out and it was not done yet. So I turned the oven up to 375 and baked it for about 5-7 minutes more. It was much better.


Let it cool a bit before serving. Add more parmesan if desired.

This was a pretty good idea and didn’t taste terrible, but it had way, way, way too much onion. I also think, surprise, surprise, not enough cheese was involved. Next time I would still mix in some cheese, but also cover the top to give it a crispy, cheesy crust. And yeah, less onion. It was overpowering. And more garlic.

This pie has a lot of potential in it. I’ll be updating when I make the next version.

Wednesday, December 16, 2009

Curried Pumpkin Seeds

I have one final bit of baking extravaganza. This isn’t a cookie/baking recipe, but rather part of the snack we had in the middle of sugar time. I had made it prior to bake day after doing all that pumpkin business for Thanksgiving. It’s not much of a change on pan roasting pumpkin seeds, but it’s tasty nonetheless.

Curried Pumpkin Seeds:

Clean, dried pumpkin seeds
Olive oil
Sea salt to taste
Ground pepper to taste
Curry powder


In a medium skillet, heat a bit of olive oil over medium to medium-high heat. Add pumpkin seeds, ground pepper, and sea salt. Roast in pan, stirring constantly, until pumpkin seeds begin to puff up and brown. Allow to cool. Transfer to a container; add a bit more ground pepper and sea salt. Add the curry powder to taste. Stir to coat.

I love pumpkin seeds and I really like the curry-pumpkin flavor combo. This is a fantastic little snack.

Tuesday, December 15, 2009

Food Processor!

Aaron is the best! I now own a regular size food processor as a Chanukah gift. We had fun earlier grating and slicing cheese and pureeing onion. This is going to make pastry dough so much easier!

As you might be able to tell, I am very excited.

Ginger Crinkles

This was the very last thing made for the baking extravaganza super awesome holiday plates. I have to say that the whole day was quite the success. Baking with Corey was definitely fun and I think we will have to do it again.

These ginger cookies are phenomenal! Seriously, so good. Yes, it’s The Fiddlehead Cookbook again! These cookies were recommended to me by my friend’s mom after she tried my Mexican cookies. I am so glad to have gotten that recommendation because of how delicious these are.

Ginger Crinkles from The Fiddlehead Cookbook:

Makes about 36 cookies

½ lb. butter
1¾ c. granulated sugar
1 egg
1/3 c. molasses
2¾ c. unbleached white flour
1¼ tsp. baking soda
1¾ tsp. cinnamon
1¾ tsp. powdered ginger
½ tsp. salt
1/3 c. granulated sugar

Heat oven to 350 degrees and arrange racks so they are evenly spaced.

In a large mixing bowl, cream together butter and 1¾ cups sugar until fluffy. Beat in egg and molasses.

In a separate bowl, mix together flour, baking soda, spices, and salt. Carefully stir flour mixture into butter mixture.

Form dough into walnut-size balls, dip in the 1/3 cup sugar (there will be leftover sugar) and place on an ungreased cookie sheet, sugar side up. Bake for 12 to 13 minutes. If you like these cookies soft in the center (which I do and so do most of the people I have discussed this with. Yes, I have cookie discussions.), remove from oven when cookie is puffed, very light golden brown, and cracked on top. If you prefer crisp ginger cookies (which I suppose is your prerogative, even if it’s crazy), bake 2 to 3 minutes more, until puffed cookie has fallen and is golden brown.


Remove from oven and allow cookies to rest for 2 minutes before removing from cookie sheet. Cool on racks.

So good! I had a hard time not eating all of them before they hit the plates. I made most of them on the chewier (read: better) side and some on the crunchier side because I am nice like that and will help those weird, crunchy cookie lovers. Anyway, I recommend these cookies up and down. You should make them!

Monday, December 14, 2009

Pumpkin Cupcakes with Cinnamon Frosting

All I really want to say about this one is heck yes, pumpkin cupcakes! Also, I am in love with this frosting forever and ever and ever. I used the cinnamon amount from the original recipe and even though cream cheese frosting is pretty fantastic, I just had to use this one.

Okay, one more thing. I think we probably should have called baking extravaganza powdered sugar extravaganza. Seriously, so much powdered sugar was used. It was kind of ridiculous.

Pumpkin Cupcakes with Cinnamon Frosting modified from A Pookie Pantry:

Makes 12 cupcakes

¼ c. firmly packed brown sugar
¼ c. granulated sugar
4 Tb. unsalted butter, room temperature
2 Tb. molasses
1 egg
½ c. pumpkin puree
1 c. all-purpose flour
½ tsp. baking soda
¾ tsp. ground cinnamon
¼ tsp. ground nutmeg
Pinch of allspice
Scant ½ tsp. kosher salt
½ c. buttermilk
The best frosting in the world plus 1½ tsp. ground cinnamon

Heat oven to 350 degrees. Line a cupcake pan with 12 liners. Set aside.

In a large bowl, combine brown and white sugars. Using a mixer on low speed, mix together to remove any lumps. Add butter and beat until fluffy (one to one and a half minutes). Add the molasses and egg and mix to combine. Add pumpkin puree and mix to incorporate fully.

In a separate bowl, mix together flour, baking soda, cinnamon, nutmeg, allspice, and salt. Add the flour mixture to the pumpkin mixture in three batches, alternating with buttermilk (start and end with flour). I was a little uneven here, but it worked out well. Mix well after each addition, but don't overbeat.

Fill the cupcake liners. Tap pans against counter to level out the batter. Bake for 15 to 18 minutes, or until toothpick inserted in the center of a cupcake comes out clean. Cool in pan for 5 minutes and remove to cool completely on wire racks before frosting.


Make the super rad frosting, mix in the cinnamon. Frost the cupcakes and possibly decorate with leftover dyed raw sugar. Regular raw sugar would also be very good on these. They are super moist and super delicious.

Holiday Cookies

Sugar cookies are the greatest things in the whole world, but dang if they aren’t a time intensive project. While Corey was making muddy buddies and working on the peppermint bark, I was working on holiday cookies. Yes, the whole time. It’s not like the dough takes the much work, it’s just rolling it out, cutting out the shapes, re-rolling the leftover bits of dough. And then baking, baking, baking. And then decorating. It’s worth it though.

I got this recipe from The Fiddlehead Cookbook (previously seen here, here, and here). It makes for a deliciously crunchy and buttery cookie. The frosting is a modified version of the one seen here.

Holiday Cookies from The Fiddlehead Cookbook and Frosting modified from howtoeatacupcake.net:

Makes so very many cookies

For the cookies:
¾ lb. butter
2 c. powdered sugar
2½ c. unbleached white flour
1 egg white, which can be 2 egg yolks for a very delicate cookie. I did the egg white.
1½ tsp. vanilla extract

For the frosting:
½ c. unsalted butter, at room temperature
1¾ c. powdered sugar
A pinch of salt
1/3 c. half-and-half
½ tsp. vanilla extract

Heat oven to 350 degrees.

Cream butter in a large mixing bowl until fluffy. Add the sugar and continue to beat until light. Add flour and stir until almost completely combined. Add egg white and vanilla and mix until smooth, but do not overbeat.

Roll out on a lightly floured surface and cut into fancy shapes with a cookie cutter. Like different animals using your IKEA cookie cutters. Also, make moose and squirrel jokes. Maybe make too many moose and squirrel jokes. When I bought the set, I thought the snail was a whale (and, as you might be able to see, Corey thought it was too, so that works) and I thought the hedgehog was a porcupine. I still say it’s a porcupine.

Bake cookies on ungreased cookie sheets for 5 to 10 minutes (I was closer to 10 on most of these) depending on shape and thickness of dough, until lightly browned around the edges. Remove from oven and transfer to racks to cool. Wait until completely cool to frost/decorate.


To make the frosting, follow directions from these cupcakes, subbing in the half-and-half for the heavy whipping cream. It thins it out enough to make it the perfect consistency for cookies. Corey then separated the frosting into several bowls and added a few drops of food coloring to each. We had the regular white, as well as blue, green, and red. We also added some yellow food coloring to raw sugar for sprinkling on the cookies. Decorate as you see fit.


They are delicious cookies and they are festive and your friends will enjoy them. Promise!

Saturday, December 12, 2009

Second Night of Chanukah

In just a little while, I'm going to go grate a ton of potatoes, smush them with some onion, matzoh, egg, salt, and pepper and fry them up. It's latke party time!

I just wanted to get on here and wish you all a very happy Chanukah. Or whatever holiday you celebrate.

Love to you all!


from choralicious.com

Friday, December 11, 2009

Peppermint Bark

So this is part of the baking extravaganza and I swear that at one point during the day not only did I participate, but there was baking. This one was just another to have gotten started early and was also directed by Corey. By directed, of course, I mean she did it all and I helped at the end.

I have always seen peppermint bark around and yet haven’t had much. Why oh why haven’t I been eating this all my life? It’s so delicious! And really simple. It just involves a double boiler, a baking pan, and room in your refrigerator. That’s pretty awesome.

Corey doubled the original recipe (here) so we could have a lot of peppermint bark to go around. Below is what they did as Corey isn’t here and I only watched her do it while working on other things.

Peppermint Bark from joyofbaking.com:

6 oz. semi sweet chocolate, coarsely chopped
2 tsp. vegetable oil
6 oz. white chocolate, coarsely chopped
1/3 - ½ c. crushed candy canes (Corey put ours into a resealable baggie and crushed them with a rolling pin. It worked really well. Do that.)

Line the bottom and sides of a 9 inch square baking pan with aluminum foil, smoothing out any wrinkles. We used a larger casserole dish for this, like the one I use for enchiladas and the like, as we had so much more. I’d recommend it if you’re going the double route.

Melt the semi sweet chocolate and 1 teaspoon of vegetable oil in a double boiler. Immediately pour the melted chocolate into the prepared pan and tilt the pan so the chocolate makes an even layer. Place in the refrigerator for about 30 minutes, or until the chocolate has set.

Then, melt the white chocolate and remaining 1 teaspoon of vegetable oil in a double boiler. Immediately pour the melted white chocolate over the dark chocolate and tilt the pan so the chocolate is in an even layer. I know this part was a little more tricky and a bit of it became more of a swirl than a layer, but for the most part, it looked great. Good job Corey! Sprinkle the crushed candy canes evenly over the white chocolate. Place in the refrigerator for about 30 minutes, or until the chocolate has set.


Remove the peppermint bark from the pan by lifting the edges of the aluminum foil. Peel back the foil and break the bark into small irregular pieces (like I could ever make regular shaped pieces anyway).

Super delicious and also super all gone as Aaron really loved this stuff. I must make this myself soon.

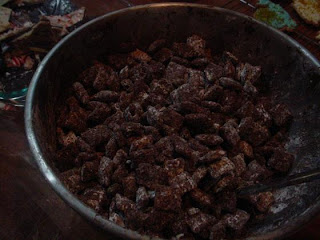
Muddy Buddies

Remember when I had the panna cotta at Ciao Vito? That's also when this whole baking extravaganza idea got started. Corey mentioned that she really liked baking and she knew how much I liked baking, so why not have a great big bake day together and give the results to our friends? Why not indeed! So for a few of the upcoming recipes, I’ll be mentioning her a lot as she did a bunch of the work and had a lot of great ideas as well. It was a fun day.

We started out in the morning, went grocery shopping, and came back to my place to bake the day away. And that’s what we did until after 6 in the evening, with only one small hummus break so we wouldn’t die of sugar overload…which I nearly did. Anyway, this was one of the first things to be completed and I only watched it happen. This was all Corey. In fact, I’d never even heard of muddy buddies (original recipe here) before we started this, but I am glad to know what they are now!

Muddy Buddies from chex.com:

Makes 18 ½ cup servings

9 c. Rice Chex
1 c. semisweet chocolate chips
½ c. peanut butter
¼ c. butter
1 tsp. vanilla
1½ c. powdered sugar

In a large bowl, measure cereal and set aside.

The directions then have you microwave the chocolate, peanut butter, and butter, but I know that’s not what she did. Since we already had the double boiler out for other things, she used that to melt the above ingredients and blend together. Stir in vanilla. Pour mixture over cereal, stirring until evenly coated. Pour into 2-gallon resealable food-storage plastic bag.


Add powdered sugar. Seal bag; shake until well coated. She then put them into a bowl and we kind of, maybe, snacked on a bunch of them throughout the day. They are fantastic!

Thursday, December 10, 2009

Baking Extravaganza

My friend Corey and I made all of this:


What you see there, and will be seeing here, are muddy buddies, peppermint bark, ginger crinkles, holiday cookies, pumpkin cupcakes with cinnamon frosting, and Mexican wedding cakes. These are going out to friends later today. I can tell you now that they are all delicious.

Monday, December 07, 2009

Cookies and Cream Cupcakes

Tastespotting is such a dangerous website. I saw these cupcakes a bit back, just before Thanksgiving, and said “oh, hey, I should make these” and then I mentioned it to Aaron and then to another cupcake fanatic, so I had to do it. And I wish I should have done it sooner because oh my gosh. I didn’t want to use cake mix because that’s not my style. So I used this recipe that my fabulous friend Renai used for her recent cupcake adventure and added in the cookies.

The thing that I thought was really funny is that you have to break Oreos in half with frosting on both sides for the bottom of the cupcakes. I am usually great at not breaking them apart perfectly when I want to, so of course when I needed them to have frosting on both sides, I had all perfect breaks. It was kind of ridiculous. But if ridiculousness leads to deliciousness, I’m okay with it.

Cookies and Cream Cupcakes from Kittencal and howtoeatacupcake.net:

Makes 18 delicious cupcakes

30 Oreo cookies

For the cupcakes:
2 c. all-purpose flour
1½ c. sugar
2½ tsp. baking powder
1 tsp. salt
½ c. shortening (very soft but not melted. I used Spectrum organic.)
¾ c. milk
1 Tb. vanilla
2 large eggs
1 c. crushed Oreos

For the frosting:
½ c. unsalted butter, at room temperature
1¾ c. powdered sugar, sifted
Pinch of salt
1/3 c. whipping cream
½ tsp. vanilla extract
Remaining crushed Oreos

Heat oven to 350 degrees.


Line 18 cupcake cups with paper liners. Take nine of the Oreos and split them in half, attempting to have frosting on both sides. Place halves frosting side up in liners. Set pans aside.

Take twelve Oreos and crush them. I broke mine up into pieces, put them in a bowl, and crushed them with the back of a measuring cup. Make sure they aren’t totally ground up. There should be some distinguishable cookie pieces remaining. Set crumbs aside.

In a large bowl, mix together the flour with sugar, baking powder and salt until combined. Add in the shortening, milk, vanilla, and eggs. Add in one cup of the crushed Oreos. Beat on medium speed of an electric mixer scraping the bowl constantly until just blended. The batter will be very thick.


Pour into paper-lined regular size muffin tins filling under just three-quarters full. Bake for 20-22 minutes or until the cupcakes test done (do not overbake as they will be dry). Seriously, don’t overbake. I had an issue with some of the cupcakes not being done at about 22 minutes, so I left them in and kept checking. They started to brown when I finally pulled them. So the outsides were a little crunchy, but the insides still very moist. Just watch it.

Immediately remove cupcakes from pans. Cool completely before frosting.


To make the frosting, mix together butter, powdered sugar, and a pinch of salt until creamy. Increase your mixer speed to high and beat until light and fluffy. Add whipping cream and vanilla. Beat until smooth. Fold in crushed Oreos.


Frost cupcakes. Break remaining nine Oreos in half and use as a garnish. Eat, eat, and eat. This frosting is so ridiculously and amazingly delicious, I had to put water in the bowl so I would stop eating it. These cupcakes are pretty much like eating Oreos. They look so pretty too. I will definitely be making these again.

Tuesday, December 01, 2009

Brownies with Bailey's Ice Cream

As part of my pie free Thanksgiving, I decided that I would need to make two desserts. This is the second of those two. I love brownies. I think they are fantastic. Usually I just go with the regular Baker’s chocolate, but since this was a holiday, I used up the rest of the Ghirardelli I had left over from Amy’s birthday cake. And again, it was a holiday, so I needed some fancy ice cream to go with the brownies.

My guidelines for the ice cream, as always, come from my pals Ben and Jerry. They don’t have a recipe for Bailey’s ice cream, but do provide some ground rules for making ice cream with alcohol. It was of tremendous help to me.

Brownies and Bailey’s Ice Cream from Baker’s Unsweetened Chocolate box and my brain:

Serves 6 with a ton of leftovers

For the brownies:
4 oz. baking chocolate
¾ c. unsalted butter
2 c. sugar
3 eggs
1 tsp. vanilla
1 c. flour

For the ice cream:
2 eggs
¾ c. sugar
2 c. heavy cream
1 c. milk
2 Tb. Bailey’s Irish Cream

To make the brownies, heat oven to 350 degrees. Grease a baking pan.

Microwave chocolate and butter in a large microwaveable bowl on high for two minutes or until butter is melted. This is the one-bowl method, so you can melt the butter and chocolate together in a double boiler if you don’t want to use/don’t have a microwave. Stir until chocolate is completely melted. Stir in sugar. Blend in eggs and vanilla. Add flour and mix well. Spread into prepared pan.


Bake for 30 to 35 minutes (mine are usually closer to 35) or until wooden toothpick inserted in center comes out with fudgy crumbs. Cool in pan and then cut into squares to serve.


The ice cream is very easy and uses the same base I use for all my ice creams. Beat eggs in a bowl until fluffy, about two to three minutes. Whisk in sugar a little at a time and then for one minute more to fully incorporate. Whisk in cream and milk. Transfer to ice cream maker and follow manufacturer’s instructions. Mine mixes for 25 minutes total. About two minutes before complete, add in Bailey’s. Transfer to freezer safe container and freeze for at least four hours. Overnight is preferable. Serve over brownies, seen here with the panna cotta.

Seriously so good. I may have to make a Bailey’s milkshake or the like sometime soon.

Vanilla Panna Cotta with Pumpkin Cherry Compote and Pumpkin-Caramel Sauce

This is probably one of the most involved desserts I have ever made. It’s not often I make something I’ve never made before plus a compote I’ve never made before PLUS a caramel sauce I’ve never made before. But it was all worth it just because it was that amazing.

I love panna cotta, but gelatin freaks me out. I think it’s just a creepy product in general. I had some at Ciao Vito the other day for happy hour and it was so tasty I thought that maybe I should do that for Thanksgiving instead of pie. For whatever reason, I decided to go pie free this year. I think it worked out. Anyway, on my search for a panna cotta recipe, I was getting a little frustrated with all the gelatin in it when I found this one, which uses agar flakes instead. Agar agar is derived from seaweed and is completely vegetarian and not creepy. It’s also better than gelatin as far as being able to reset it by reboiling the liquid. Yeah, rad. So while that recipe did use agar flakes, I didn’t want to use whole milk and buy vanilla beans, so I searched some more and found this recipe. Combining the new one, with tips from the first one, and advice from this website, I got a solid panna cotta recipe. Good deal.

But you can’t just have panna cotta! You need some sort of fruit thing and a sauce. So I searched from pumpkin recipes on epicurious.com, as there would be no pumpkin pie, and found this compote and this sauce and as a result, made a dessert. I made all three the day before Thanksgiving and I think it worked out really well. It’s also really easy to veganize. Just replace the heavy cream with soy cream for the panna cotta and the sauce and oil based margarine for the butter in the compote and sauce.

Vanilla Panna Cotta with Pumpkin Cherry Compote and Pumpkin-Caramel Sauce from my brain and David Lebovitz as well as Gourmet and Bon Appétit via epicurious.com:

Serves 6 and makes a ton of extra compote and sauce

For the panna cotta:
4 c. heavy cream
½ c. sugar
2 tsp. vanilla extract
4½ Tb. agar flakes
6 Tb. cold water

For the compote:
½ c. dried tart cherries
2 Tb. unsalted butter
½ c. packed brown sugar
¼ c. granulated sugar
2 Tb. lemon juice
¼ tsp. cinnamon
1/8 tsp. salt
2 c. fresh pumpkin (preferably sugar or cheese pumpkin), peeled, seeded, and cut into 1/4-inch dice

For the sauce:
¼ c. unsalted butter
½ c. sugar
1 c. heavy whipping cream
½ c. canned pure pumpkin


Heat the heavy cream and sugar in a saucepan. Once the sugar is dissolved, stir in the vanilla extract. Bring to a boil.

Meanwhile, lightly oil six cups with a neutral-tasting oil. Sprinkle the agar over the cold water in a medium-sized bowl and let stand 10 minutes.


Whisk in agar and simmer, whisking, until completely dissolved, about 15 minutes. Cool panna cotta slightly. Pour into glasses and chill until set, at least 2 hours.

To make the compote, deal with your pain of a pumpkin first. Seriously, peeling, seeding, and dicing a pumpkin is ridiculously involved. It took me forever and probably would have taken longer if I hadn’t remembered my mini-prep food processor part way in. After that is all set, soak cherries in hot water to cover until softened, about 15 minutes, then drain.


Melt butter in a large skillet over moderate heat. Add sugars, lemon juice, cinnamon, and salt, then cook, stirring until smooth. Add pumpkin and drained cherries and simmer, covered, stirring occasionally, until pumpkin is tender, 8 to 12 minutes.


The sauce is really easy, but kind of weird. I’ve never made caramels or caramel sauce, so this was all new to me. Melt butter in heavy small saucepan over medium heat. Add sugar and cook until mixture is deep amber, stirring constantly, about 8 minutes. The mixture will be grainy. Reduce heat to medium-low. Add cream. It was at this point that my caramel mixture became solid and freaked me out. It says in the original recipe that the mixture will bubble, but that took a little while. Stir until caramel bits dissolve, about 2 minutes. Add pumpkin and stir until heated. Refrigerate until cold, about 2 hours.


To assemble, run a sharp knife around the edge of each panna cotta and unmold each onto a serving plate. Drizzle with sauce (I took mine out a little before serving) and scoop on compote.

I thought that this was ridiculously delicious. The panna cotta was a little more solid that I would have liked, but for my first time making it and messing with a couple of different recipes, I thought it came out rather well. The compote was sweet, but not too sweet and the sauce was just dang delicious. I may never make the compote again just because of how difficult it was to deal with that pumpkin, but I might modify it with apple or something like that. This is such a pretty dessert and I’d love to show it off again.

Maple-Orange Cranberry Sauce

This Thanksgiving was an ambitious one for me. I decided on making several different things, most of which I had never made before. Go big or go home, right? For example, I have never made cranberry sauce before, but I love it. I think I’ve only had the stuff in the can once and was not impressed. Like most things in the kitchen, if I think I can do it, I’m going to try it out. As I have mentioned before, this usually works out for me fairly well.

This sauce was supposed to be Maple-Tangerine Cranberry Sauce (original here), but as I couldn’t find tangerines, decided that orange was just fine. I honestly didn’t try that hard to find them. I think it worked out well just the same.

Maple-Orange Cranberry Sauce modified from Maple-Tangerine Fresh Cranberry Sauce from recipegirl.com:

Makes 12 servings

2 c. orange juice (I did half fresh squeezed/half concentrate)
3 c. fresh cranberries (one 12 oz. bag)
½ c. packed brown sugar
½ c. pure maple syrup
1 whole cinnamon stick
1 tsp. finely grated orange zest
pinch of kosher salt


In a 10” skillet, combine all of the ingredients. Bring to a simmer over medium-high heat and then reduce to maintain a gentle simmer. Cook, stirring occasionally, until the liquid has thickened somewhat and looks slightly syrupy, about 30 minutes.
Remove the cinnamon stick and let the cranberry sauce cool in the pan- it will thicken a bit more as it cools. Serve slightly chilled or at room temperature.


I made this on Monday night for Thursday and it was fantastic. I’d actually recommend making this a day or two ahead of time because the flavors really deepen. The orange pops in this recipe and the maple just gives it a little something wonderful. For my first time out in cranberry sauce land, I got a winner.

[I just realized, while doing some editing, that I never posted this. Wow. So I'm being a total cheater and backdating it because I did mean to and this is really delicious.]
Related Posts Plugin for WordPress, Blogger...